 EseeCloud Help Center
Video
Troubleshooting intermittent or missing video images after adding cameras to the NVR.
Frequently asked questions about NVR video display and image issues.
The image comes and goes after adding the camera to the NVR
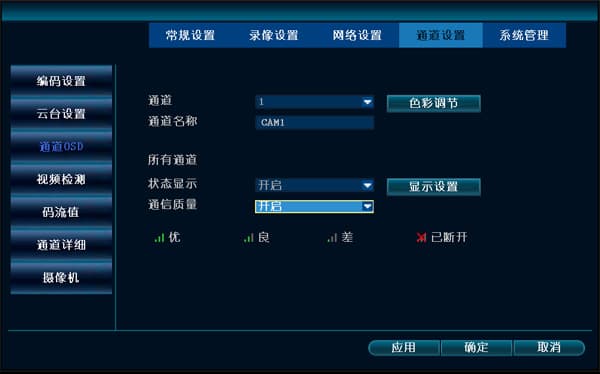
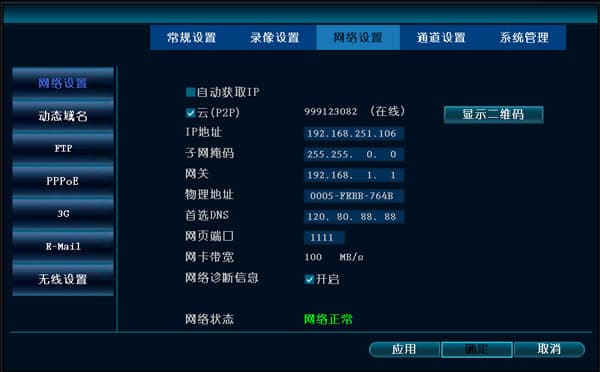
- Check whether the network connection to the IPC is normal. Go to System Settings → Channel Settings → Channel OSD and enable Communication Quality. Also go to System Settings → Network Settings and enable network diagnostic information, so you can see the signal status on the preview screen.
-
Confirm whether the network cable or the router has a problem, and try replacing them.
-
Confirm how many IPCs are connected to a single router or switch, and check whether the problem is caused by insufficient bandwidth.
-
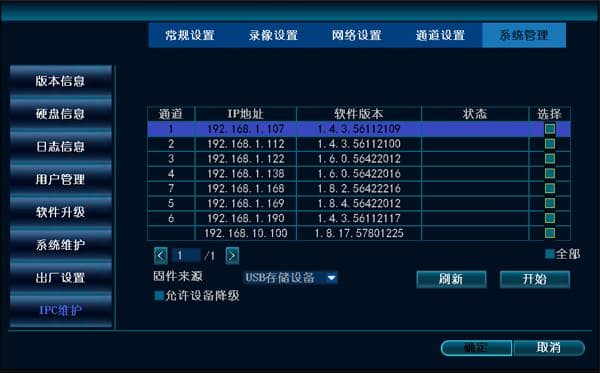
Check the firmware version of the IPC and the NVR. You can view the current IPC software version under System Settings → System Management → IPC Maintenance. If the problem is caused by the firmware, you can update it to the latest version.
- Try adding the camera using the N1 private protocol and observe whether the problem still occurs.
The ID is online, but no image appears after it is added
-
Enter the demo point and check whether the image displays normally. If it does not, check whether the traffic detection on the current screen is 0. EseeCloud may not have permission to access WiFi or 3G. Enabling the corresponding permission allows access.
-
If the permissions are fine but there is still no image, it may be a phone compatibility issue. Contact technical support for assistance.
-
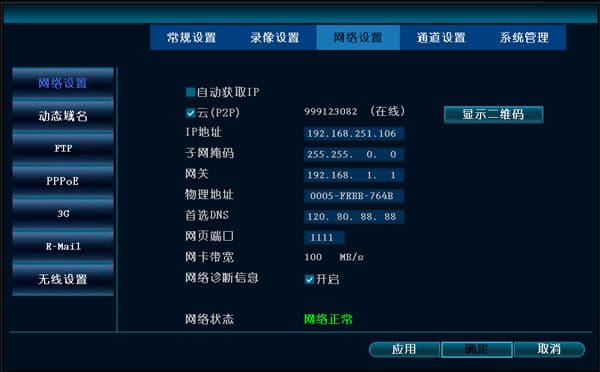
If the demo point displays the image normally, go to System Settings → Network Settings on the device and change the web port to 1111, then restart the NVR and reconnect after 2 minutes. This situation may be caused by port 80 being occupied.
-
Check the current software version on the device. If it is an old version, update the firmware.
-
You can contact technical support for further troubleshooting.