 EseeCloud Help Center
Alarm & E-Mail Notifications
How to configure E-Mail alarm notifications on the NVR for motion detection, alarm input, and video loss, plus troubleshooting tips for alarm and wiring issues.
Frequently asked questions about NVR alarm settings and E-Mail alarm notifications.
How do I set up E-Mail alarm notifications on the NVR?
-
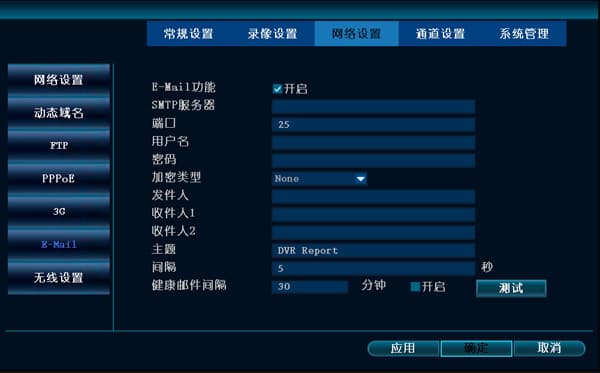
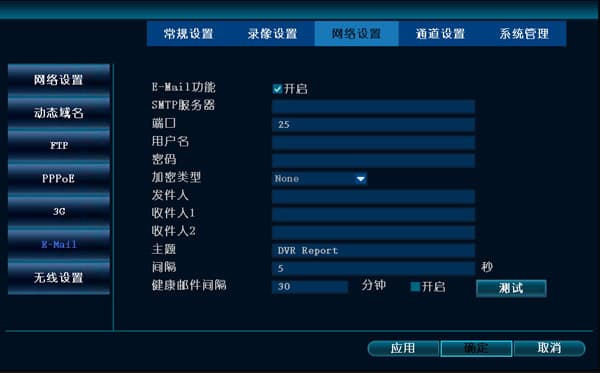
Right-click the mouse → System Settings → Network Settings → E-Mail.
-
Set the E-Mail function to On.
-
SMTP server: the input format is smtp.your-email-provider.com (for example, for 163 enter smtp.163.com, and for QQ enter smtp.qq.com).
-
Port: the service port of your email provider.
-
User name: your email user name (for example, if your email is [email protected], then your user name is [email protected]).
-
Password: enter your email password.
-
Encryption type: by default you can leave it unselected; if the test fails when you click "Test", change it to SSL.
-
Sender: enter your full email address (for example, [email protected]).
-
Recipient: enter the email address you want to use to receive alarm emails (for example, [email protected]).
-
Subject: the default is fine.
-
Interval: the time interval between received emails (if alarms are triggered very frequently, an interval that is too short may flood your mailbox).
-
Health email On: used to verify that the DVR is running normally.
-
Health email interval: how often, in minutes, an email is sent to the recipient you configured to confirm that the recorder is running normally.
-
Change the default "Dvr port" subject to anything else.
-
After entering everything, click "OK" to save.
-
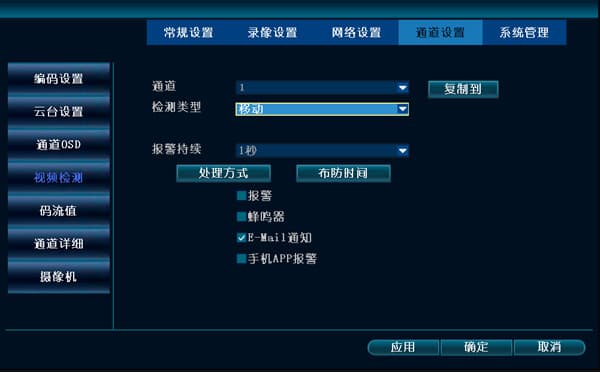
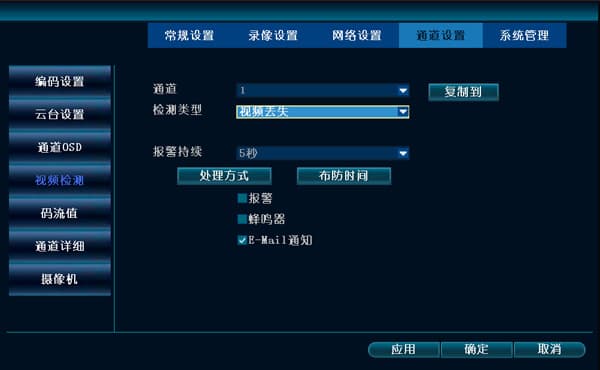
Then, wherever you need an E-Mail alarm, select E-Mail alarm notification (for example, inside motion detection).
-
Note: the firewall of the new version of 163 mail now restricts emails, and customers must log in with an authorization code. It is best to use a QQ mailbox.
Possible reasons you don't receive emails:
A. Motion detection was not triggered, meaning the camera did not detect any movement.
B. Because there can be many emails, the sending mailbox or the receiving mailbox treated them as spam and deleted them directly.
The sending mailbox must be configured before it can be used normally; otherwise you will see the prompt "User name, password, or encryption type is incorrect." Once enabled, it takes effect within 24 hours.
After setting up E-Mail alarms as described, why does the test prompt that the user name and password are incorrect, or that the encryption type is incorrect?
-
Check that the email user name and password are entered correctly.
-
Test both encryption types, none and SSL.
-
If you are using a QQ mailbox and steps 1 and 2 still prompt an error, check whether the SMTP server in the QQ mailbox is properly enabled.
-
If you are using a NetEase mailbox, the issue is that newly registered accounts and older accounts have different security levels, and the server may refuse access.
-
If you are using Google's Gmail, pay attention to the SMTP port.
-
If your mailbox is Hotmail, the SMTP server address is smtp.live.com, not smtp.hotmial.com.
-
If your mailbox is Outlook, the SMTP server address is smtp-mail.outlook.com and the port is 587, not 25.
How do I set up motion detection to send an E-Mail alarm?
- From the main menu, right-click System Settings → Channel Settings → Video Detection. Set the detection type to Motion, check Enable, set the sensitivity and alarm duration, check E-Mail notification, and confirm.
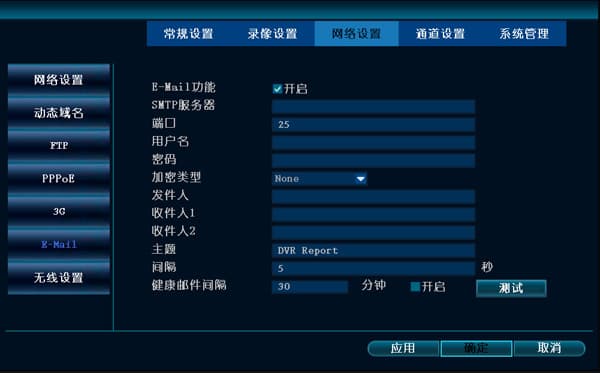
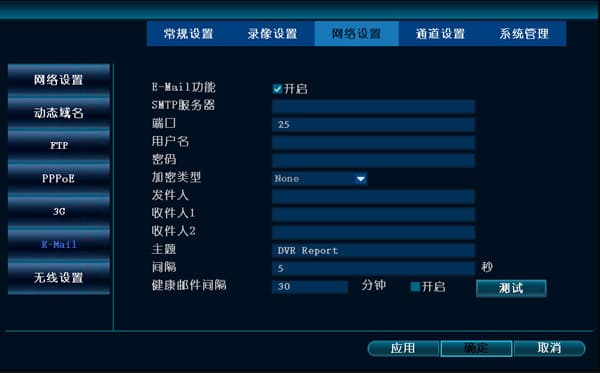
- From the main menu, right-click System Settings → Network Settings → E-Mail, and configure the relevant information.
How do I set up alarm input to send an E-Mail alarm?
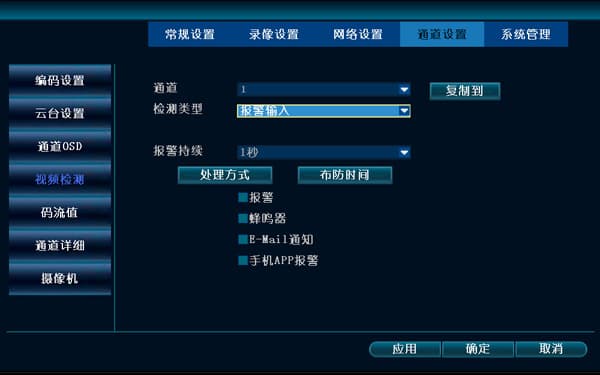
- From the main menu, right-click System Settings → Channel Settings → Video Detection. Set the detection type to Alarm Input, check Enable, set the sensitivity and alarm duration, check E-Mail notification, and confirm.
- From the main menu, right-click System Settings → Network Settings → E-Mail, and configure the relevant information.
How do I set up video loss to send an E-Mail alarm?
- From the main menu, right-click System Settings → Channel Settings → Video Detection. Set the detection type to Video Loss, check Enable, set the sensitivity and alarm duration, check E-Mail notification, and confirm.
- From the main menu, right-click System Settings → Network Settings → E-Mail, and configure the relevant information.
Alarm setting issues
-
Check that the alarm settings are correct.
-
Confirm that the alarm wiring is correct.
-
When connecting alarm devices, be careful not to connect two loops at the same time. (One front-end device connected to two NVRs, or connected to both an NVR and an alarm host at the same time. A relay must be added for isolation.)