 EseeCloud Help Center
Recording & Playback
How to configure recording modes, calculate storage, back up footage, and troubleshoot missing or blank playback on the NVR.
Frequently asked questions about NVR recording, storage, backup, and playback.
How do I set the recording mode?
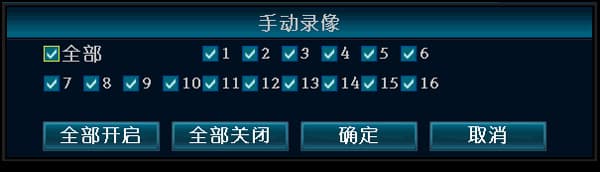
- Manual recording: right-click → "Manual Record" → "Enable All" → exit. You can also press the REC key on the front panel to enable manual recording on all channels. Once manual recording is set successfully, a small red dot appears on the screen.
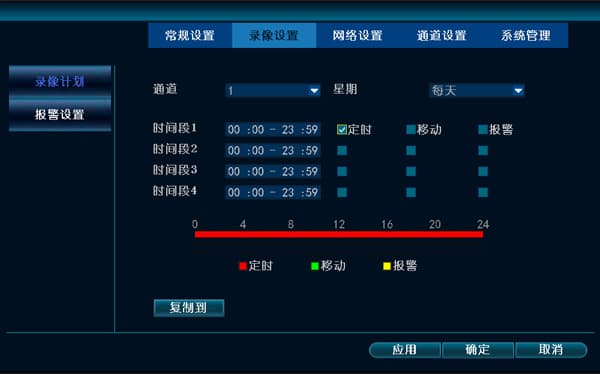
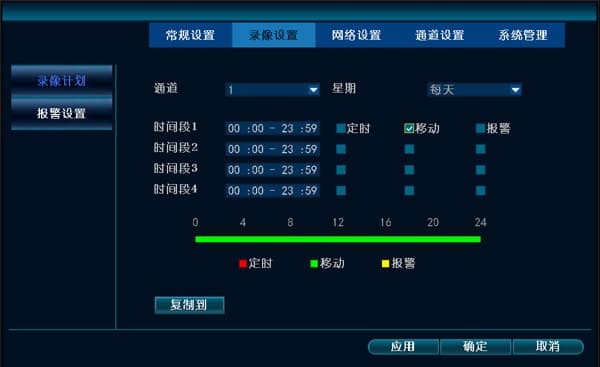
- Scheduled recording: right-click → System Settings → Recording Settings → set "Day" to Every Day → check the "Scheduled Recording" option → set Channel to All → "Copy to All" → confirm. Once scheduled recording is set successfully, a clock icon appears on the screen.
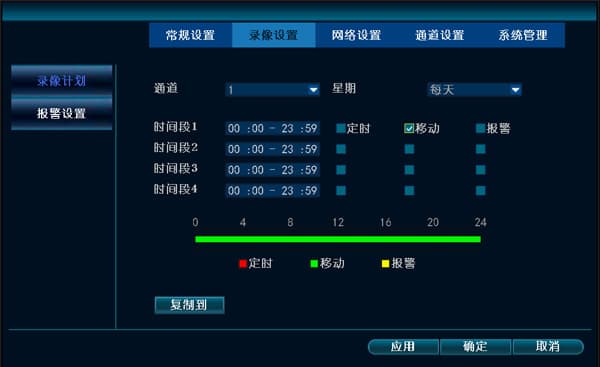
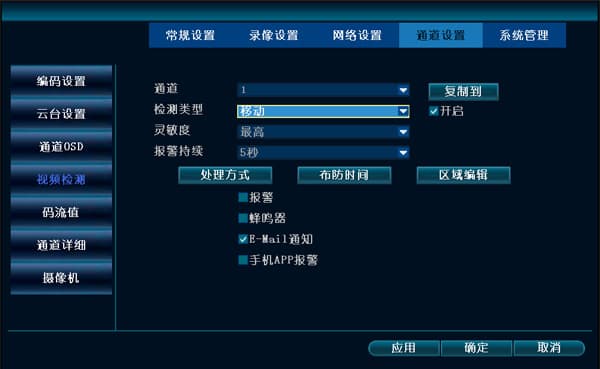
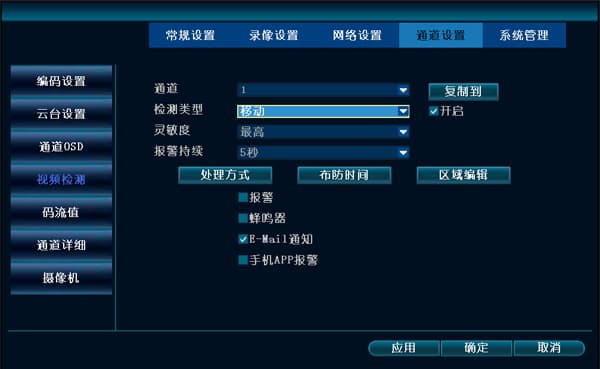
- Motion detection recording: right-click → System Settings → Recording Settings → set "Day" to Every Day → check the "Motion" option → set Channel to All → "Copy to All" → confirm and exit. You then also need to go to System Settings → Channel Settings → Video Detection and configure the motion detection area, channel, sensitivity, handling method, and arming time. Once motion detection recording is set successfully, a person icon appears on the screen.
How do I set up motion recording?
- Right-click → System Settings → Recording Settings → Recording Schedule, select "Motion" → confirm.
- Right-click → System Settings → Channel Settings → Video Detection → Detection Type → Motion (select the required handling method, arming time, and channel count) → confirm.
I can't find any recordings during playback or backup?
-
First, check the recording settings: make sure the start time, recording mode, and channel are all set correctly.
-
Go to Disk Management and check the disk status: whether automatic overwrite is enabled, whether the disk is being read, and whether the disk's total capacity, used capacity, and other information are normal. This is usually a disk issue (the disk data cable or the disk power cable).
-
Go to System Information → Log Information. Check whether there are records of recording starting or stopping during the corresponding time period.
-
Confirm the maximum length of footage the disk can store. For example, if it can store at most 15 days of footage, then searching for footage older than 15 days will obviously return nothing.
What is the maximum single-disk capacity the recorder supports?
The maximum supported capacity is 6T.
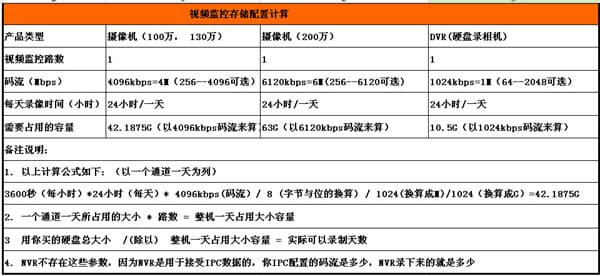
How do I calculate the storage space used by recordings (based on a 4096 kbps stream)?
- The formula is as follows (using one channel for one day as an example):
3600 seconds (per hour) * 24 hours (per day) * 4096 kbps (stream) / 8 (conversion from bits to bytes) / 1024 (convert to MB) / 1024 (convert to GB) = 42.1875 GB
-
Space used by one channel for one day * number of channels = total daily space used by the whole unit
-
Total size of the disk you bought / (divided by) total daily space used by the whole unit = actual number of days that can be recorded
-
These parameters do not apply to the NVR, because the NVR is used to receive IPC data: whatever stream your IPC is configured with is exactly what the NVR records.
How do I back up and play back the recorder's footage on a LAN PC?
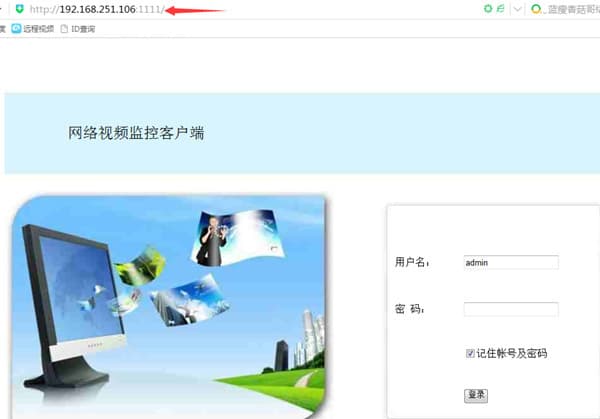
- On a PC in the same LAN, enter the recorder's IP address in the browser and log in.

- Select the channel and date, then click "Search". Click play to play back the recording file. To download and back up to the PC, you can back up directly in .flv format and play it with Storm Player.
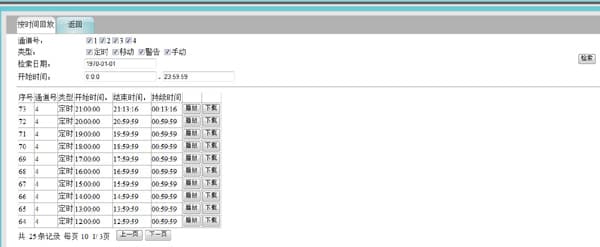
How do I back up and play back recordings on the recorder itself?
The USB drive must be in FAT32 format.
-
Connect a USB storage device (USB drive) to the recorder's USB port, select a date to search for recording files, then select the channel's recording files and back them up to the storage device. Play the backed-up recording files with "Storm Player" or "VLC Player".
-
Enter the recording playback interface, select a time period, search for recordings, select a channel, and click playback.
-
If the USB drive cannot back up recordings, use the CMS PC client or the LAN web page to back them up.
-
If none of the above methods work, please contact technical support.
Why does backup fail when the NVR uses a portable hard drive?
- A portable hard drive that draws power from the USB port has high USB power requirements that the NVR's USB port cannot meet, so the backup fails. A portable hard drive with external power that does not draw power from USB does not have this problem and can be backed up successfully.
Backing up with a USB drive on the NVR is too slow and holds too little data — is there a better backup method?
-
You can use the "disk-to-PC data copy software" with the disk mounted on a PC. Get it from the web page at http://www.dvr163.com → Technical Support, or request it from technical support.
-
Open the disk-to-PC data copy software interface. Select the correct time and the correct backup disk; it is recommended that the backup path be in English (Chinese characters may cause backup to fail), then click backup.
-
Once successfully backed up, the files can be opened directly with "Storm Player" or "VLC Player".
-
Log in to the recorder web page to back up.
The NVR shows images in multi-screen preview, but there is no image during playback?
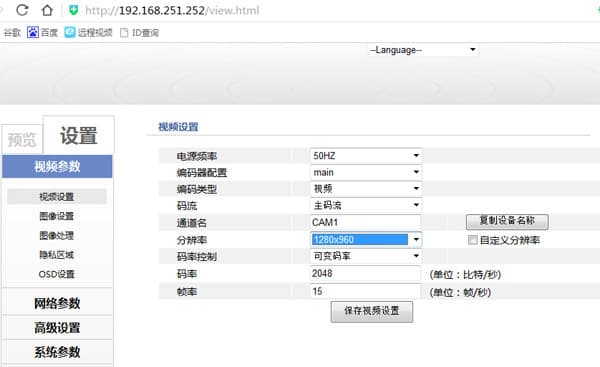
- Right-click → System Settings → Channel Settings → Encoding Settings, and check whether the IPC main stream resolution is a standard resolution.
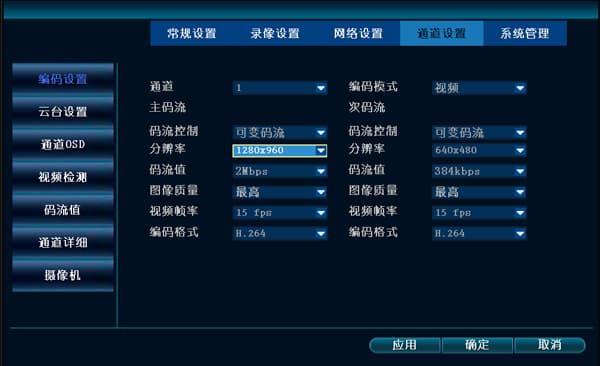
- If the IPC's main stream resolution is larger than the NVR's maximum supported resolution, the real-time preview will show the sub stream instead, so seeing an image there is normal. In versions after 2.3.2.3, when a camera exceeding the maximum supported resolution is connected, a "resolution too large" prompt appears, and the image cannot be displayed normally on either large or small channels; you can connect it by adjusting the IPC's main stream resolution.
Basic Operations
Common NVR operations — adding cameras, troubleshooting automatic restarts, startup failures, and a continuously sounding buzzer, plus firmware upgrades and PTZ dome cruise setup.
Boot Logo Settings
How to change the NVR boot logo via USB upgrade or remote-control key sequence, and what to check when the boot logo cannot be updated.