 EseeCloud Help Center
Solar Wire-Free Camera Kit
Quick guide for the Hiseeu Solar Wire-Free Kit (A052) — product overview, charging, system installation, app setup, and camera and solar panel mounting.
Quick Guide (A052-V1.1) for the Hiseeu Solar Wire-Free Kits. Suitable for the Hiseeu WK-2TD504-EG / WK-4TD504-AT system.
7/24 App online support. Please carefully read this Quick Guide before using the product and ensure that you keep it in a safe place.
Safety Precautions
- Do not place any fluid containers on the product.
- Use the product in a well-ventilated environment and ensure the vents are not blocked.
- Please use the included power supply with the product to prevent damage.
- Use the product within its standard working temperature and humidity, as advised in this manual or on the distributor's website.
- Dust accumulation on the PCB may cause a short circuit. We recommend cleaning the dust from the PCB regularly to ensure proper functionality. When using this product, please comply with all regulations and policies in your country and area.
Getting Started
For NVR install
- NVR
- 12V 2A power adapter for NVR
- Ethernet cable (or connect by Wi-Fi)
For camera install
- WTD504 camera
- USB cable
- Screws and anchors
- Solar panel
- Mounting base
- Solar panel bracket
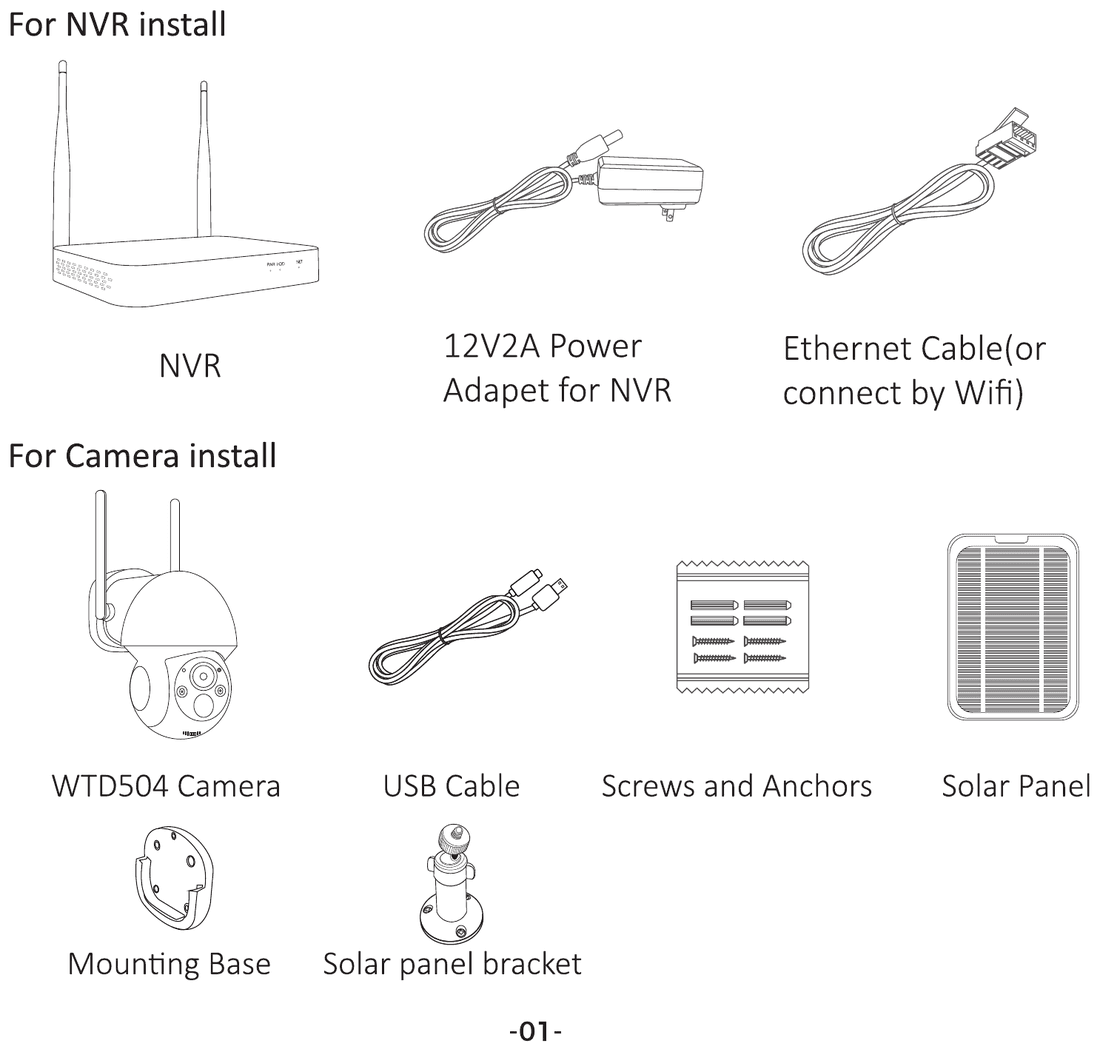
Product Overlook
WTD504 Camera
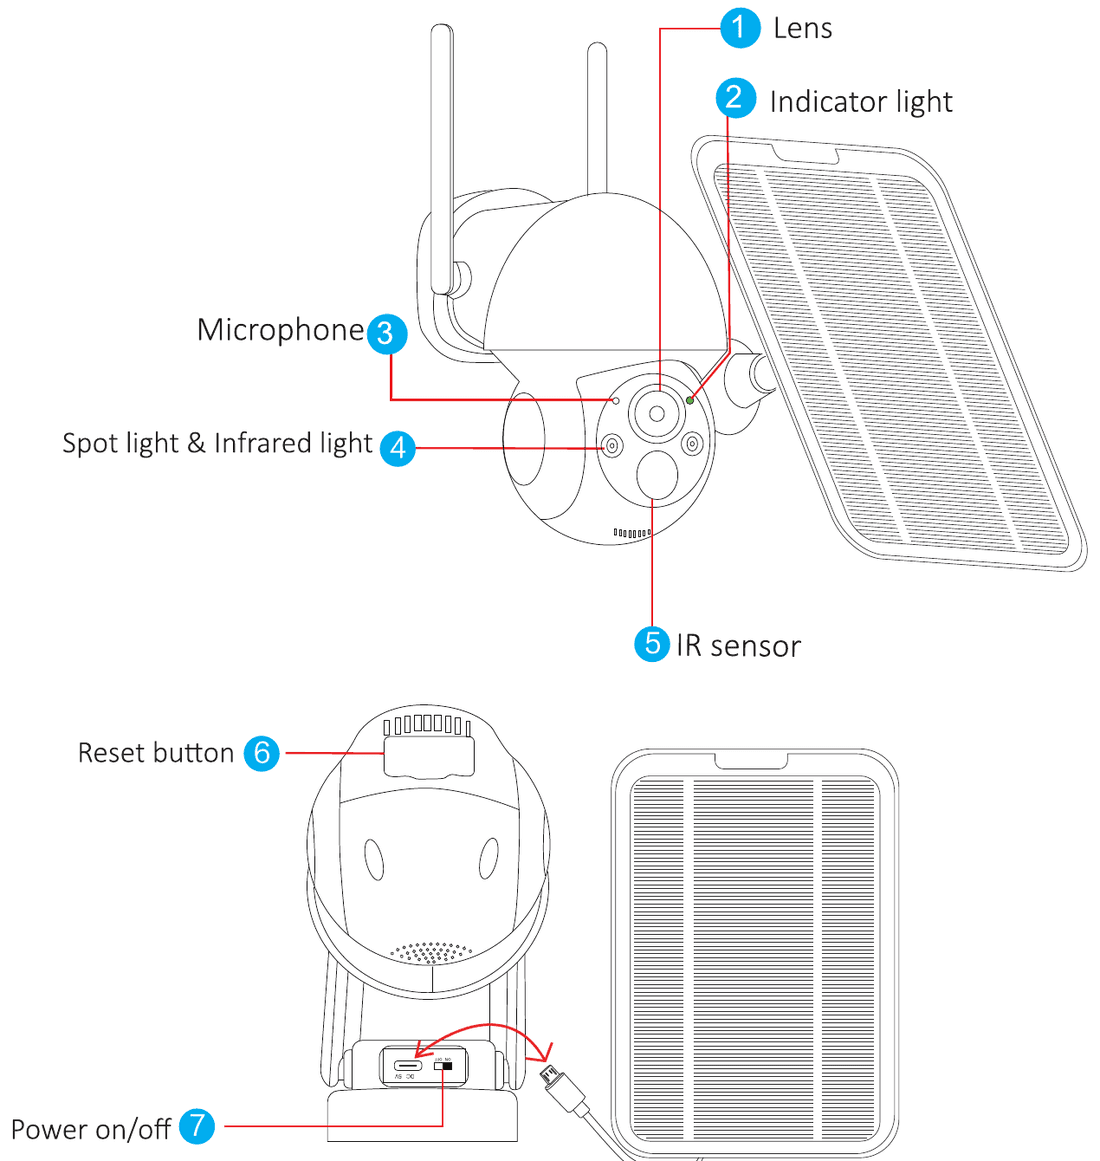
- Lens
- Indicator light
- Microphone
- Spot light & Infrared light
- IR sensor
- Reset button
- Power on/off
NVR
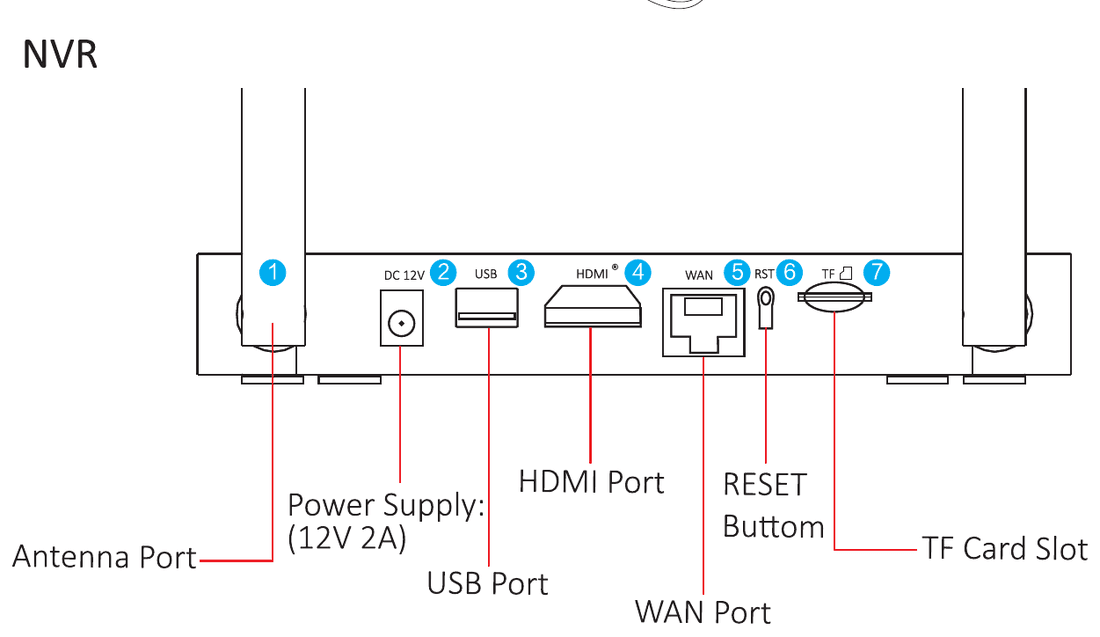
- Antenna Port
- Power Supply (12V 2A)
- USB Port
- HDMI Port
- WAN Port
- RESET Button
- TF Card Slot
Charging
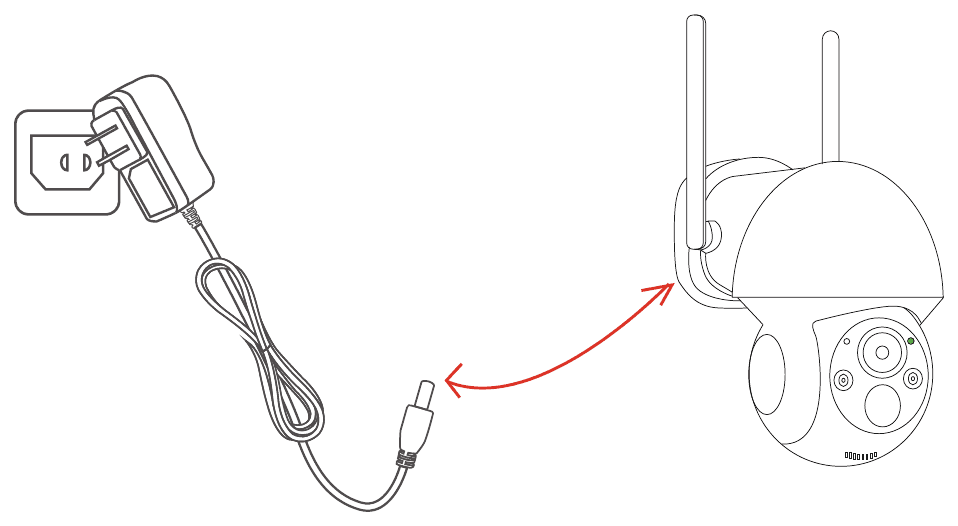
Before use, please charge the camera for a couple of hours. The yellow light indicates charging, and the light turning off indicates a full charge.
Method 1
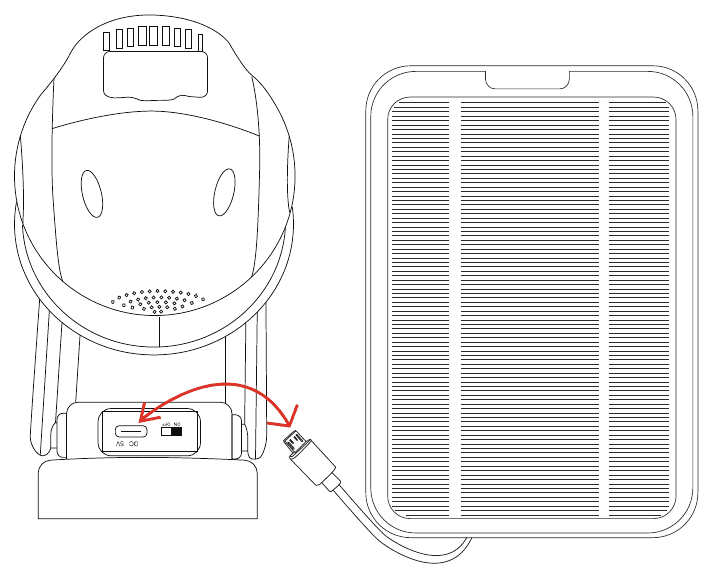
Method 2 — as a plug-in camera
System Installation
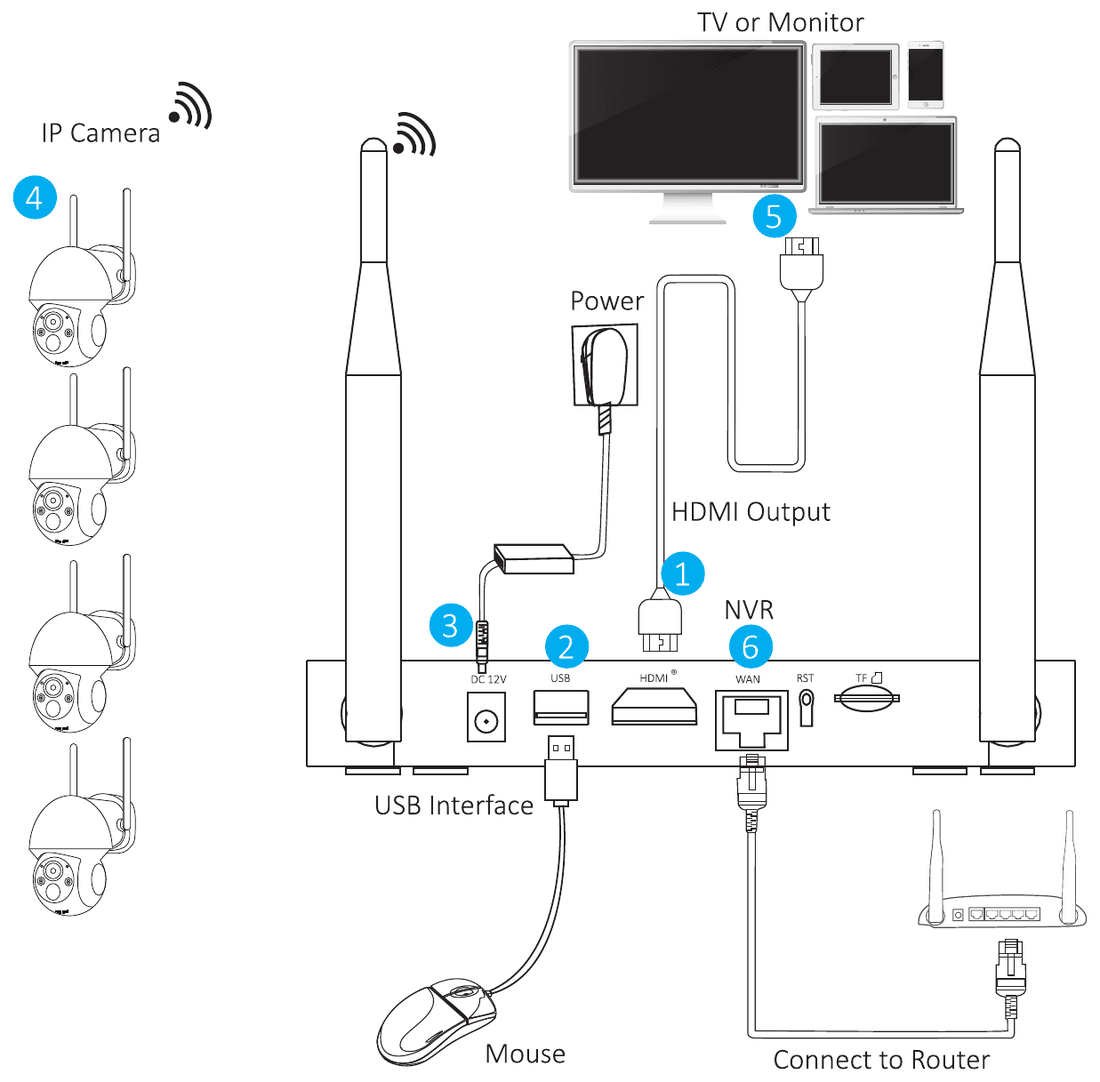
Please follow the steps below to connect the system:
- Connect the NVR to your HDTV or computer monitor with an HDMI cable. Please note that laptops and all-in-one computers cannot be used as monitors.
- Plug a mouse into the NVR's USB port.
- Connect the NVR to a power source with the provided 12V 2A power adapter.
- Place the camera next to the NVR to test whether the video can be shown.
- Turn on the NVR and ensure that all cameras are displaying images before installing them outside.
- Network connectivity is not necessary for basic function, but it helps you to view cameras remotely via your cellphone or computer. The system supports both wired and 2.4GHz Wi-Fi connections to your home network.
- Install the camera outside of the house; please refer to the correct installed location (see the Select Height and Location section).
After powering on, please follow the steps of the setup wizard to complete the settings.
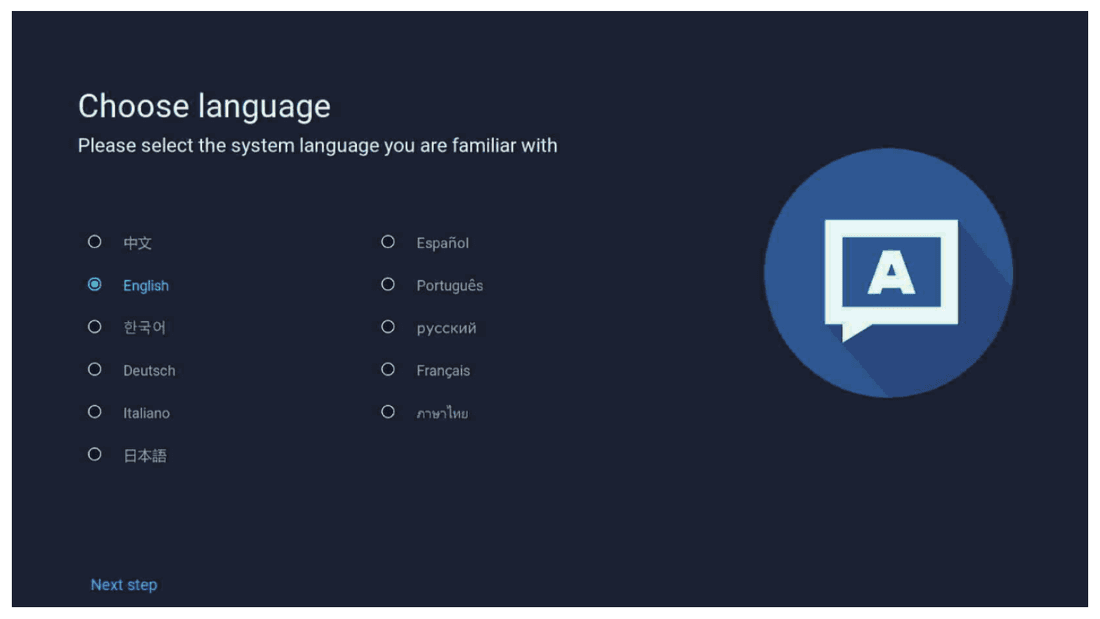
- The system provides many languages to choose from; you can select English, Spanish, Chinese, and so on.
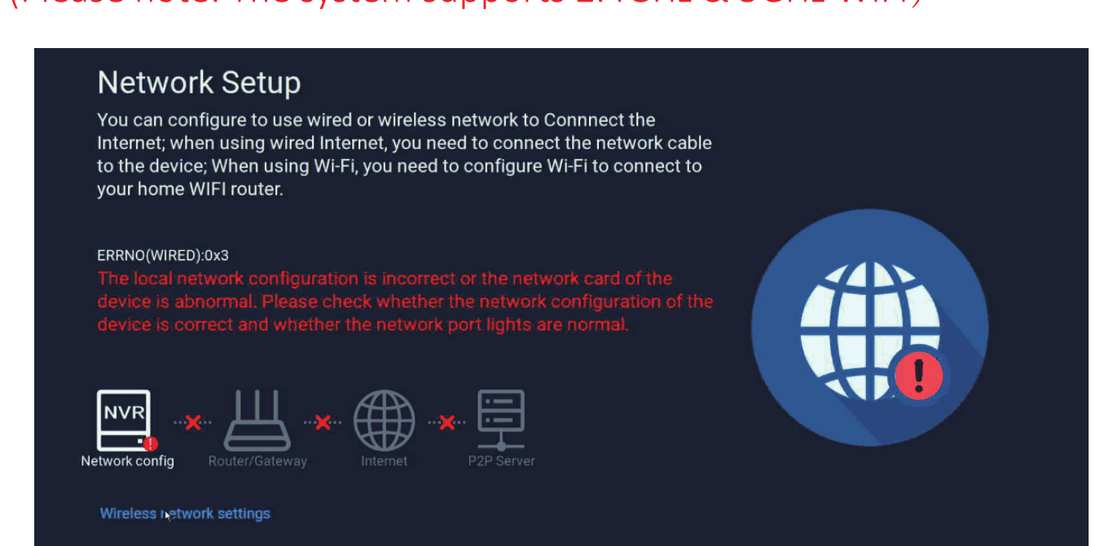
- Click Next Step to connect with your home Wi-Fi. Click Wireless network settings, and the NVR will automatically search for Wi-Fi near you. Select your home Wi-Fi, enter the password, and click Connect.
The system supports 2.4GHz & 5GHz Wi-Fi.
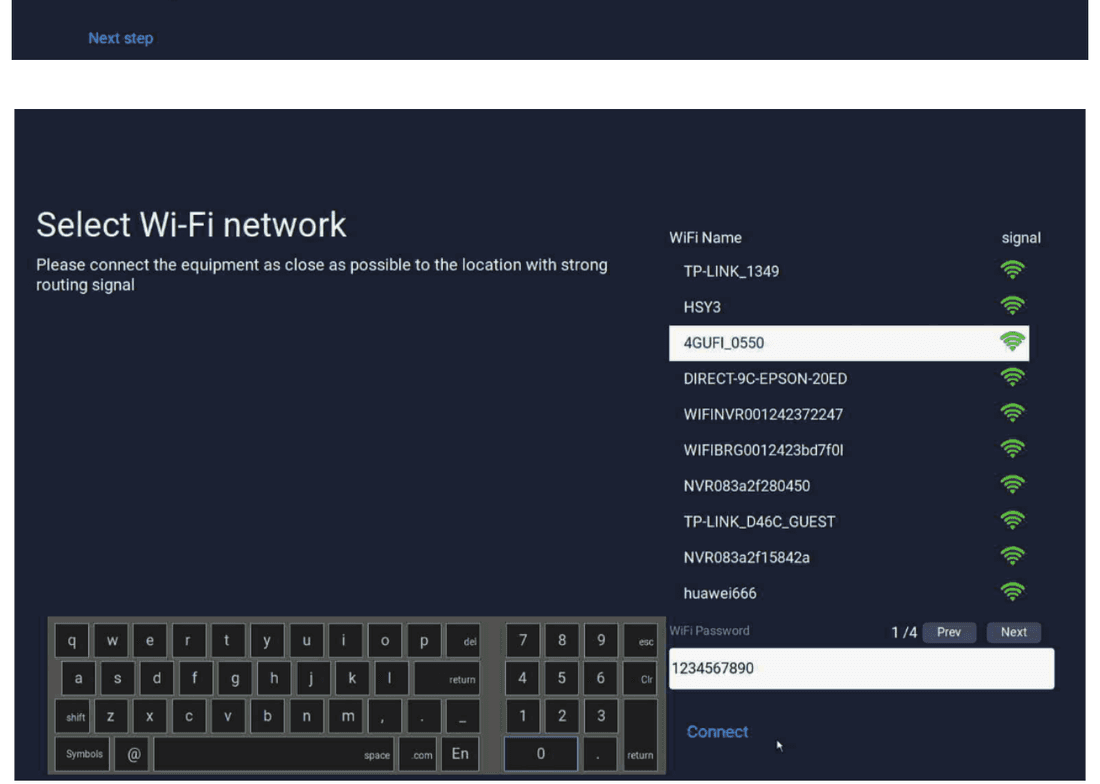
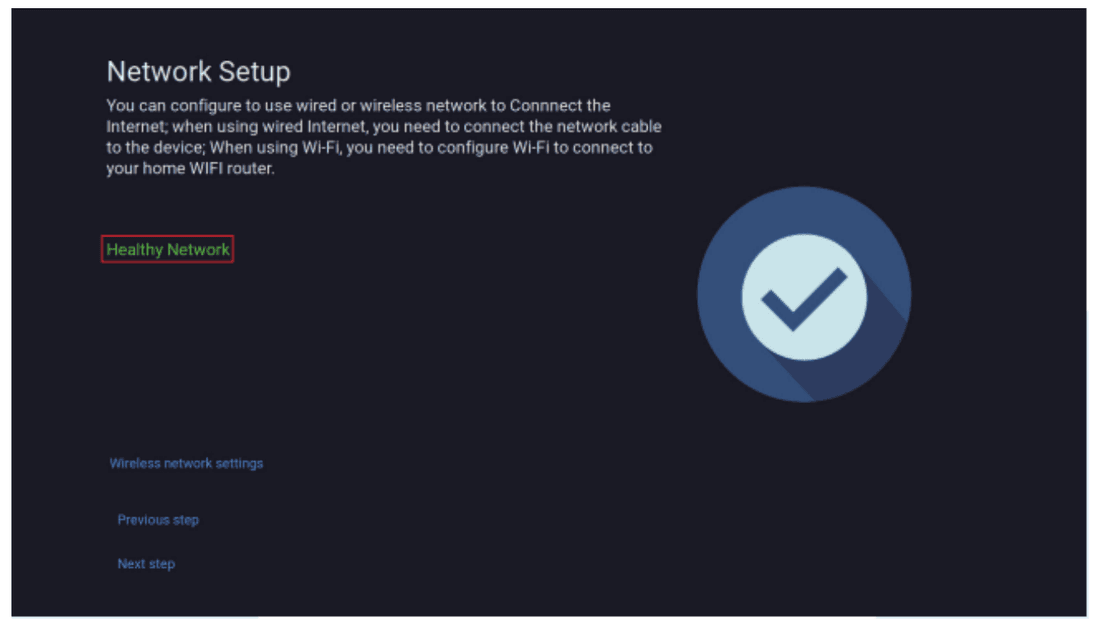
- If it shows Healthy Network, your system has been successfully connected to the Internet. Then click Next step.
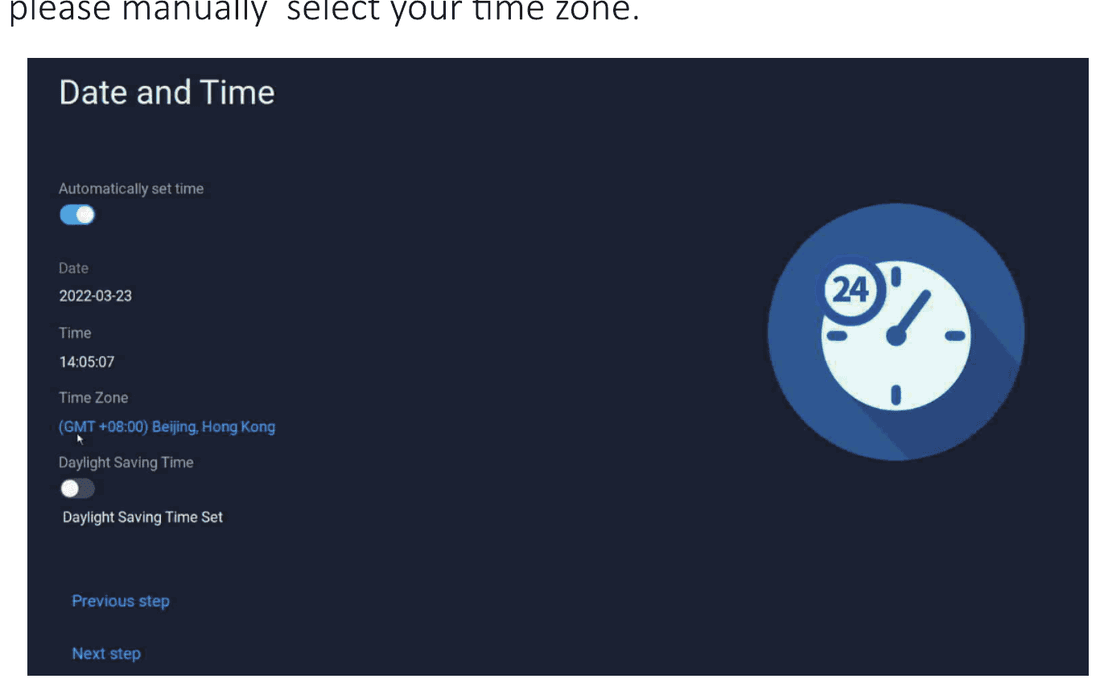
- Turn on the Automatically set time option. If the time is incorrect, please manually select your time zone.
App Remote View
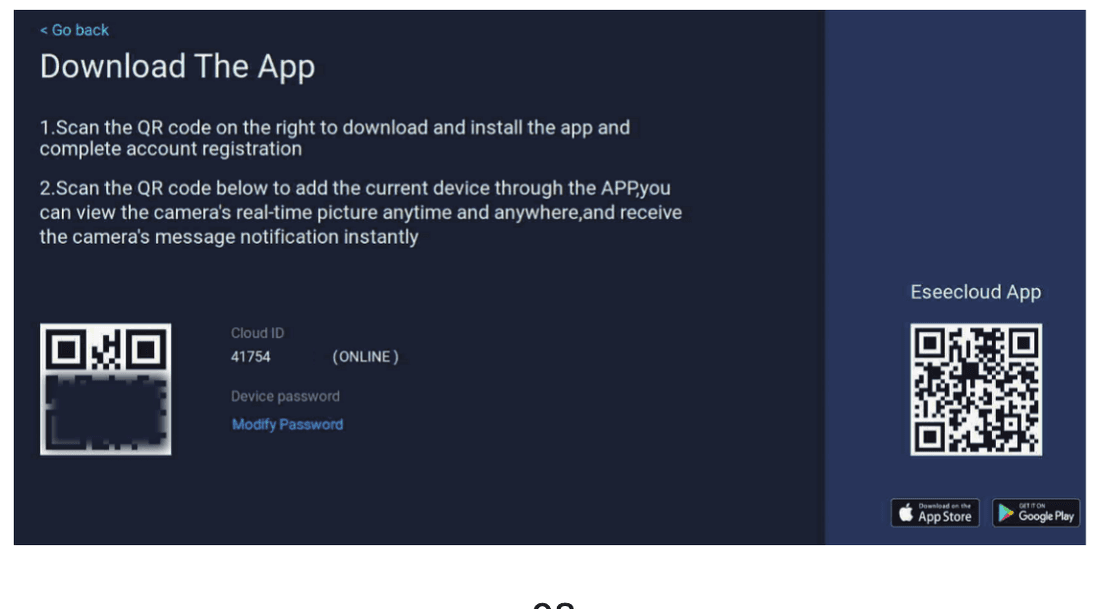
Sign up for an EseeCloud account, then follow the steps to hook up the system to the App. For a detailed walkthrough, see the EseeCloud App User Guide.
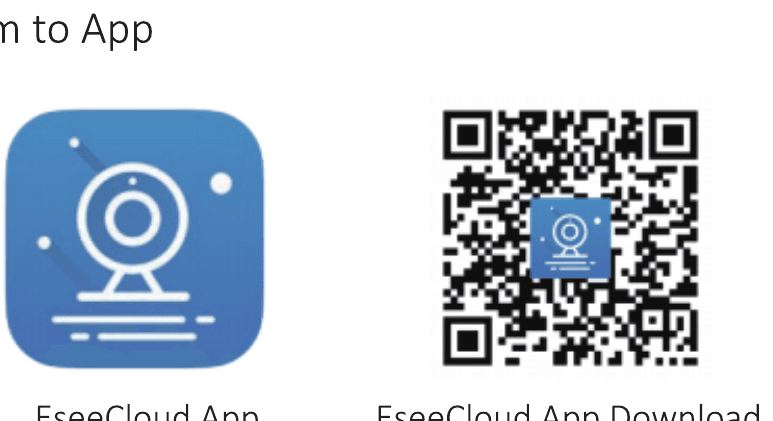
For iOS, it requires iOS 9.0 or above. For Android, Android 5.0 or above.
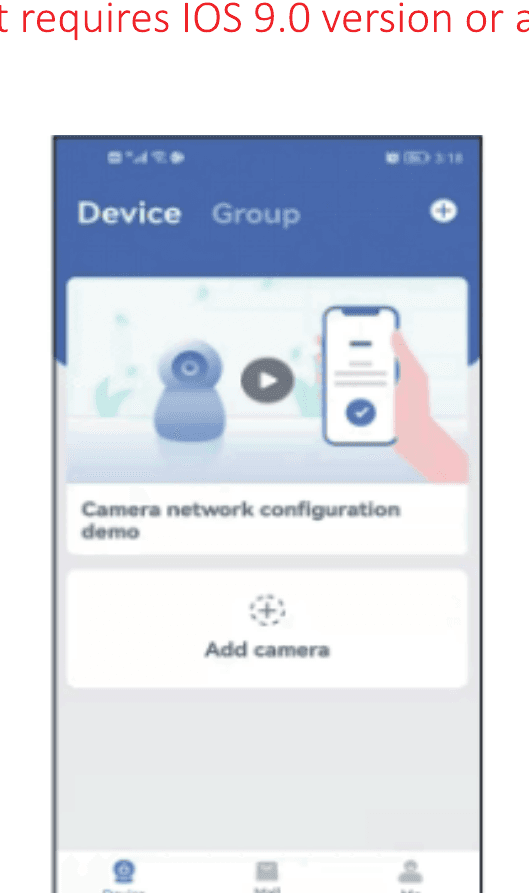
Click Add Device > Scan to add and scan the QR code of the monitor.
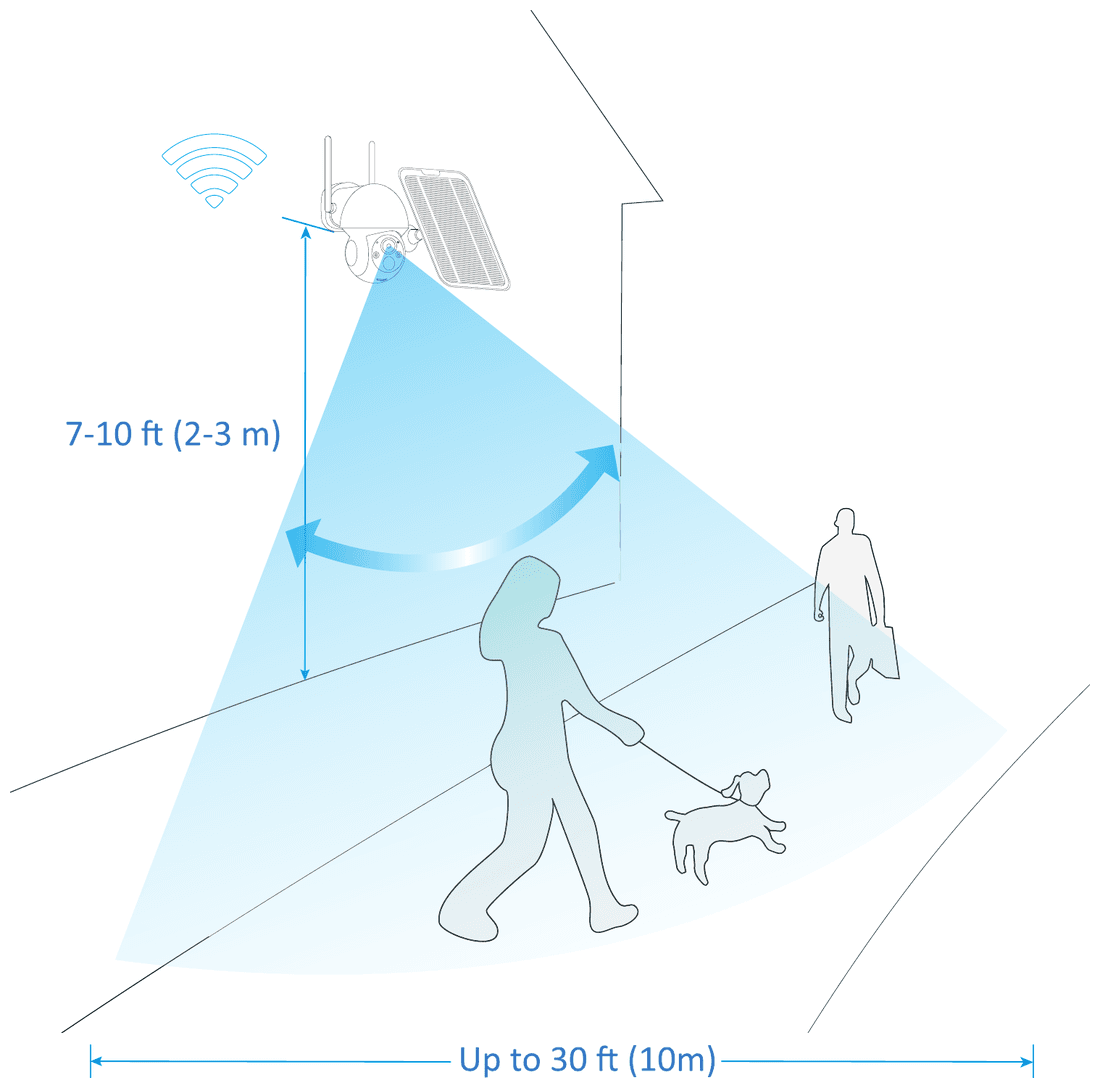
Select Height and Location
Hang the WTD504 Security Camera 7–10 ft (2–3 m) above the ground. This height maximizes the detection range of the motion sensor of the Wire-Free Security Camera. Avoid placing the Wire-Free Security Camera under direct sunlight.
Mount the Camera (outdoor or indoor)
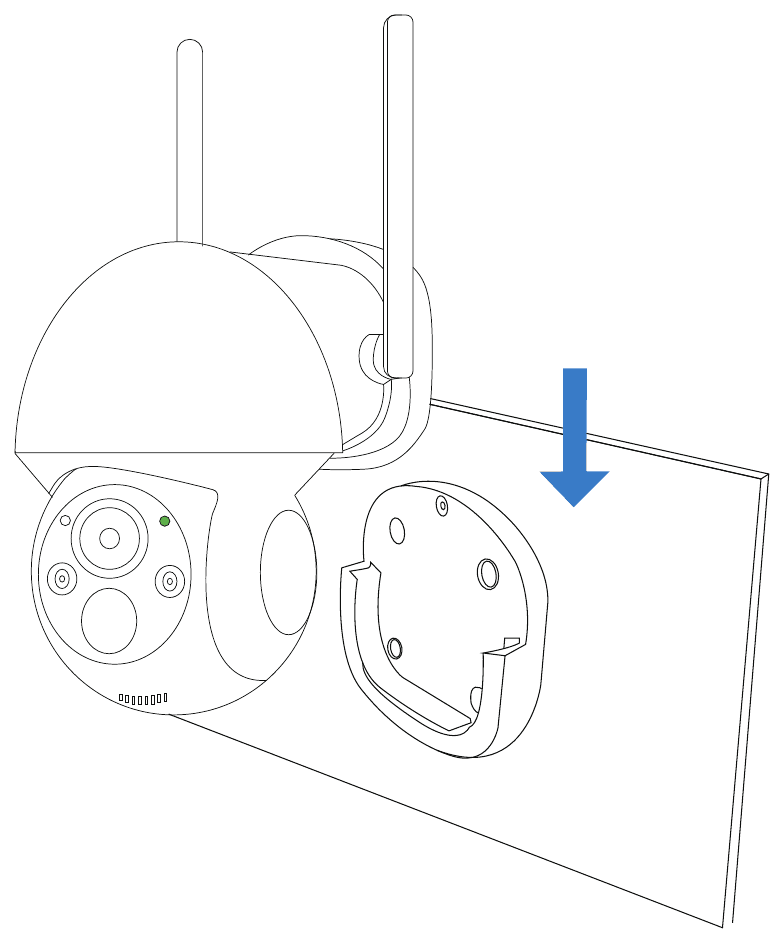
- Drill holes with a 15/64 inch bit, then insert the anchors into the holes. The camera can be mounted both indoors and outdoors. Anchors are necessary for walls that are made of hard materials such as concrete, brick, or stucco. Firmly nail the mounting base onto the wall.
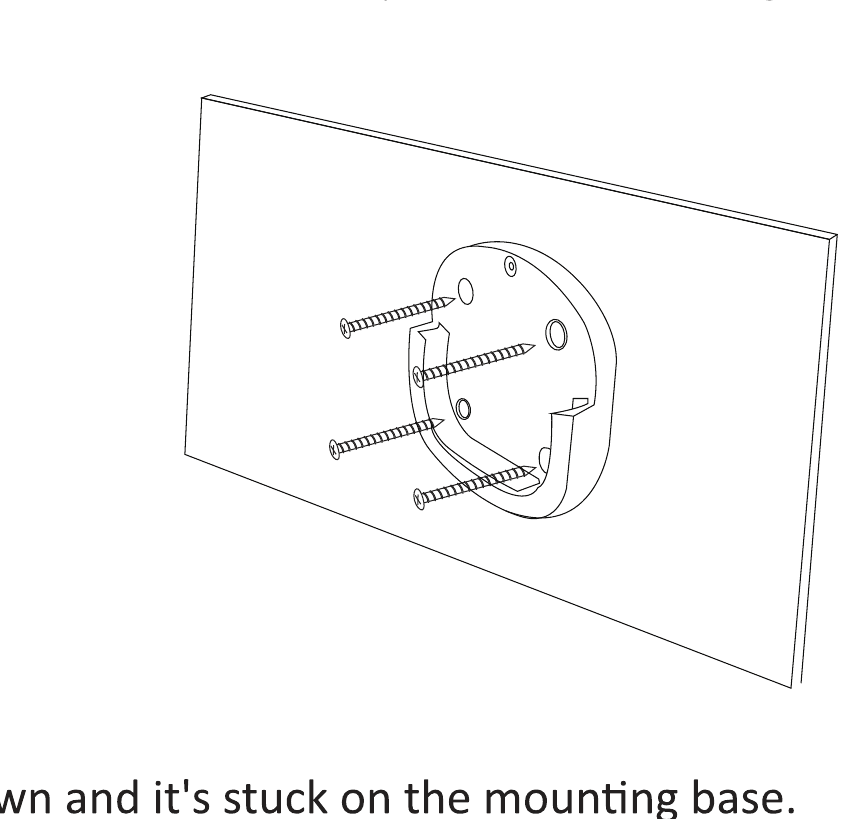
- Move the camera down and it locks onto the mounting base.
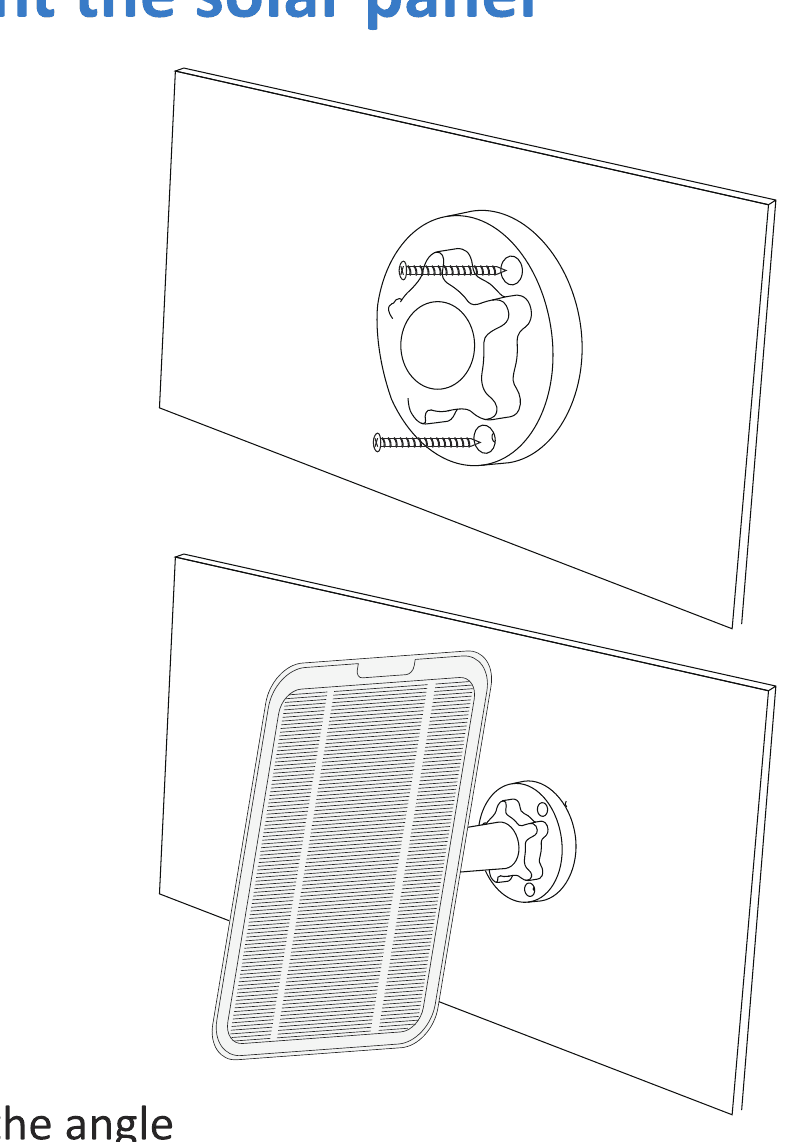
Mount the Solar Panel
Adjust the angle
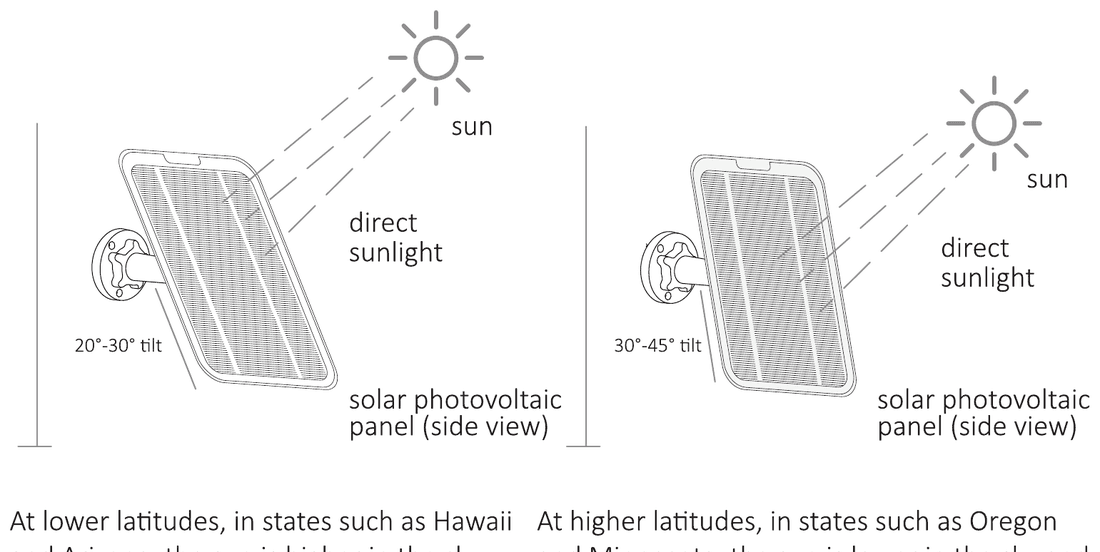
- At lower latitudes, in states such as Hawaii and Arizona, the sun is higher in the sky and solar photovoltaic panels do not require much tilt to receive direct sunlight.
- At higher latitudes, in states such as Oregon and Minnesota, the sun is lower in the sky and solar photovoltaic panels are often installed at greater tilt angles in order to receive direct sunlight.
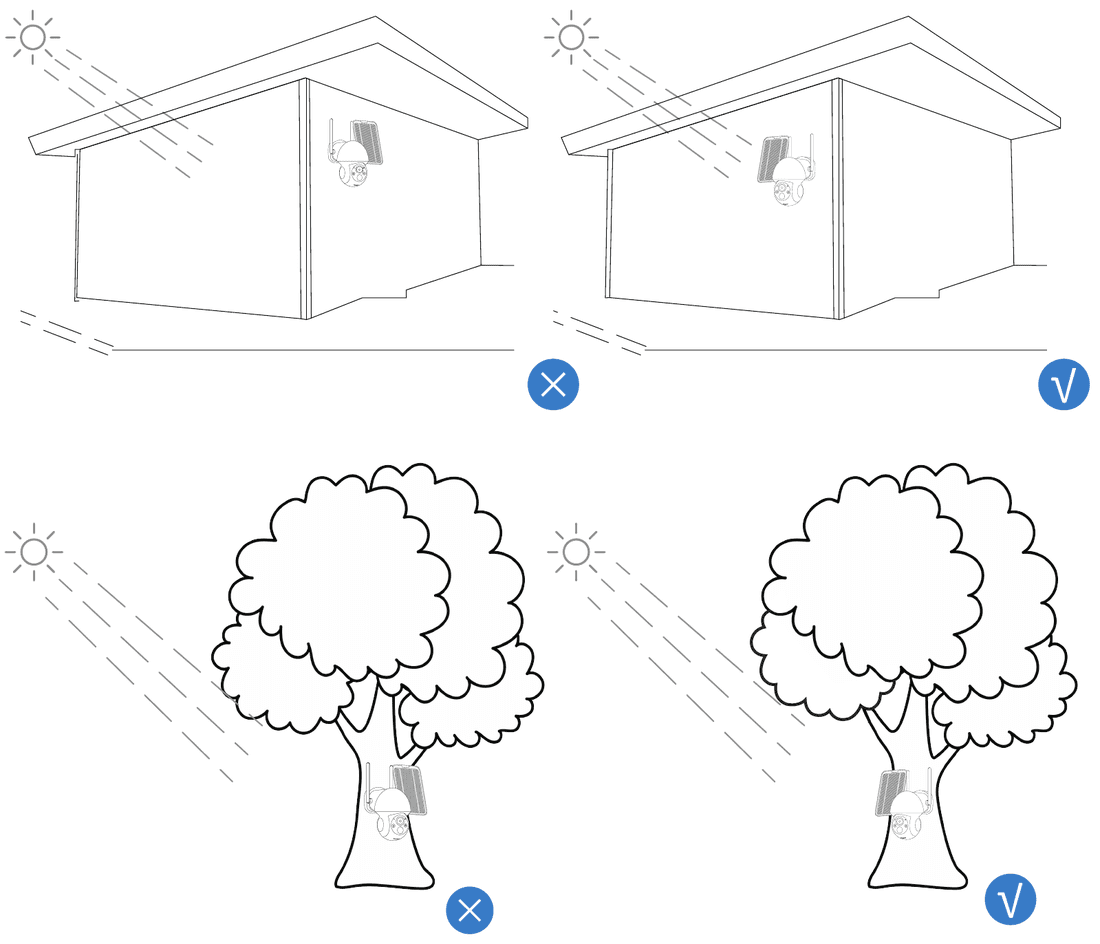
Table of recommended optimal directions and angles for summer and winter in each U.S. state:
| State | Postal code | Best directions for summer | Optimal tilt angle in summer (degrees) | Best directions for winter | Optimal tilt angle in winter (degrees) |
|---|---|---|---|---|---|
| California | 90001–96162 | South | 20–30 | South | 30–40 |
| Arizona | 85001–86556 | South | 20–30 | South | 30–40 |
| New York | 10001–14905 | South | 25–35 | South | 35–45 |
| Massachusetts | 01001–02791 | South | 25–35 | South | 35–45 |
| Florida | 32003–34997 | South | 30–40 | South | 40–50 |
| Texas | 75001–79999 | South | 30–40 | South | 40–50 |
| North Dakota | 58001–58856 | South | 35–45 | South | 45–55 |
| Minnesota | 55001–56763 | South | 35–45 | South | 45–55 |
Battery Warning
- The battery cannot be replaced.
- Replacement of a battery with an incorrect type can defeat a safeguard (for example, in the case of some lithium battery types).
- Disposal of a battery into a fire or a hot oven, or mechanically crushing or cutting a battery, can result in an explosion. Leaving a battery in an extremely high-temperature environment can result in an explosion or the leakage of flammable liquid or gas.
- A battery subjected to extremely low air pressure may result in an explosion or the leakage of flammable liquid or gas.
Customer Service
Warranty
12-month limited warranty (the actual warranty period shall be implemented according to the requirements of local laws and regulations).
APP online support
The EseeCloud app provides one-on-one 7/24 online support. For any questions, please contact us directly through the app to get your problem solved. You can also browse our Help Center.
Email us
Call us
US/CA +1 917-338-1084 (Mon–Sun 9AM–5PM)
- Facebook: @Hiseeu Security Camera
- YouTube: @HiseeuOfficial
- TikTok: @hiseeusolarlife
- WhatsApp: +86 15361562950
Wireless Battery CCTV Kit
User manual for the Hiseeu Wireless Battery CCTV Kits (A031) — out-of-box audit, product overlook, installation, NVR setup wizard, app remote view, NVR menu options, camera and system settings, computer viewing, and FAQ.
Wireless Battery-Powered Camera Kit
User manual for the Hiseeu Wireless Battery-Powered Security Camera Kit (A023) — base station and battery cameras, app setup, functions, settings, and FAQ.