 EseeCloud Help Center
Battery Security Camera
User manual for the Hiseeu Battery Security Camera (C014-V2.1) — appearance, installation, app setup, PC viewing, camera functions, settings, and FAQ.
User Manual (C014-V2.1) for the Hiseeu Battery Security Camera.
Please read this guide carefully before using the product and keep it properly.
Appearance Description
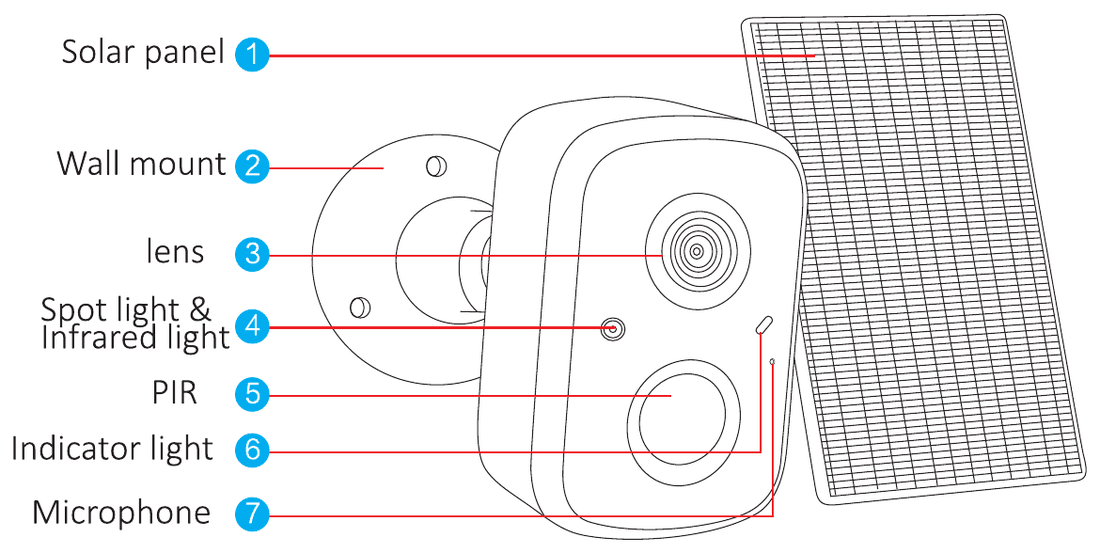
- Solar panel
- Wall mount
- Lens
- Spot light & Infrared light
- PIR
- Indicator light
- Microphone
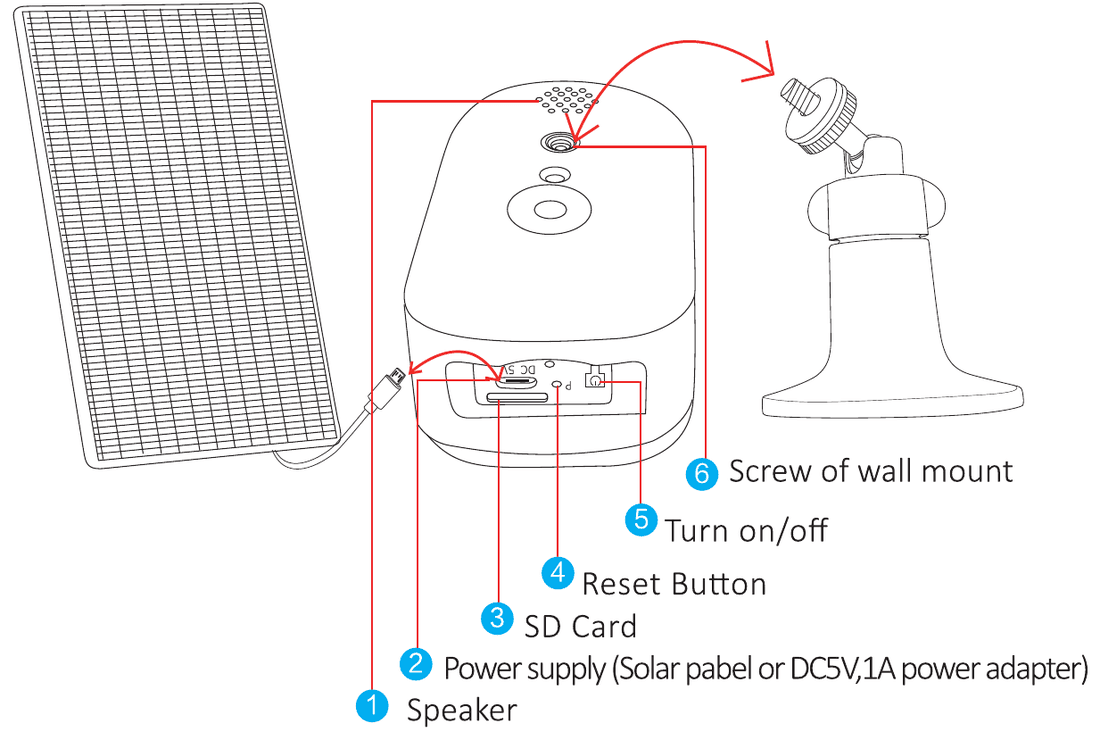
- Speaker
- Power supply (solar panel or DC 5V, 1A power adapter)
- SD card
- Reset button
- Turn on/off
- Screw of wall mount
Safety Guidelines
- Please do not put any fluid container on the product.
- Please charge the camera for 12 hours when using the camera for the first time.
- Please use the product in a ventilated environment and prevent blocking the vents.
- Please use the included power supply with the product to prevent damage to the product.
- Please use the product under its standard working temperature and humidity.
Installation
- Ensure that the equipment in the package is in good condition and includes all assembly parts. If you lack accessories, please contact us.
- During installation, please ensure that the distance between the camera and the router is within the area with good Wi-Fi signal.
- Make sure the walls are strong enough to withstand four times the weight of the camera and bracket.
- Please install the camera as close to the router as possible, and install the solar panel in a well-lit location.
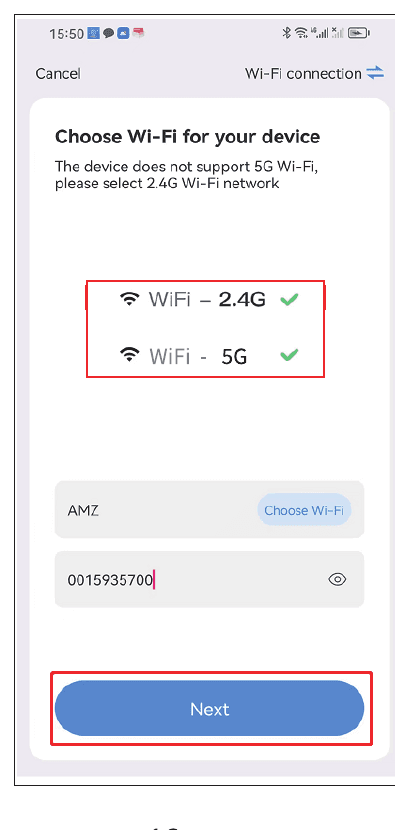
- Please use 2.4G/5G Wi-Fi for connection.
Solar Panel Placement
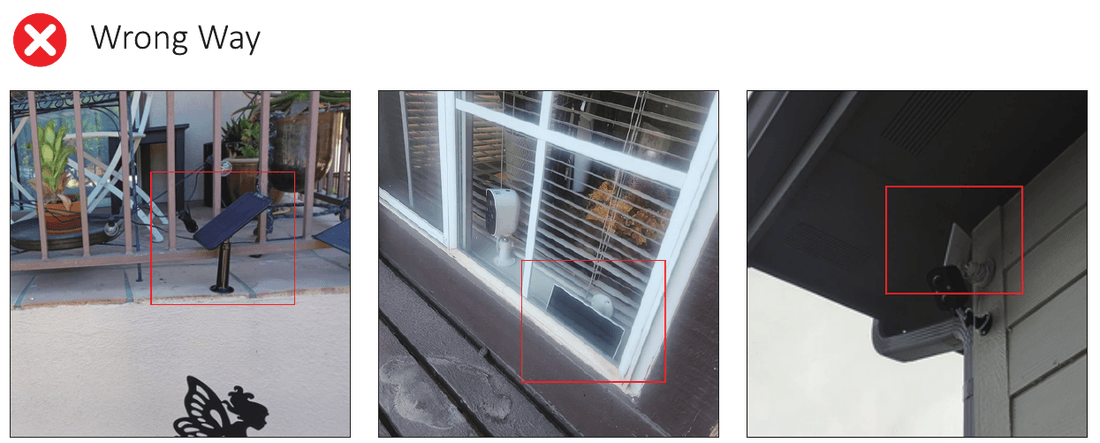
Wrong Way: Install the solar panel in the places where the sunlight is blocked.
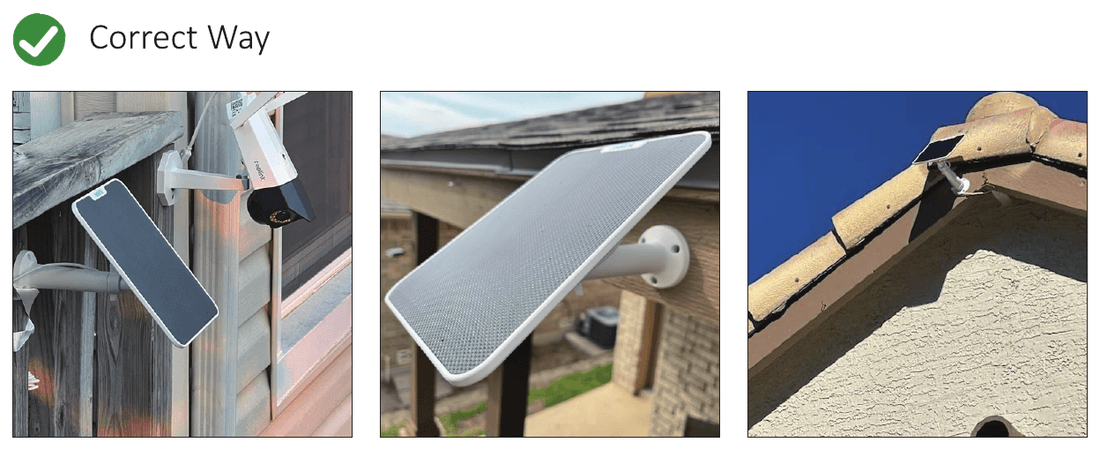
Correct Way: Install the solar panel in the places where the sunlight is directly light. Ensure the correct angle and enough sunlight for the solar panel.
Please Read the Following Precautions Before Activating the Camera
- If you need recording and check playback videos, please insert an SD card or buy cloud storage; otherwise you can only see notification pictures when detecting motion/human. (You can contact us for one free 64G SD card if you need.)
- Please note when you are inserting the SD card, please ensure the camera isn't charging at that time. (If you insert an SD card while charging, the SD card may burn out.)
- Please ensure your home Wi-Fi is 2.4Ghz/5Ghz.
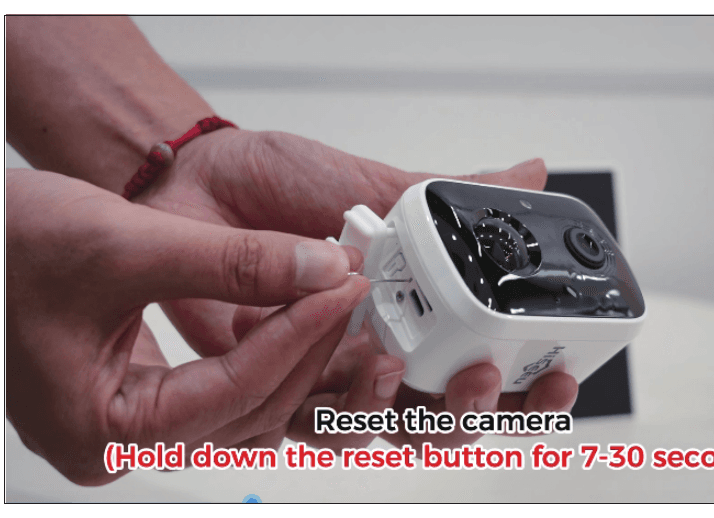
- Please RESET the camera by pressing the reset button for 7–30s before connecting it.
- Please check the setting, turn off the "only humanoid detection"; otherwise the camera only detects some people coming in the detection area.
- Please check the setting, choose the correct "customized detection area" if the camera can't detect any motion.
- Please note if the battery ran out for more than two hours, charge the camera at least 5 hours and then turn it on.
- Please note the battery camera is suitable for places where there are less than 100 triggers per day. (The lifetime for one full charge is three months if there are 100 triggers per day.)
If you need the detailed instruction PDF or the video about complete connection steps, please scan the QR code printed in the manual to download.
Add Device
Software Download
Search the free app EseeCloud in the App Store or Google Play. The phone app will be updated sometimes; if your phone app menu is different from the menu on the user manual, please contact us to get the latest user manual. For a detailed walkthrough, see the EseeCloud App User Guide.
For iOS, it requires iOS 9.0 or above. For Android, Android 5.0 or above.
Register Account and Log In
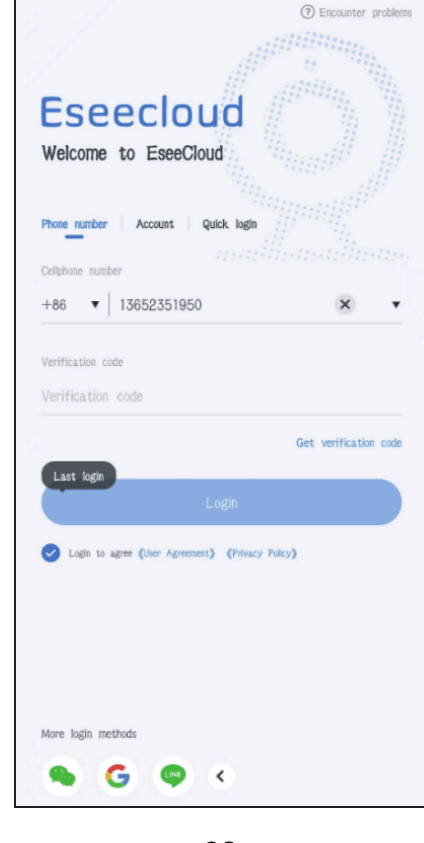
1) Phone number — Go to the login interface and click "Phone number".
- a. Choose the region code and input the phone number.
- b. Manually press and hold the tennis ball, drag it to the red dot, and then drag it to the tennis racket to go to the next step.
- c. You'll receive a verification code; input the verification code.
- d. Input the code and register successfully.
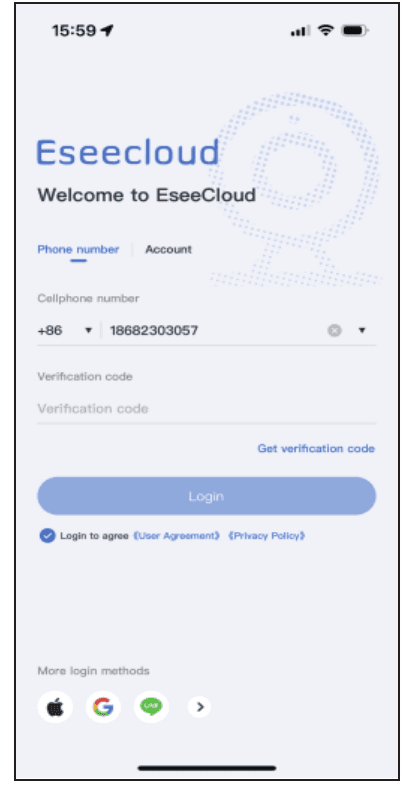
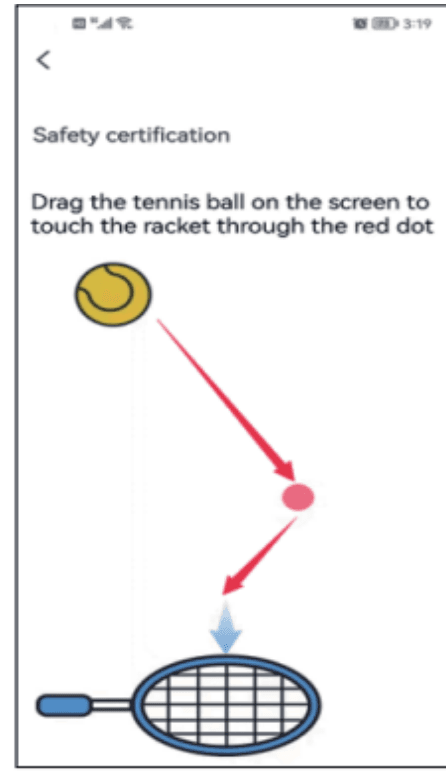
2) Account — Register an account with your phone number or email to log in.
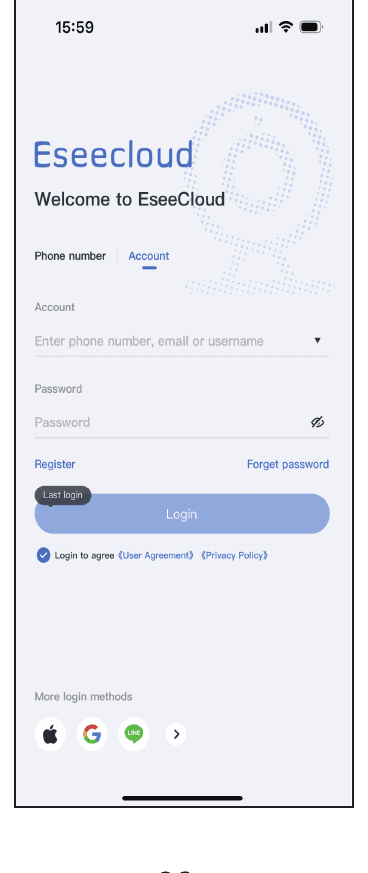
- a. Click "Register".
- b. Register with your phone number/email, and click "Confirm".
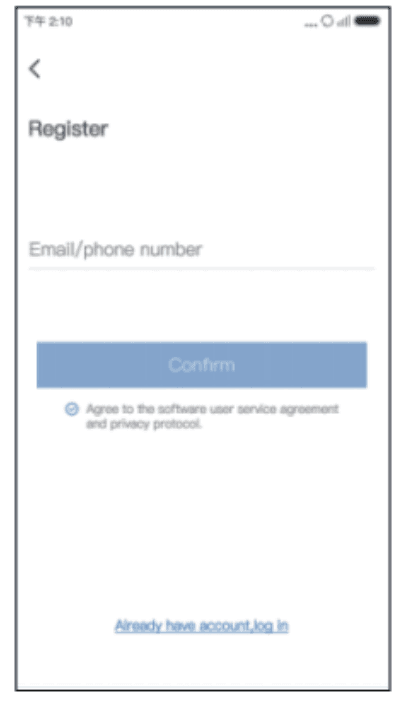
- c. Manually press and hold the tennis ball, drag it to the red dot, then drag it to the tennis racket.
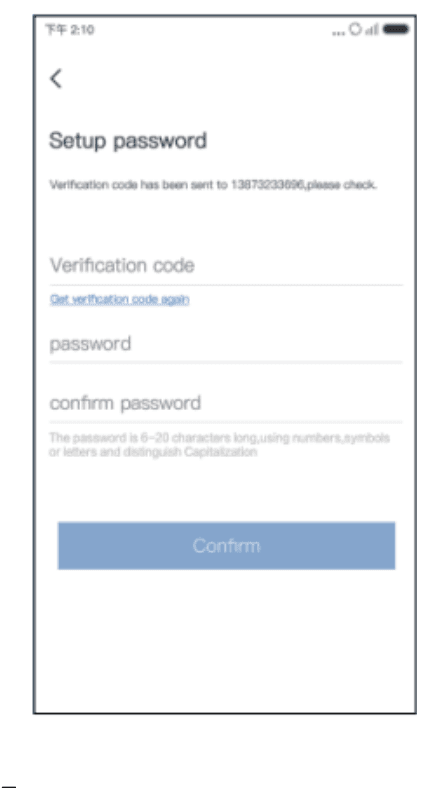
- d. Next, you'll receive a verification code. Input the verification code and set up your password. Then click "Confirm" to finish.
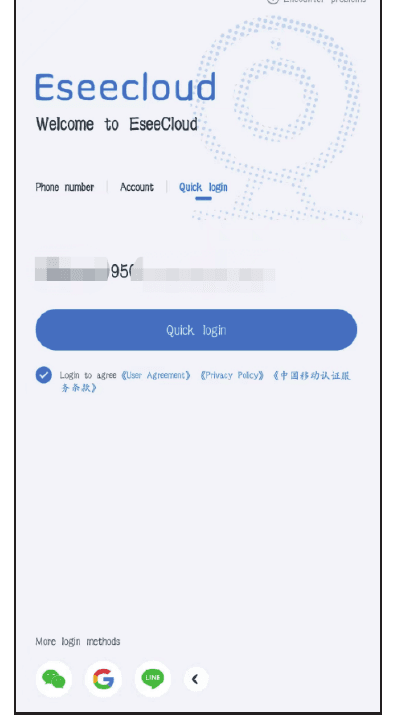
3) Quick Login — After your first log in, the app will automatically recognize your phone number; next time you can choose "Quick login".
4) More login methods — You can log in via Wechat, Google or Line account.
Add Camera to Mobile App
Method 1 — By Bluetooth Connection
Please fully charge the camera for 12 hours at the first time use.
- Turn on the camera.
- Reset the camera by pressing the reset button for 7–30s.
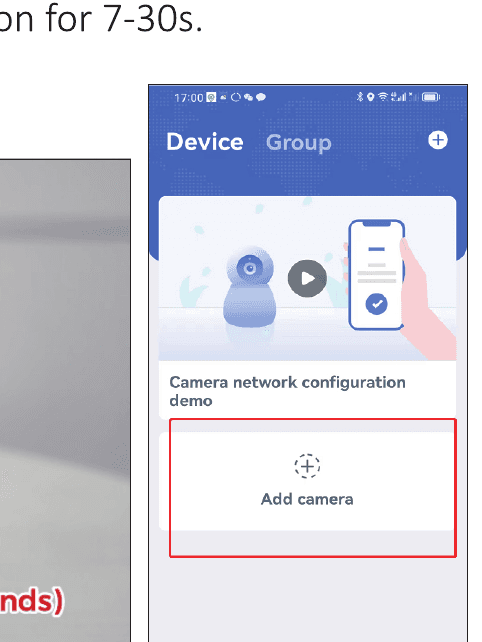
- Click "Add camera" on your mobile app.
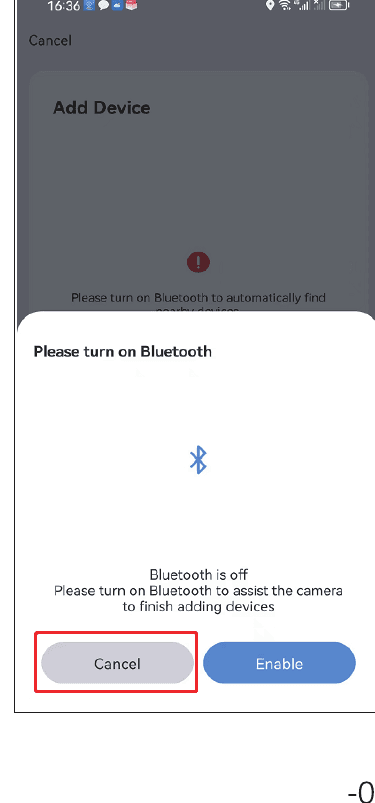
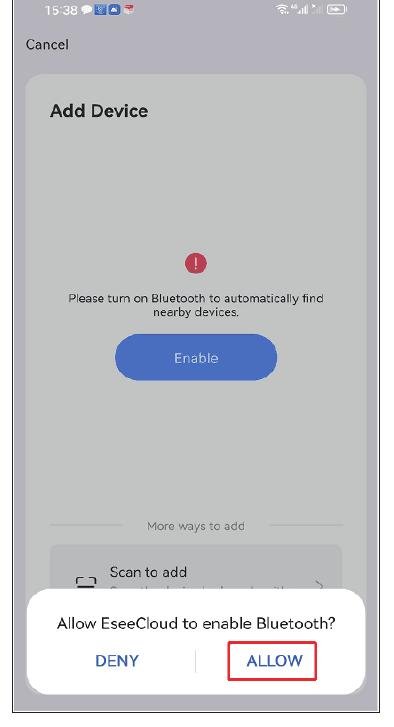
- Please turn on Bluetooth — Enable.
- Find the new device and click on "Add".
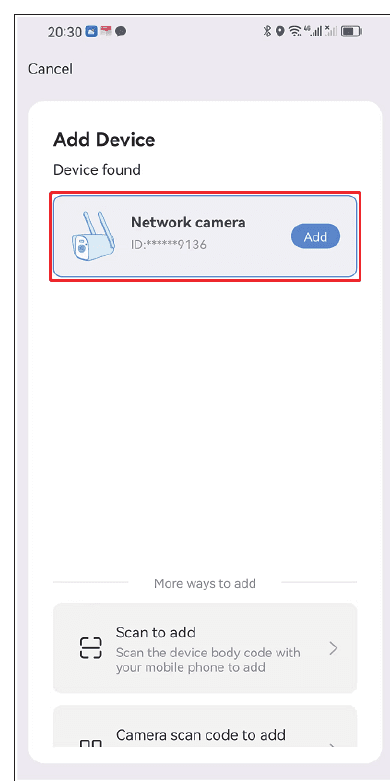
- Choose your home Wi-Fi. Please note it supports 2.4ghz/5ghz Wi-Fi.
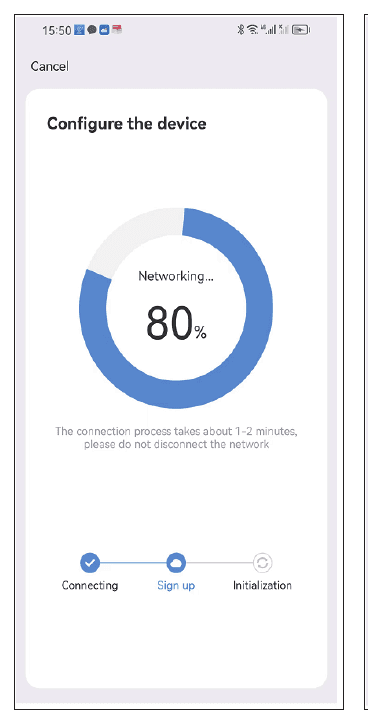
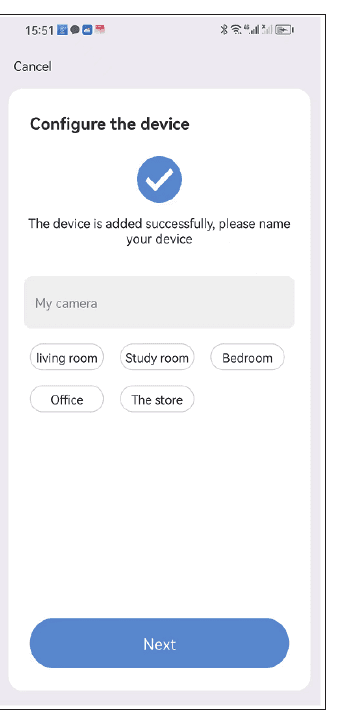
- Wait for configuring successfully, then you can name your camera.
- Set up the motion detection alert if you need the function.
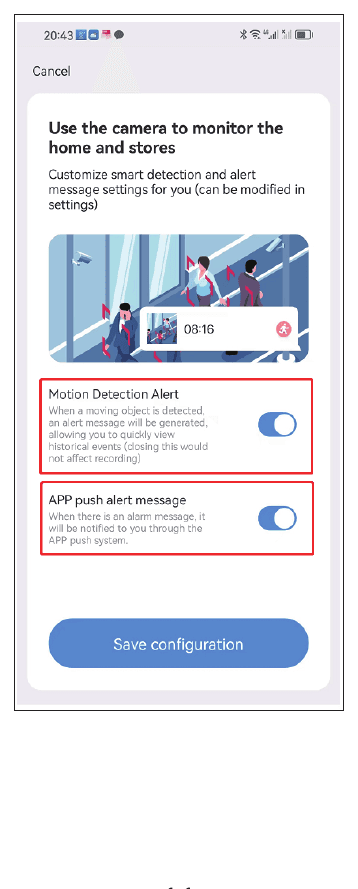
Please note: if you can't or you don't want to use the Bluetooth connection, you can choose "Cancel" when it pops up the Bluetooth connection. After you connect with your Wi-Fi, there will be a code on your phone; you can use your camera to scan the code on your phone to finish configuring the device.
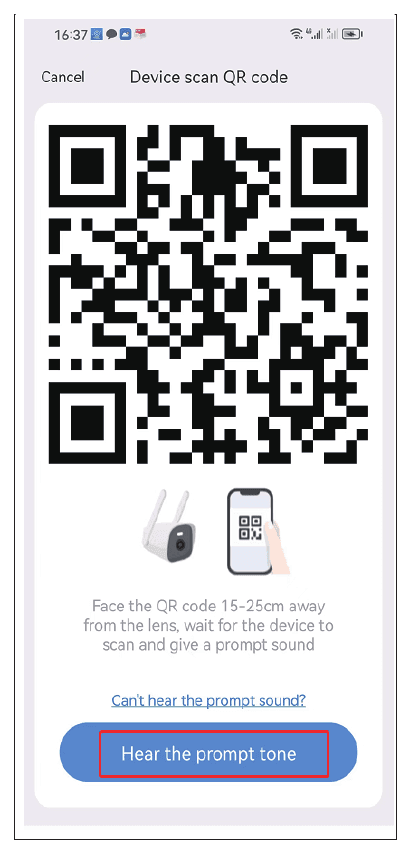
Method 2 — Scan to Add
Please fully charge the camera for 12 hours at first time use. Turn on the camera.
- Click "Add camera" on your mobile app, then choose the "Scan to add" option.
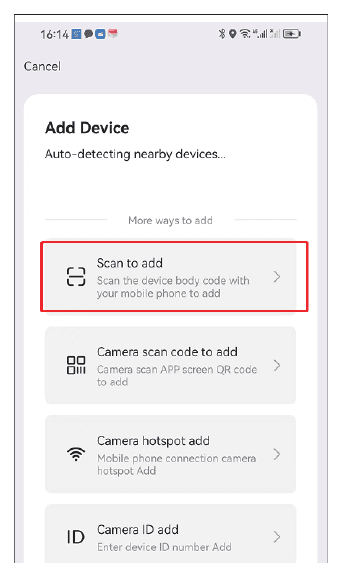
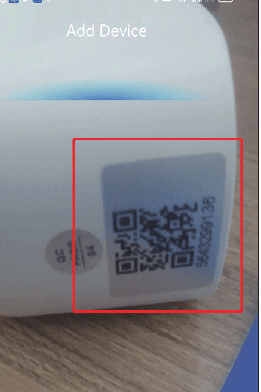
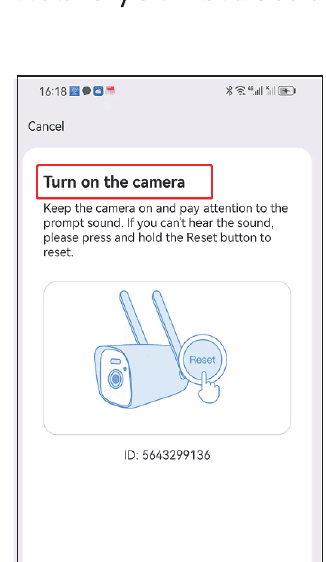
- Enable your Bluetooth (or cancel it to use the camera-scan method), then scan the camera code on the device body.
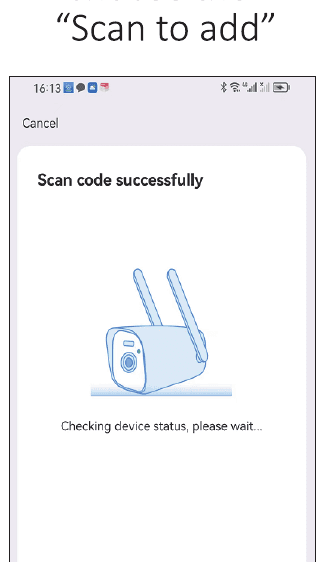
- Check "hear the device prompt sound" and click "Next". Then choose your home Wi-Fi (2.4ghz/5ghz), wait for configuring successfully, name your camera, and set up the motion detection alert if you need the function.
To View on EseeCloud Software on PC
You need to register an account of EseeCloud on your mobile phone and add the device first, so that you can remote view on PC. This is the link of EseeCloud software.
- Windows: http://download.dvr163.com/tool/eseecloud/EseeCloud_Setup_3.0.8.0.exe
- MAC: http://download.dvr163.com/tool/EseeCloud-mac-2.0.8_20200228.zip
You can also email [email protected] / [email protected] (For US/CA) or [email protected] (for UK/EU).
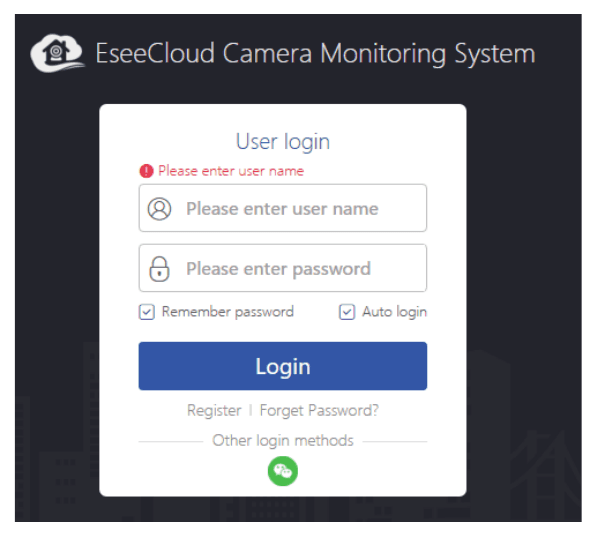
- Input the same account and password of EseeCloud as your mobile terminal, then click login.
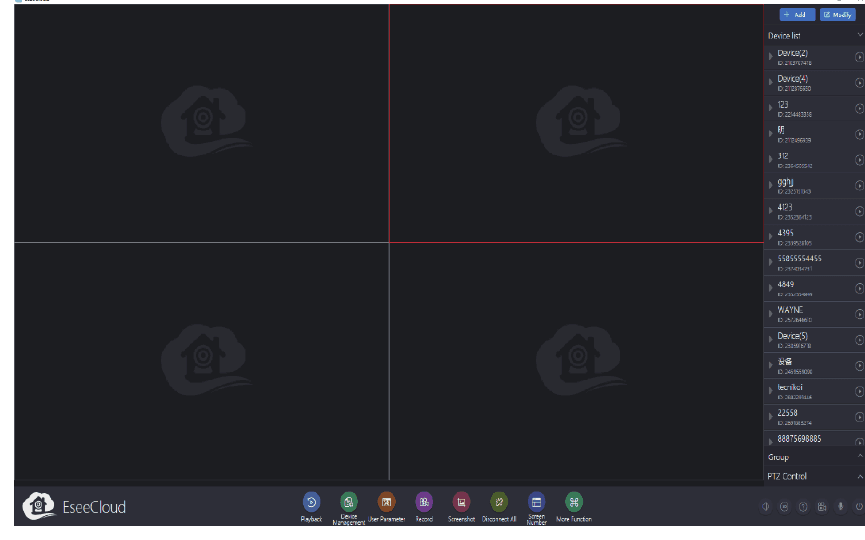
- After logging in with the account and password, the device will automatically synchronize to the computer.
Camera Function
1. EseeCloud Main Interface
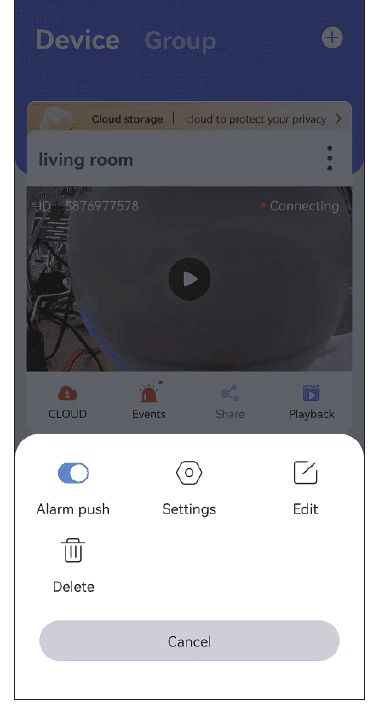
Click the menu icon and you will see four options.
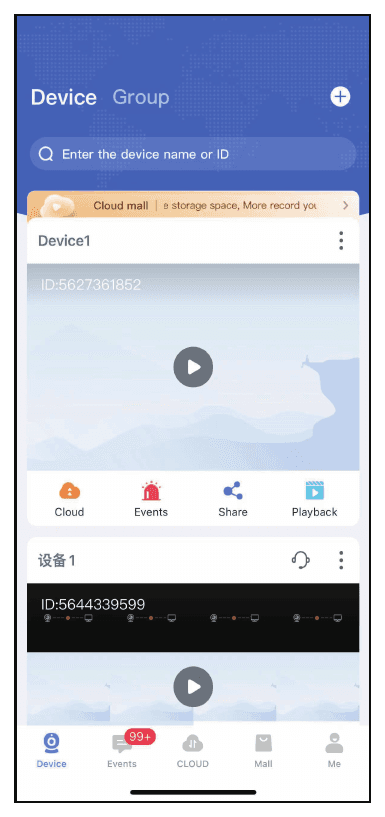
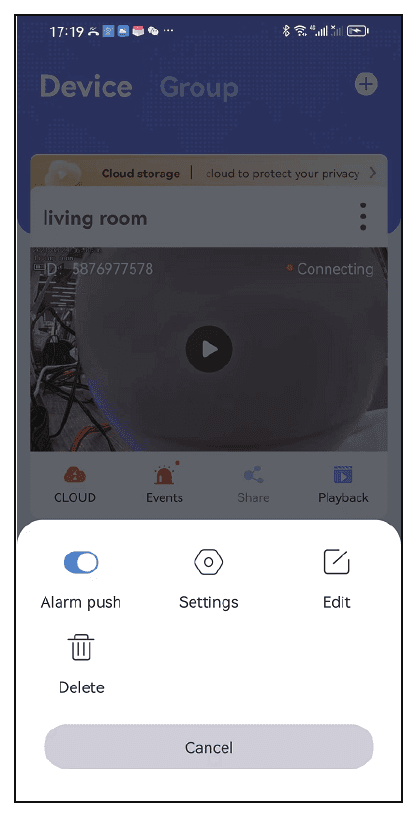
- a. If you want to receive alarm messages, please turn on the "Alarm Push" option.
- b. Click Settings, you can go to the setup interface directly.
- c. Click "Edit" option, you can edit the device name.
- d. The last option is to delete the device.
Cloud Storage
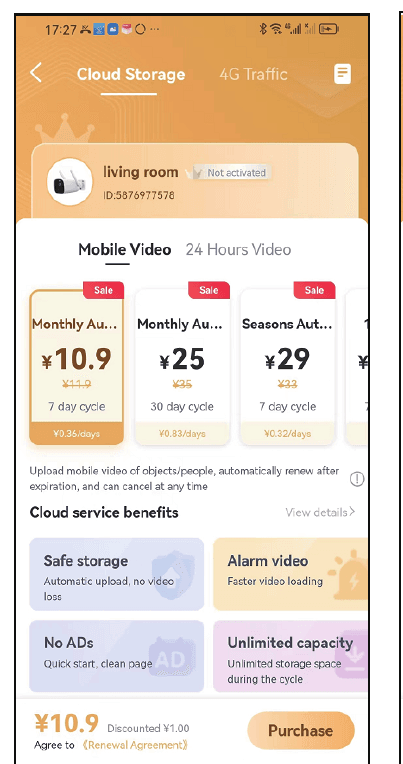
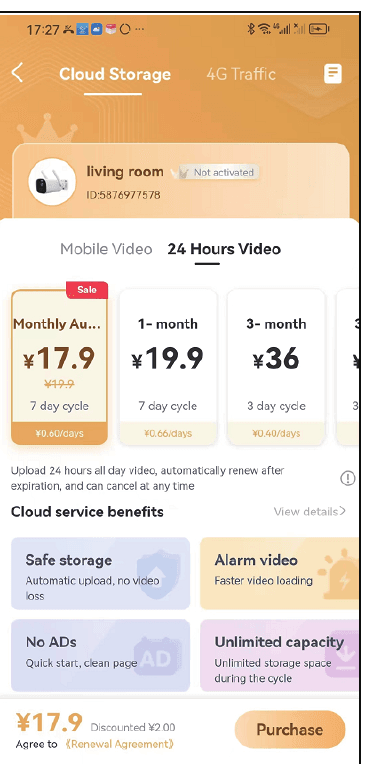
Click the Cloud service icon — you can purchase cloud service, and each device needs to be purchased separately. There are two storage modes. Mobile video means it only records when the camera detects a suspicious object. 24-hour video will record 24/7 days.
Alarm Messages
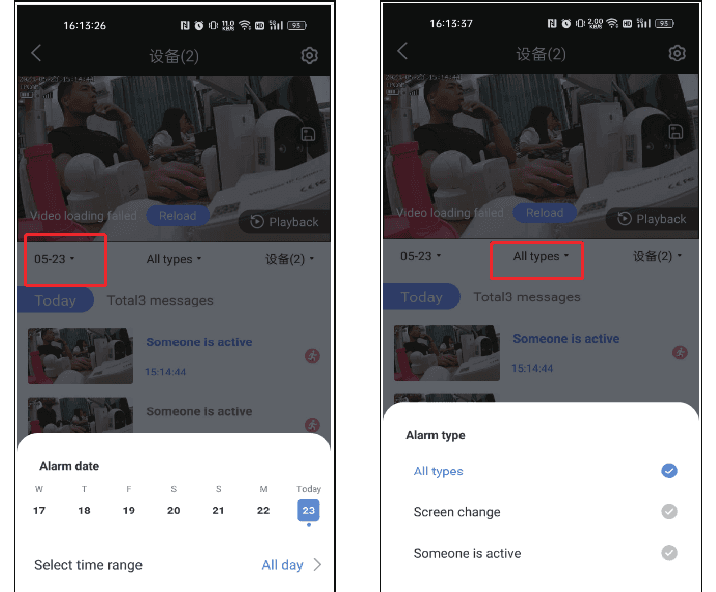
Click the Events icon, you can check the alarm message, and you can select date, time range and motion type, such as all types, screen change, someone is active, etc. The alarm message will be overwritten automatically after three days.
Share the Device
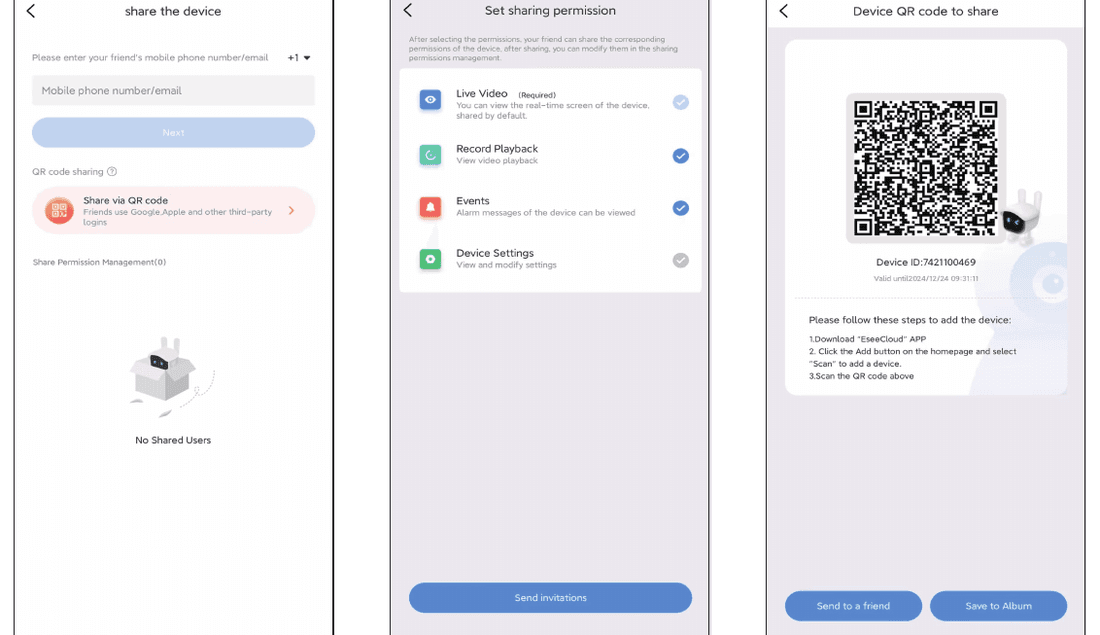
Click the Share icon, you can share the device to your friend or family.
- a. Click "share" icon, select share permission and QR code validity.
- b. Click "finish" in the upper right corner to generate a QR code, then share the QR code to other people.
Playback
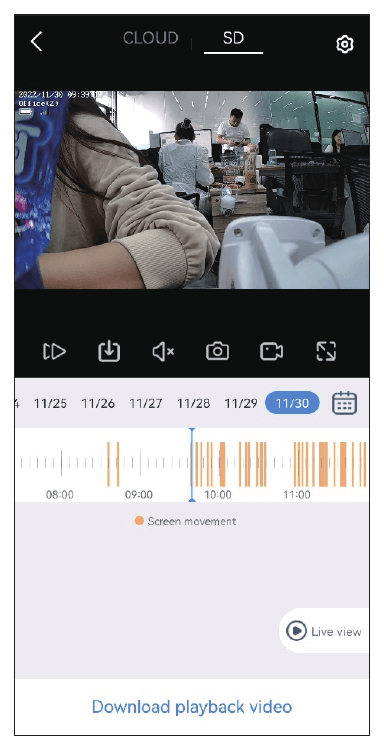
Click the Playback icon, you can watch the camera record, but you need to insert the SD card or purchase cloud service first.
Please note, just cloud service supports the fast-forward option; SD card does not support it.
2. Real Time Video Recording Function
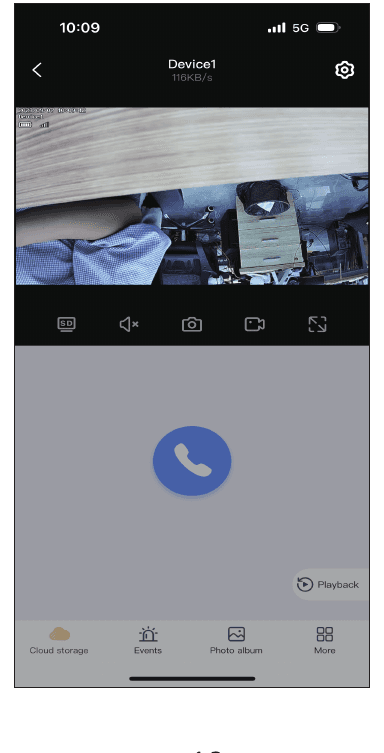
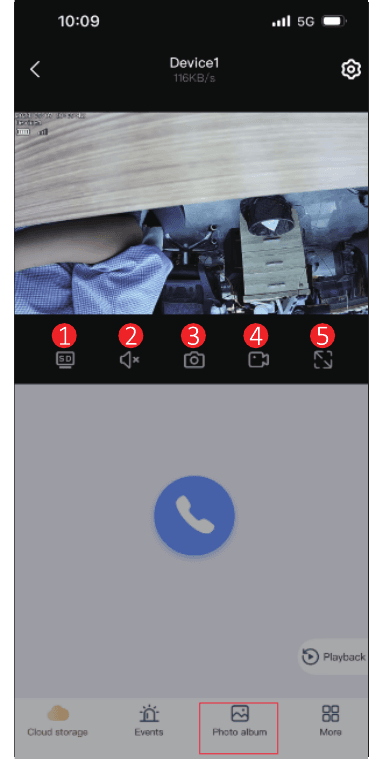
- SD & HD Switch — If the camera image is not clear, you can switch to HD mode, and EseeCloud will keep HD mode all the time.
- Sound — When you view the camera, please open the sound button; otherwise you can't hear anything of the camera recording voice. Please note that you also need to turn the phone volume up.
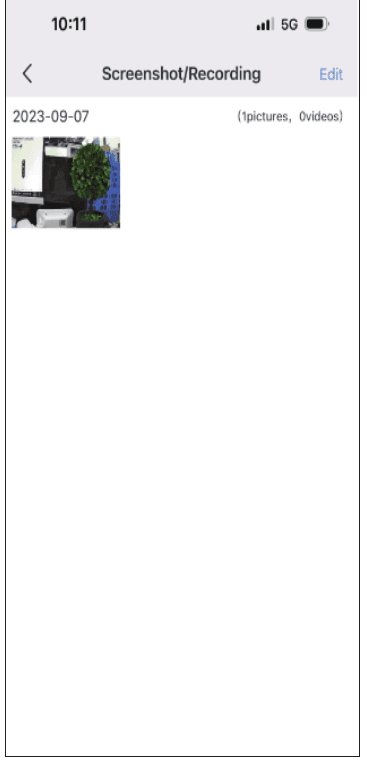
- & 4. Screenshot & Recording — You can take a screenshot or record of an important event picture and save it on your mobile phone. After recording successfully, please click "Photo album", you can check the video on this interface.
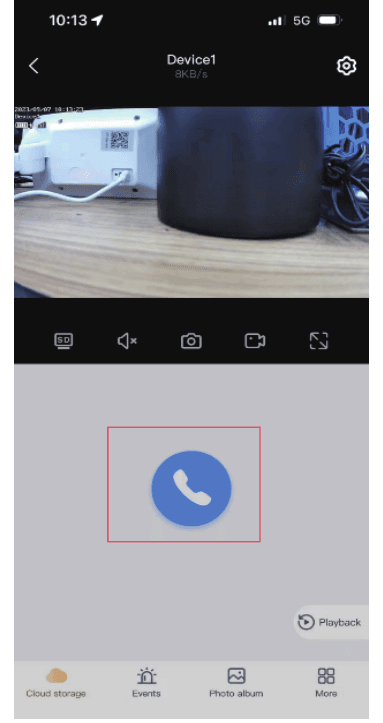
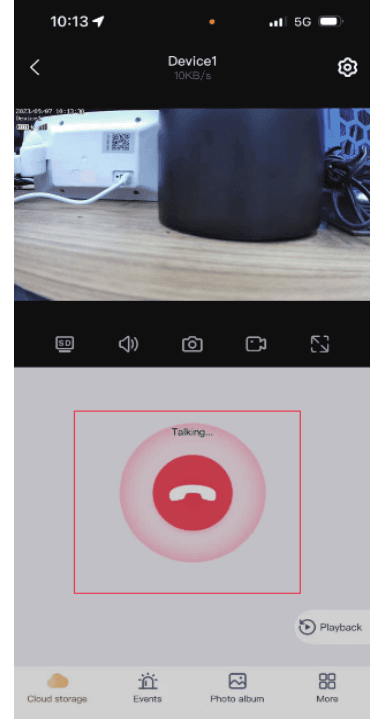
Two Way Audio
Click the blue microphone icon to speak, then you can communicate with your family or visitors, and you can click on the red button to finish talking.
More Features
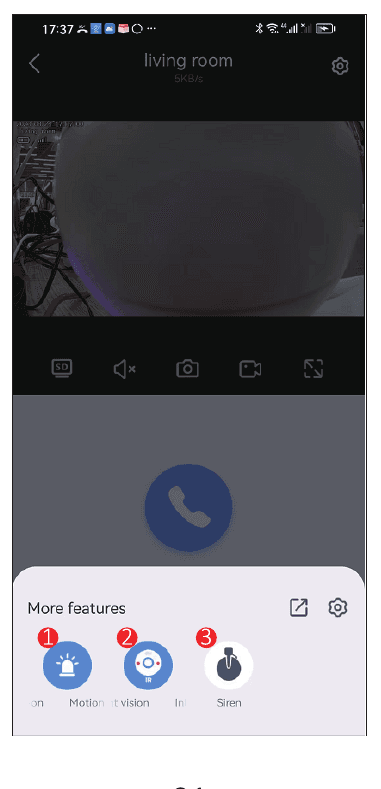
- Motion Detection — When someone enters the monitoring range, the camera will immediately detect and send an alarm message to your phone.
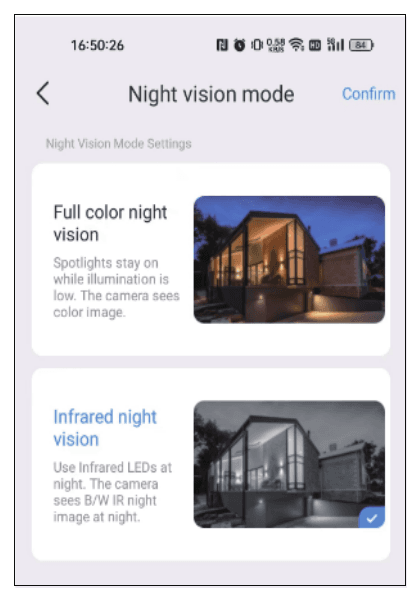
- Night Vision Model — The battery camera has two night vision modes to choose from. Clicking the button will switch to another mode.
- Full color night vision: When it detects the surrounding environment begins to darken, the floodlights will automatically turn on and display a color image.
- Infrared night vision: Camera will switch to black and white image automatically at night.
- Siren — When you find someone invading, you can click the alarm button, the camera will alarm for 14 seconds to scare away the intruder.
3. Settings Feature
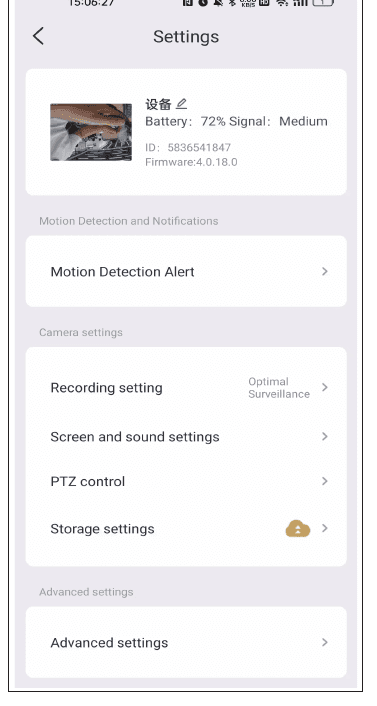
1) Motion Detection Alert
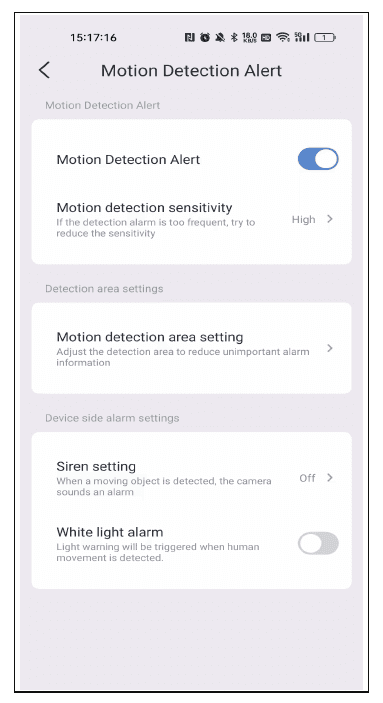
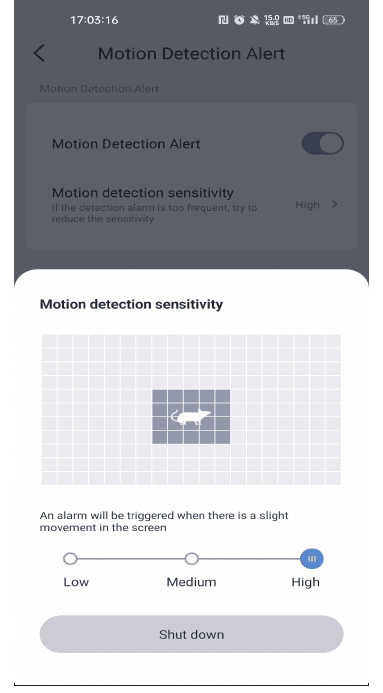
Motion detection sensitivity: If you receive too many wrong alarm messages, please set the sensitivity of motion detection to low.
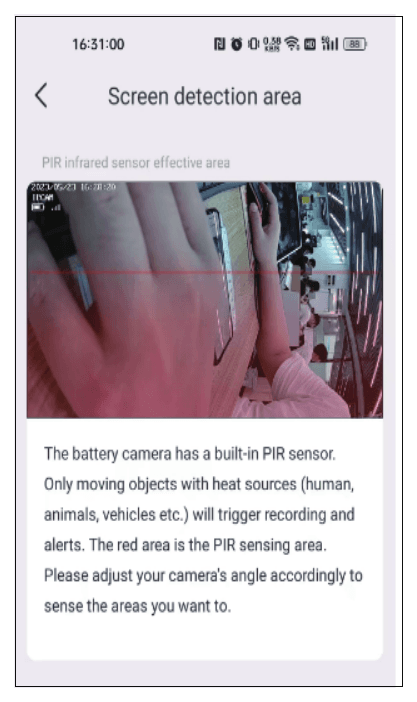
Motion detection area settings: The battery camera has a built-in PIR sensor. Only moving objects with heat sources (human, animals, vehicles, etc.) will trigger recording and alerts. The red area is the PIR sensing area. Please adjust your camera's angle accordingly to sense the areas you want to.
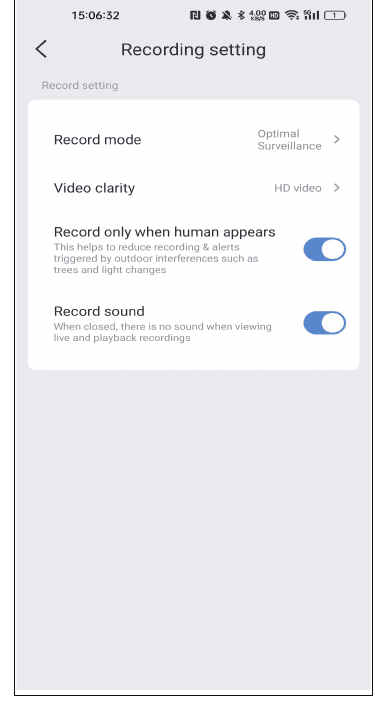
2) Recording Setting
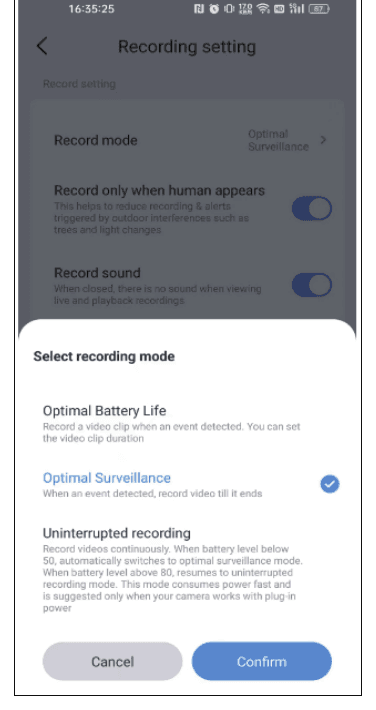
Record mode:
- Optimal Battery Life: When the camera detects the movement of an object, it will only record the video according to the duration you choose. The maximum recording time can be 30 seconds.
- Optimal surveillance: Camera will record until the move ends.
- Uninterrupted record: This option supports recording continuously, but when the battery level is below 50, it will switch to optimal battery life mode, so it is better to plug in the power adapter or solar panel.
Record only when human appears: If you install the camera outdoor, turning on this option can help to reduce recording & alerts triggered by outdoor interference, such as trees and light changes.
Record sound: If this option is not enabled, the camera will not record sound. When playback, you can only view the recorded video without sound.
3) Screen and Sound Settings
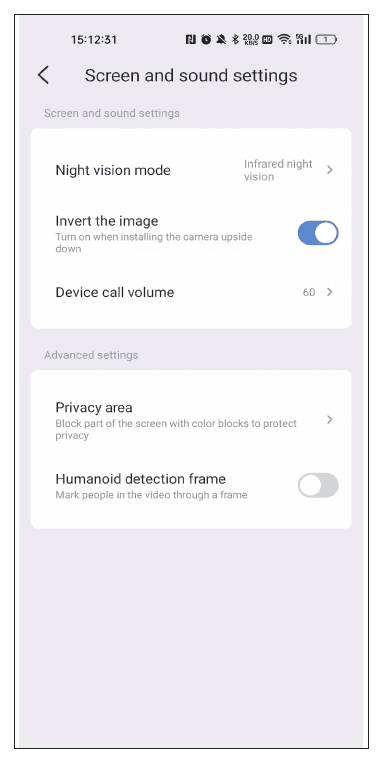
Night vision mode: If the camera is not sensitive when switching to night vision mode, you can increase the photosensitivity.
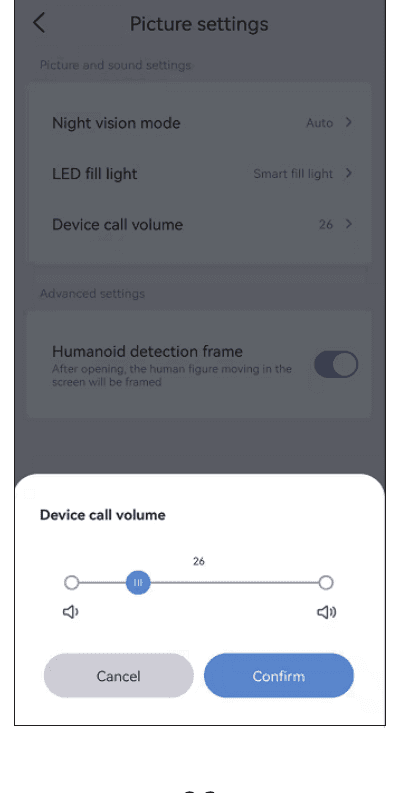
Device call volume: This option can set the volume of the two-way audio function.
Privacy zone setting: Set the privacy area, and the image area you set will be covered with color boxes.
Humanoid detection frame: When the camera detects people, it will capture the actions of suspicious people and frame them, and quickly push the alarm notification.
4) Storage Setting
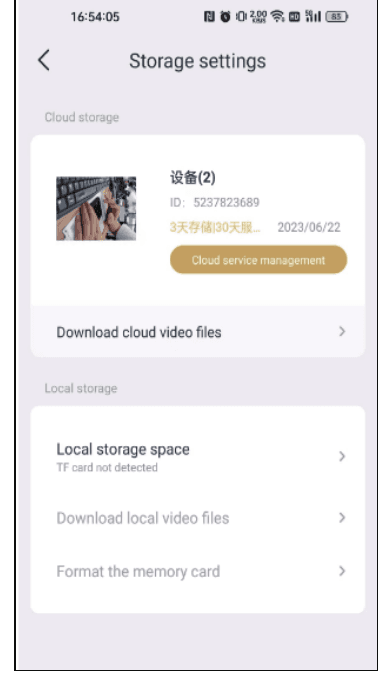
You can view the usage time of cloud storage, the status of the SD card and storage capacity in the storage settings interface. If you have inserted the SD card, but no recording, please check if the SD card status is normal or the SD card capacity is full; if full, please click format to delete all records. And you also can download video on this interface.
5) Advanced Setting
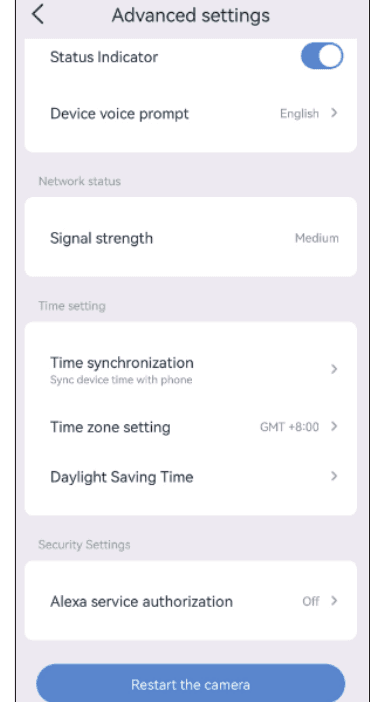
Status Indicator: When the camera is working, the yellow indicator light on the lens will flash; the indicator light will not be going on all the time.
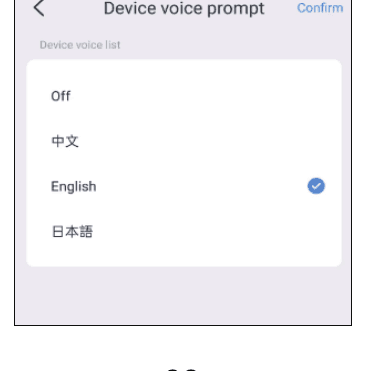
Device voice prompt: You can select English or Chinese for the camera reset prompt voice.
6) Time Setting
After you successfully connect the camera, the time displayed by the camera may be different from your mobile time. Please click the time synchronization, it will automatically sync to your phone time. If the camera time is still incorrect, you can select the time zone by yourself.
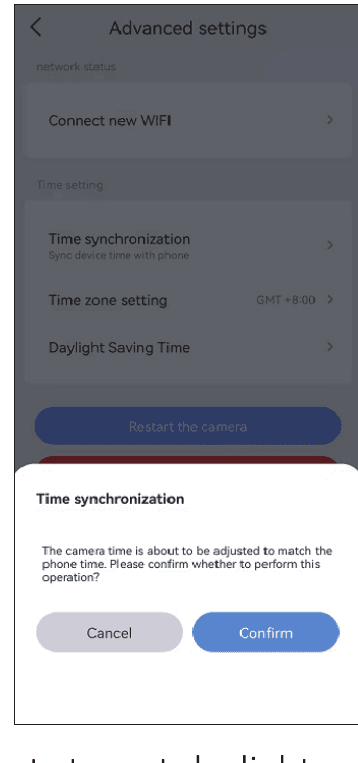
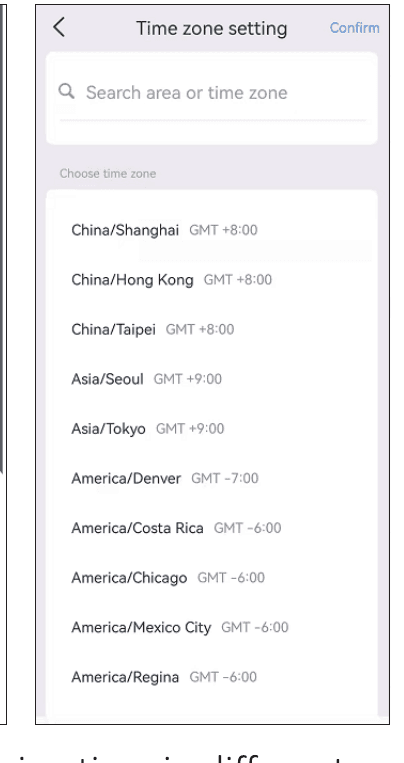
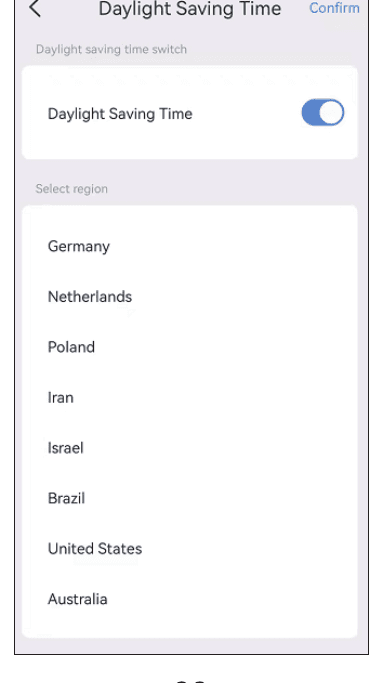
The app supports setting daylight saving time in different countries.
7) Work with Alexa
If you want to use the Alexa function, please enable the Alexa option on the app at first. Then follow the instructions below to connect the camera on Alexa.
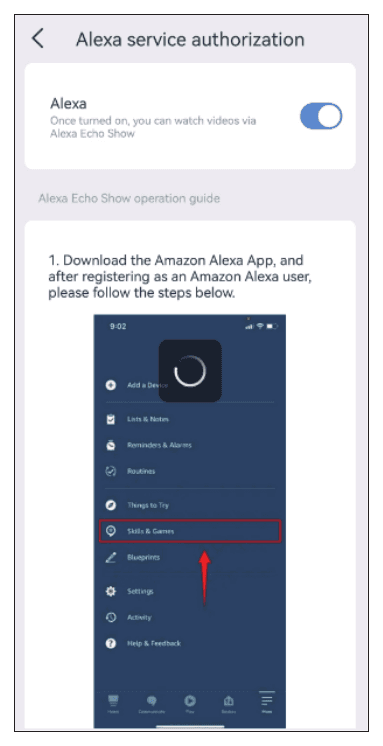
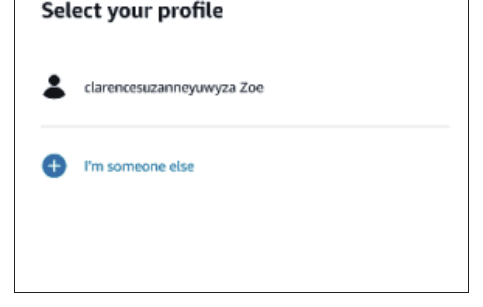
- After you enable the Alexa option on the EseeCloud, please go to your Alexa App, login your Amazon buyer account and password.
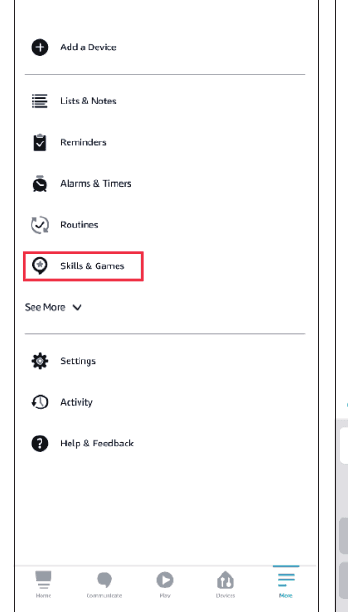
- Go to More, click "Skills & Games" — search "EseeCloud" — click this option.
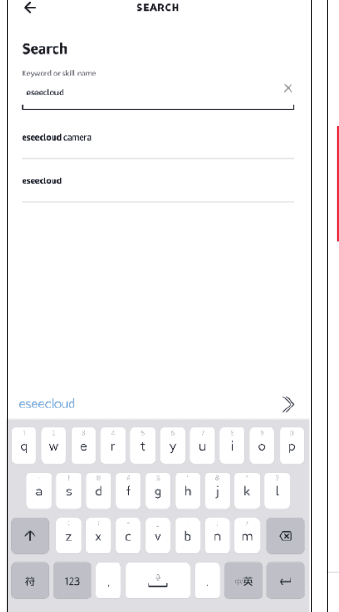
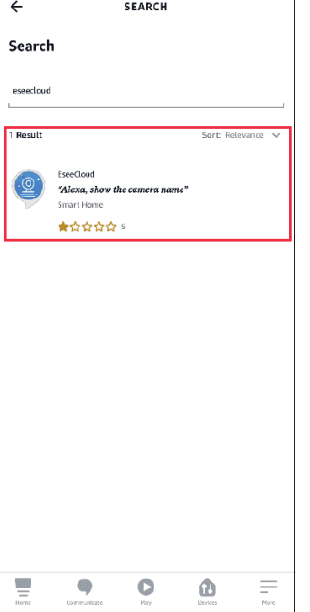
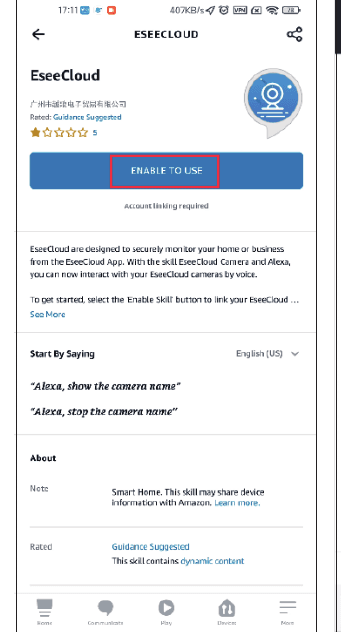
- Click ENABLE TO USE — input the account and password of EseeCloud — select DISCOVER DEVICES.
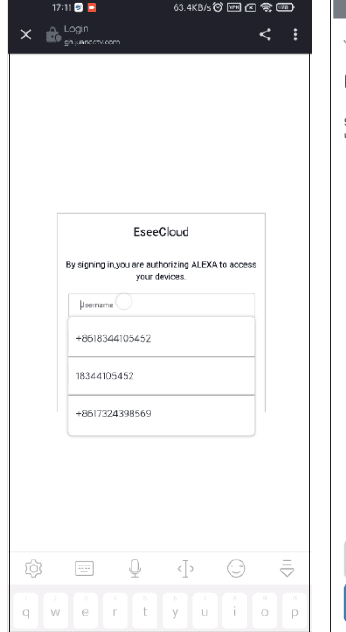
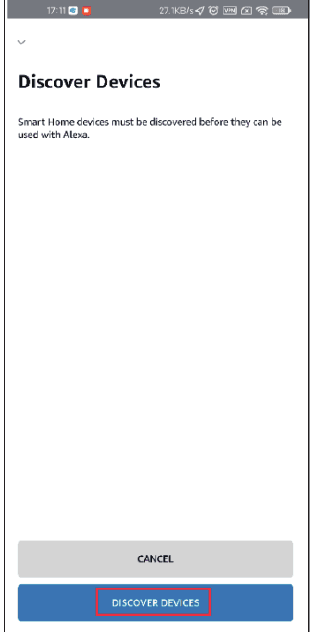
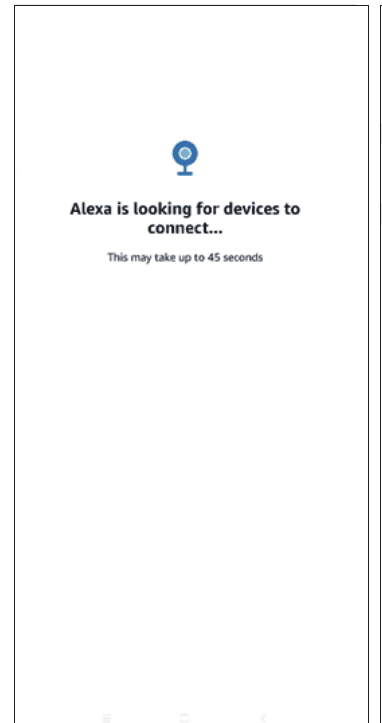
- Then wait for 45 seconds to find your device. After finding your device, you can view the camera on Echo show.
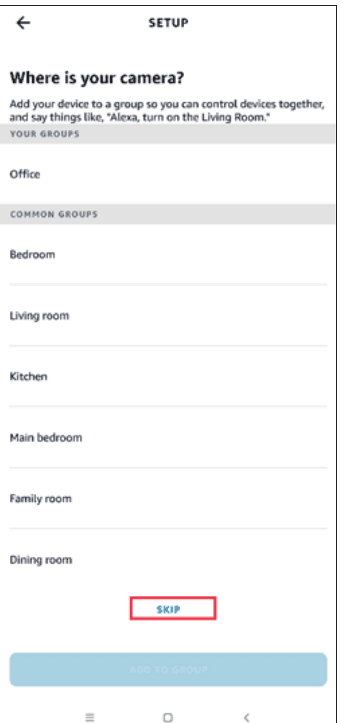
We have uploaded a video about how to add the device to Alexa, you can refer to this video: https://www.amazon.com/vdp/02b7820dd64d4ad6a457fcfd8638e830
Please Note
- If you log in to EseeCloud through a third-party software, you cannot link the EseeCloud APP to Alexa. You need to register the EseeCloud app account with a phone number or email address.
- You need to name the device, otherwise Alexa can't find your device.
FAQ
Customer Service
Email:
- [email protected] (For Amazon US&CA)
- [email protected] (For Amazon UK&EU)
- [email protected] (For AliExpress)
Whatsapp: +86 153 6156 2950
Tel: 855-660-0999 or 917-338-1084 (For Amazon US&CA)
Available Pacific Time: 6:00am–12:00pm
Web: www.hiseeu.com
For any questions, please contact us directly through the app, or browse our Help Center.
Wireless Battery-Powered Camera Kit
User manual for the Hiseeu Wireless Battery-Powered Security Camera Kit (A023) — base station and battery cameras, app setup, functions, settings, and FAQ.
4G LTE Cellular Security Camera
User Manual for the Hiseeu 4G LTE Cellular Security Camera (C016) — important features, what's in the box, camera introduction, EseeCloud app setup, camera functions, 4G subscription, and FAQs.