 EseeCloud Help Center
Battery-Powered Security Camera (Kit)
Quick guide for the EZETAI Battery-Powered Security Camera (Kit) — interface, networking, setup and installation, EseeCloud app pairing, charging, match code, app functions, troubleshooting, and FAQ.
Quick Guide for the EZETAI Battery-Powered Security Camera (Kit).
Before using the product, please read this Quick Guide carefully and keep it well. This instruction manual is for reference only.
Interface Description
Battery Camera
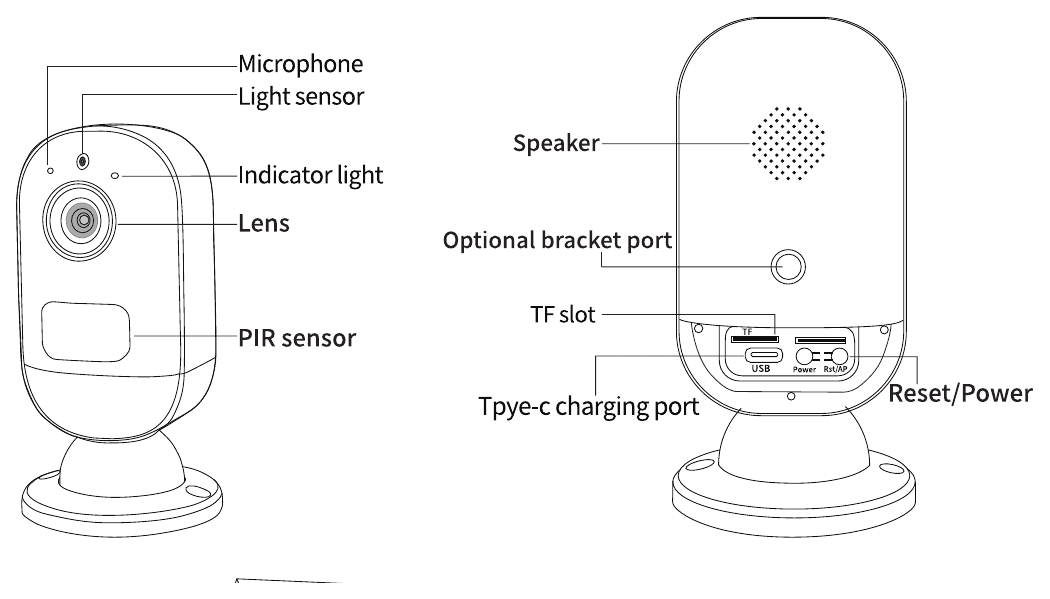
Front: Microphone, Light sensor, Indicator light, Lens, PIR sensor.
Back: Speaker, Optional bracket port, TF slot, Type-C charging port, Reset/Power button.
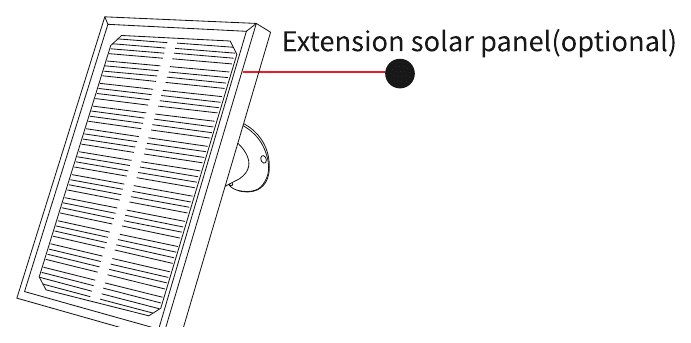
An extension solar panel is available as an optional accessory.
LED Light Instructions
- Green light + red light always on — The camera is being previewed remotely (privacy light).
- Green light is on for 1s — The device is turned on or woken up.
- Green light flashes continuously — Upgrading.
- Green light is always on — Charging.
- Red light flashes 3 times — Power off.
- Red light flashes continuously fast — Matching code.
- Red light flashes continuously slowly — Connecting to the internet.
- Red light is always on — Low battery.
Button Operations
- Press and hold for 2s in the off state — Power on (green light on for 1s).
- Press continuously for 3 times — Power off (red light flashes 3 times).
- Press and hold for 8s — Reset to enter the pairing state (red light flashes).
Networking
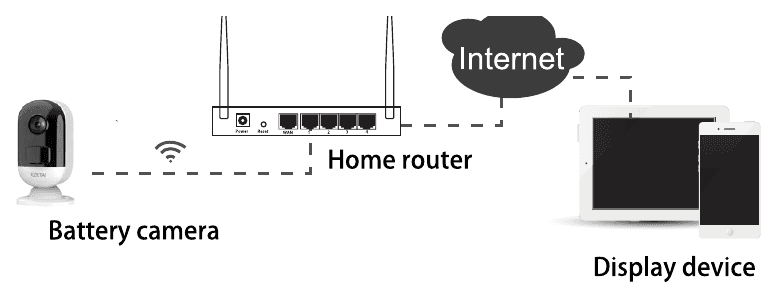
The battery camera supports two work networking methods.
1. Directly Connected to the Router
2. Paired with a Wireless NVR
Pair with a wireless NVR (Wi-Fi/4G Gateway, WNVR, Touch screen) as shown.
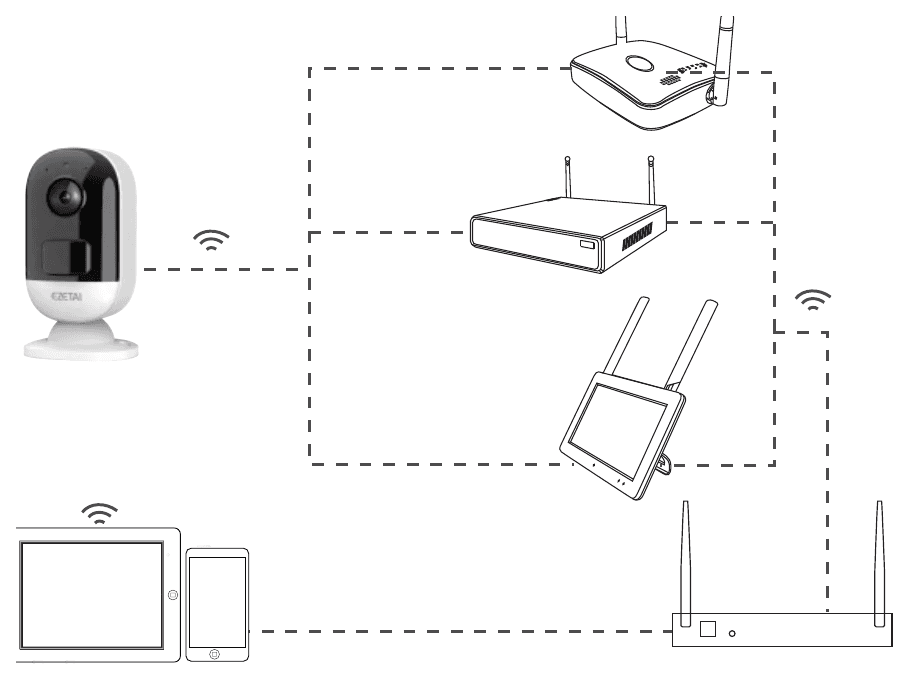
When directly paired with the router, the video is stored on the local TF card. When working with the wireless NVR, the video is stored on the wireless NVR, which also provides internet access.
Setup and Installation
Boot Up
When directly connected to the router, please insert the TF card before turning on. When paired with the wireless NVR, please make sure that the storage (TF card, hard disk, etc.) of the wireless NVR is ready.
Power on the battery camera — Press and hold the button for 2s to turn on the battery camera. If the button cannot be turned on, please plug in the charging power cord and the camera will turn on automatically.
Download the EseeCloud App
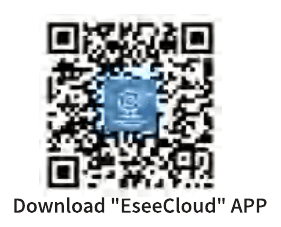
Scan the QR code below to download and install the EseeCloud app, or search for "EseeCloud" in the Apple App Store or Google Play and install it. (Apple and Android users use the same QR code.)
For a detailed walkthrough of registering and logging in, see the EseeCloud App User Guide.
Register and Log In
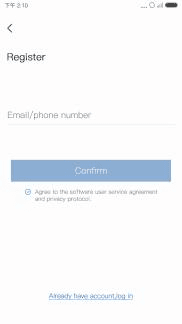
After installation, please register and log in.
- Enter your email/phone number and click Confirm to register.
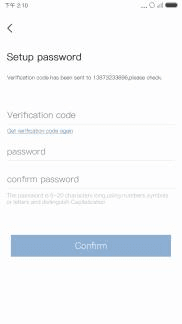
- A verification code is sent to you; enter the verification code, set and confirm your password, then click Confirm.
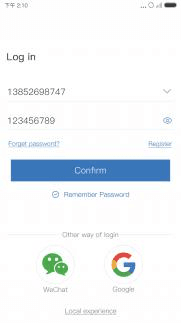
- Log in with your account and password, or use another login method such as WeChat or Google.
Add Camera to App Account
When the battery camera is directly connected to the router, use the app to directly scan the QR code of the camera. To use it with the wireless NVR, first power on the wireless NVR and connect it to the internet, then use the app to scan the QR code of the wireless NVR or add the ID displayed on the screen; the app can then access the battery camera.
Add Directly via the Home Router
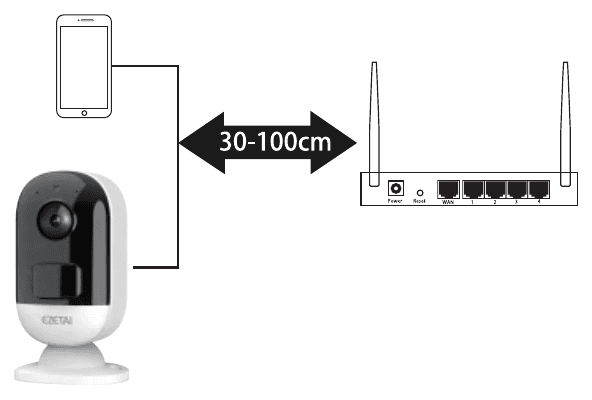
- Place the mobile phone and camera near the router, and make the distance between them 30–100cm.
-
After the battery camera is turned on, there will be a voice prompt "Start match code" and the red LED flashes. Otherwise, press and hold the SYNC button on the device for 8s and you'll hear the voice prompt "Reset successful".
-
Open the EseeCloud app, and after logging in, click the + icon in the upper right corner or Device addition in the middle of the interface to enter the QR code scanning interface.
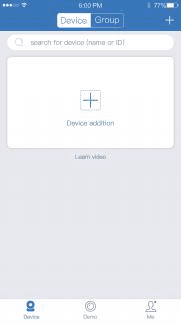
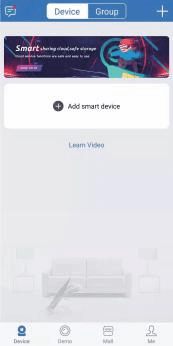
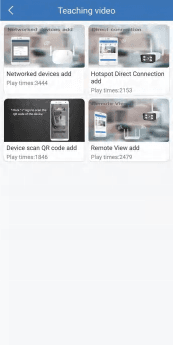
- Scan the camera QR code with the app from your phone and follow the steps in the app to complete adding the device.
View Alarm, Preview and Playback
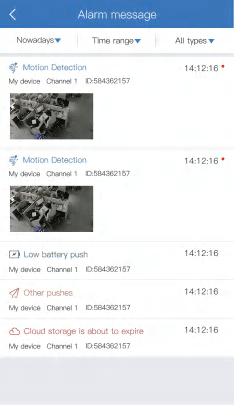
- Click the push notification or the Info button to view the alarm information of the camera.
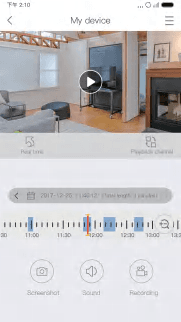
- Click the corresponding play icon in the device list to enter the preview interface, view real-time video, and use voice intercom.
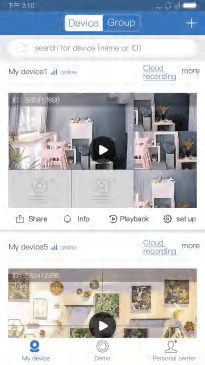
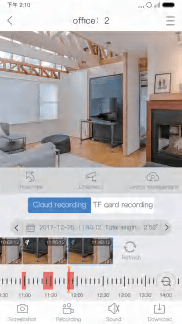
- Click the Playback or Cloud icon to view the video stored on the device or in the cloud.
- Tap the Share icon to share the camera with others.
Charging Instructions
During use, if the app pushes a low battery message or the camera displays a low battery warning indicator, you need to charge the camera.
- Connect the USB power supply to the battery camera or solar camera.
- During charging, the indicator status is: the green light is always on, and the indicator turns off after charging is completed.
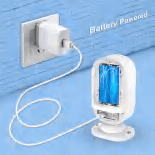
- Please use the original battery, and use the camera or the original charger to charge the battery. Using other batteries will result in an inaccurate power display and may damage the camera.
- Please charge the battery at room temperature. If the temperature is too low or too high, the charging time will be extended, the battery life will be affected, and the battery may be damaged.
Match Code
The battery camera shipped with the kit has already been paired with the wireless NVR; no code matching is required. After the pairing information of the camera and wireless NVR is cleared, you need to match the code again.
- Place the battery camera and the wireless camera / Wireless Touch Screen System / base station within 30–100cm.
Charging & Battery Tips
The camera's battery life depends on wake-up frequencies, recording length, and Wi-Fi signal intensity. To extend battery life, reduce the number of false triggers and keep a strong Wi-Fi signal between the camera and the router or wireless NVR.
Troubleshooting
| Trouble | Solution |
|---|---|
| Unsuccessful network configuration | Make sure your phone, camera, and router are close enough. Note that the camera does not support connection to a 5G router. Check that the router name and password are correct. Check the internet settings of the wireless NVR. |
| Device is offline | Check your router's internet connection. Check the connection between the camera and the router; if you change the router or the Wi-Fi password, you need to reset the camera and reconfigure the network. Check the connection between the wireless NVR and the router, and between the camera and the wireless NVR; if you change the router or the Wi-Fi password, you may need to reconfigure the WNVR's network. Check if the camera battery is dead — you can try to plug in the power and try again. |
| No preview | The server may be congested; try restarting the app. |
| No push notification | Make sure the app has notification permissions. Confirm that the alarm message push switch is turned on in the app's Personal Center settings, and that the alarm message push switch is turned on in the camera settings. |
| No recording | For direct connection to the router, insert the SD card before booting. Make sure the camera PIR switch is turned on. Make sure the camera recording switch is turned on. Check the recording settings on the wireless NVR. Check whether the SD card status is normal in the app; if abnormal, try to format the SD card. |
FAQ
EseeCloud App Functions and Settings
Function Menu
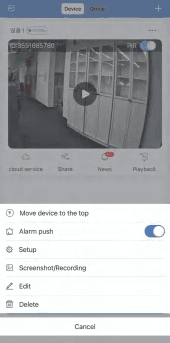
Click the ⋮ icon in the upper right corner of the device card to open the function menu, which includes Move device to the top, Alarm push, Setup, Screenshot/Recording, Edit and Delete.
Device Setup
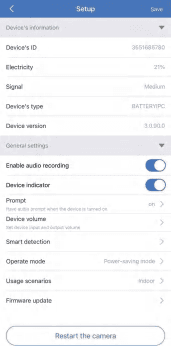
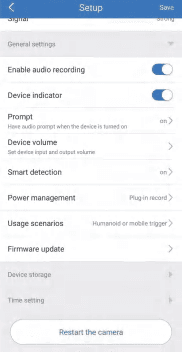
Open Setup to view the device's information (ID, electricity, signal, type, version) and adjust general settings.
Audio Recording
- On — Audio files can be saved on the TF card.
- Off — Audio cannot be recorded on the TF card.
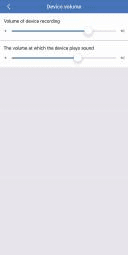
Device Volume
- Device recording volume — Adjust the microphone volume.
- Device sound volume — Adjust the playback (speaker) volume.
Smart Detection
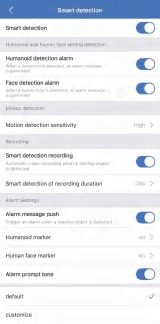
Motion detection sensitivity — Highest, high, medium, low and lowest levels are included to satisfy the alarm needs of different use environments.
Smart detection recording duration — The video length will be 10 seconds, 20 seconds or 30 seconds, set through the setup.
Humanoid marker and human face marker — Choose the switch (on/off) according to different environment requirements.
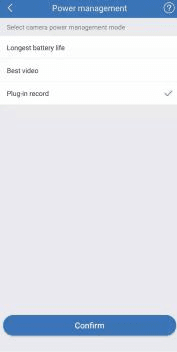
Power Management
Select the camera power management mode:
- Longest battery life — The camera is in the standby power-saving state when it is not triggered, and starts recording video after it is triggered.
- Best video — The camera is in the standby power-saving state when it is not triggered, and starts recording video after it is triggered.
- Plug-in record — Continuous uninterrupted recording, only supported when the camera is plugged in.
Usage Scenarios
- Indoor — Video and alarm will be recorded when movement or a humanoid is detected.
- Outdoor — Video and alarm will be recorded only when a humanoid is detected. If only movement is detected, it will be judged as a false alarm.
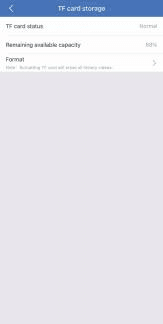
Device Storage
- Cloud storage — Service purchasing is needed.
- TF card storage — Record with a TF card after formatting.
Advanced Settings
- Video screen reversal — Adjust the front and back direction of the screen.
- Video quality settings — Adjust day and night modes.
- Privacy zone settings — Set the privacy of a certain area.
Password
Modify the device password according to your needs.
Remarks:
- The TF card must be inserted first, and then booted. Otherwise the device cannot recognize it.
- A reminder message will be sent to notify you to charge when the power of the device is less than 20%.
- Detection information push sound can be set in the notification bar settings of the app.
Compliance
This equipment has been tested and found to comply with the limits for a Class B digital device, pursuant to Part 15 of the FCC Rules. This device complies with Part 15 of the FCC rules. Operation is subject to the following two conditions: (1) this device may not cause harmful interference; and (2) this device must accept any interference received, including interference that may cause undesired operation.
This equipment should be installed and operated with a minimum distance of 20cm between the radiator and your body. Changes or modifications not expressly approved by the party responsible for compliance could void the user's authority to operate the equipment.
For more help, browse our Help Center.
OOSSXX Solar Wireless Camera Manual
Solar Wireless Security System Manual for the OOSSXX solar bullet camera — first charge, packing list, camera and port interfaces, network diagram, EseeCloud / IP PRO app setup, remote view and direct connection pairing, preview and playback, installation, charging, troubleshooting and FAQ.
Solar Camera Model-S7
User manual for the YOLUKE Solar Camera Model-S7 — product overview, mounting, EseeCloud app setup, adding the device, functions, settings, and PC software.