 EseeCloud Help Center
Solar Camera Model-S7
User manual for the YOLUKE Solar Camera Model-S7 — product overview, mounting, EseeCloud app setup, adding the device, functions, settings, and PC software.
User manual for the YOLUKE Solar Camera Model-S7, a 5MP solar-powered dome camera with PIR motion detection, two-way audio, and color night vision.
For better use of our product, please read and understand the instructions in this manual before using the camera.
Introduction
The YOLUKE dome camera is designed with advanced technology that offers 5MP HD non-stop monitoring. The adjustable focus lets you get a crystal-clear full-HD picture, and the innovative night vision allows you to record a visible image even in a dim environment.
It has a built-in PIR sensor that greatly improves detection accuracy, and its weather-resistant build makes it suitable for outdoor use. With both high-power speakers and high-sensitivity microphones it supports a two-way audio feature, so you can talk with people near the camera. The flashing white light and siren can be used to scare away any suspicious person, and the wall-mounting design makes it easy to set up.
Features
- 5MP Smart Wi-Fi
- Siren & warning lights
- Motion detection
- PTZ support — 355° pan & 90° tilt
- Easy to set up
- Cloud storage & SD card storage up to 128GB
- Stunning night vision
- Motion tracking
- Two-way communication
Product Overview
Front View
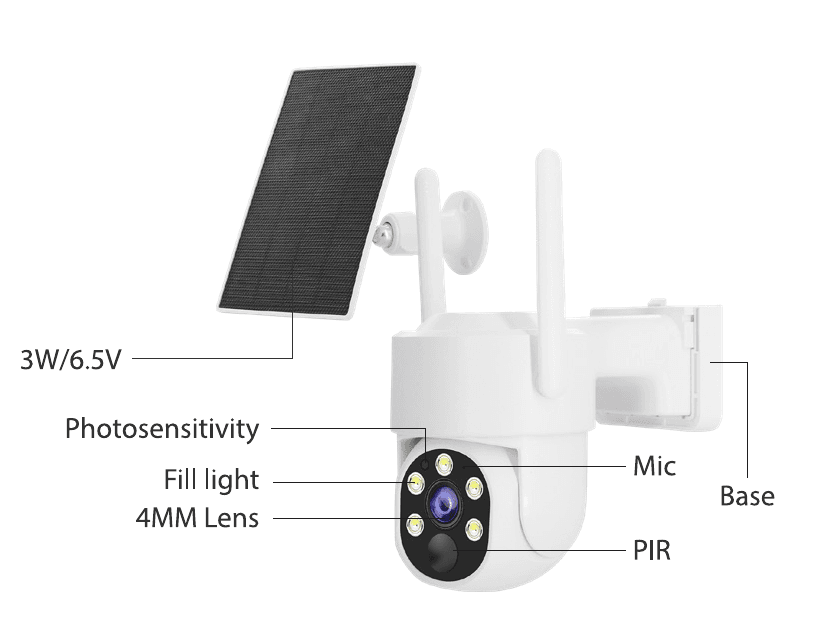
- 3W/6.5V — Solar panel
- Photosensitivity — Light sensor
- Fill light
- 4MM Lens
- Mic — Microphone
- PIR — PIR motion sensor
- Base
Back View
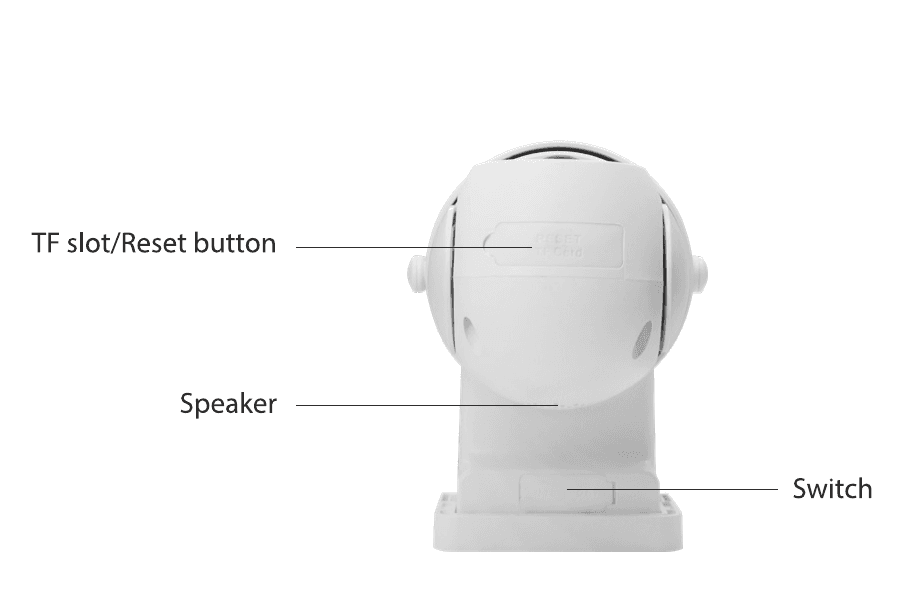
- TF slot / Reset button
- Speaker
- Switch
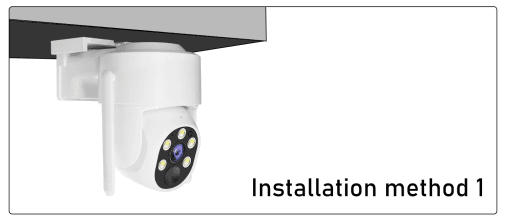
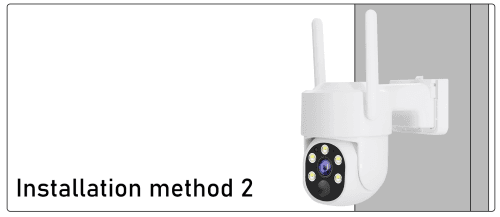
Product Mounting
- Unbox the product.
- Clean the camera with a soft cloth.
- Align the camera with the wall.
- Mount it on the wall using the screws provided.
- Once the base is screwed in, attach the camera to the magnetic base.
App Download & Installation
Search "EseeCloud" on the App Store or "IP PRO" on Google Play, or scan the QR code below to install the app.
For iOS, it requires iOS 9.0 or above. For Android, Android 5.1 or above.
For a detailed walkthrough of registering and logging in, see the EseeCloud App User Guide.
Register an Account
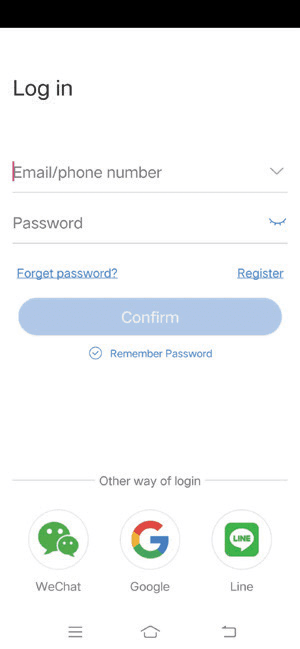
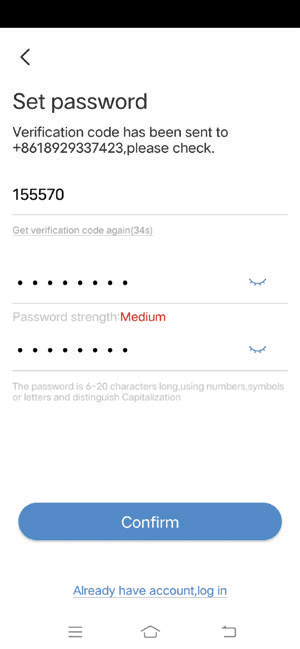
- Search and download the EseeCloud app on your mobile phone, then choose to register.
- Enter your phone number or email.
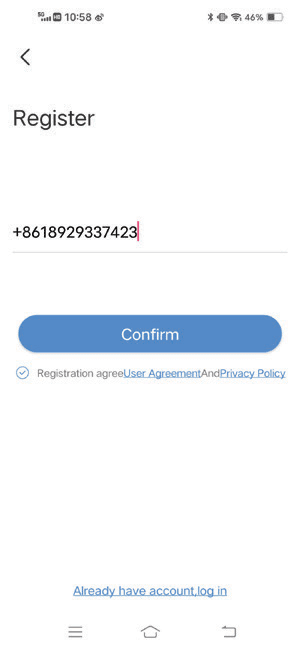
- A verification code will be sent to you. After receiving it, enter the code, set and confirm a password, then click Confirm.
The password is 6–20 characters long, using numbers, symbols or letters, and is case-sensitive.
Login
The app supports account login and third-party login.
Account Log-In
On the login interface, enter the registered phone number or email and the corresponding password, then click Confirm to log in.
Third-Party Log-In
- The app supports third-party login.
- Tap the third-party application icon, go to that app to complete the authorization, and log in.
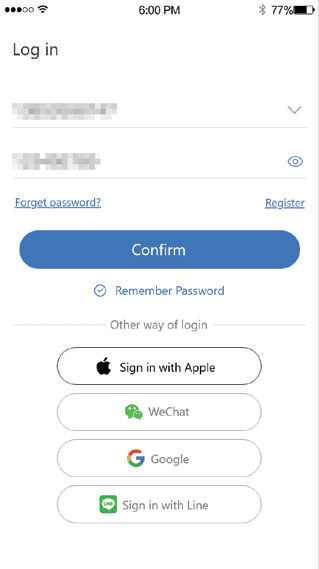
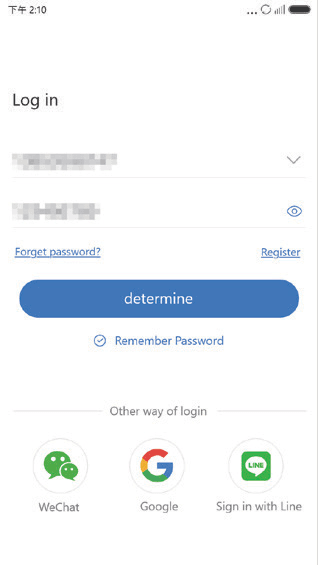
Apple mobile phones support Apple login. If you enter the wrong password more than 5 times, the account will be locked for five minutes.
Adding the Device
Adding the Camera by QR Code Scanning
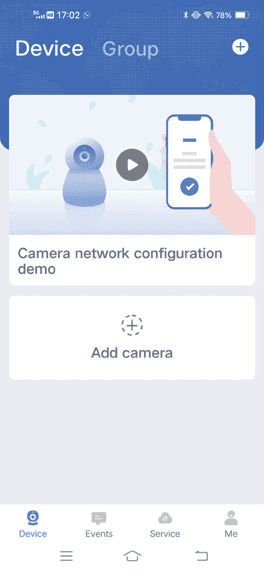
- Once you are logged in, go to the device list.
- Click the "+" add button on the interface.
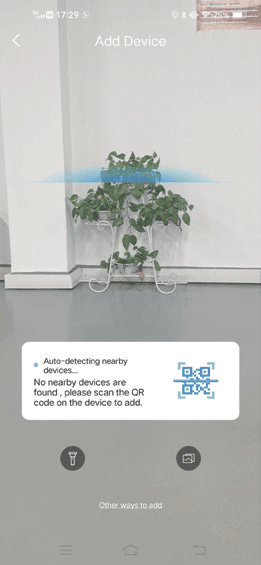
- Go to the "QR code" scanning interface and scan the QR code on the device.
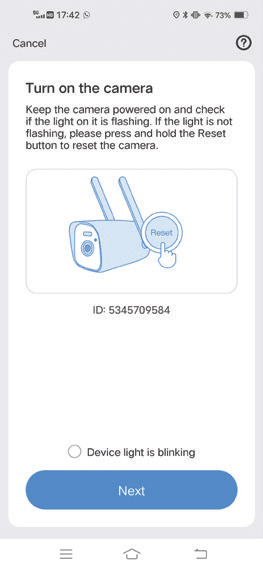
- Keep the camera powered on and check whether the light is flashing. If the light is not flashing, press and hold the Reset button to reset the camera. Check Device light is blinking, then click Next.
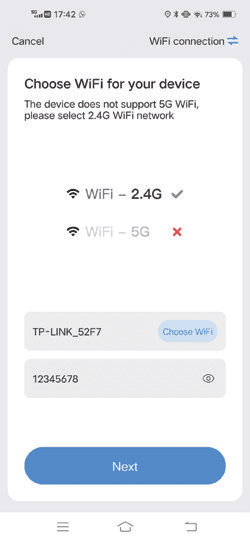
- The device does not support 5G Wi-Fi — please select a 2.4G Wi-Fi network.
- Click Next, choose your home Wi-Fi for the device, enter the Wi-Fi password, and click Next.
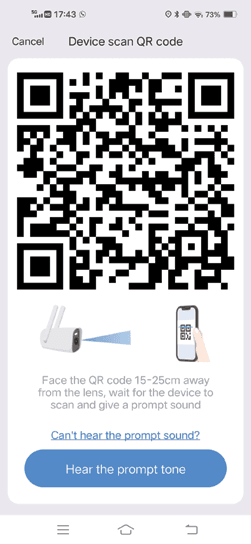
- A QR code appears on your phone. Face the QR code 15–25 cm away from the camera lens and wait for the device to scan it.
- Once the device scans successfully, it will give a prompt sound. When you hear the sound, click Hear the prompt tone.
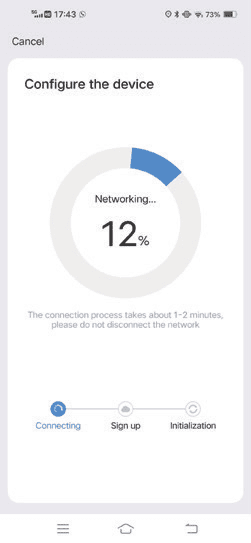
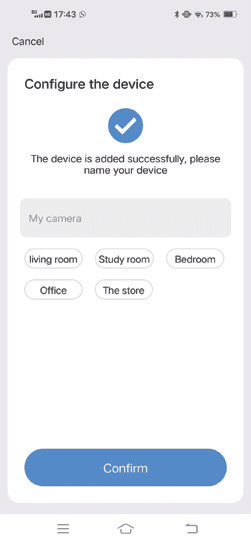
- Configure the device. The connection process takes about 1–2 minutes — please do not disconnect the network. After the configuration succeeds, name your device and click Confirm.
Connecting the Camera Through Hotspot
- Go to the mobile phone system settings and select the device hotspot starting with IPC. The default password is 11111111.
Please keep your phone connected to the device hotspot.
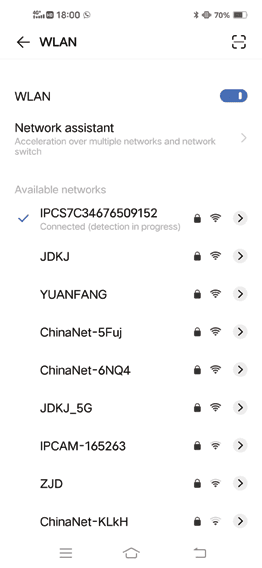
- Then return to the Wi-Fi connection step, follow the on-screen steps to complete the device name and password settings, and after adding successfully, return to the device list to display the added camera.
Adding a Shared Device
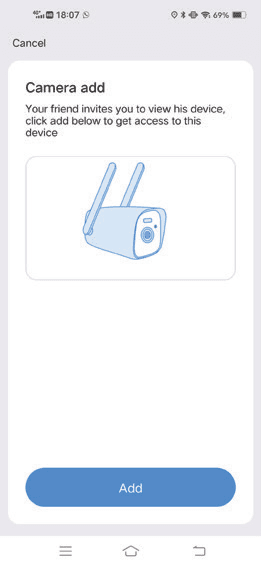
- Click the "+" add button on the device list to go to the scan-code interface.
- Scan the shared device's QR code, enter the search-device interface, confirm the addition, and return to the device list to see the result.
Functions Description
The live view interface provides the following controls:
| Function | Details |
|---|---|
| Switch definition (HD / SD) | Switch the definition of the preview. |
| Light control | Switch the fill light on/off. |
| Audio | Select whether to play the sound of the area captured by the device. |
| Screenshot | Capture the device preview screen on the current phone screen. |
| Recording | Record a preview of the device on the current phone screen. |
| Full-screen button | Switch between portrait and landscape modes. |
| PTZ button | Switch video playback and play in real-time. |
| Cloud storage | Open the cloud service details page to manage the device's cloud service, control the cloud video switch, and renew the bill. |
| Alarm picture & video (Events) | View motion detection pictures and video. |
| Cruise | When a single screen cannot fully display the monitor screen, set the camera to cruise left and right after opening. |
| More feature | Includes motion detection, cruise, PTZ calibration, lighting mode switching, and siren. (Whether a feature is available depends on the model.) |
Gesture Operation
- To enlarge the picture, stretch two fingers outward on the touch screen.
- To reduce the picture, pinch two fingers inward on the touch screen.
- Double-click on the screen to zoom in and out.
- Drag with one finger left/right and up/down to slide the screen.
Device Setting
A function in the list is only displayed if the camera hardware supports it. If the camera does not support a function, the app hides that setting item.
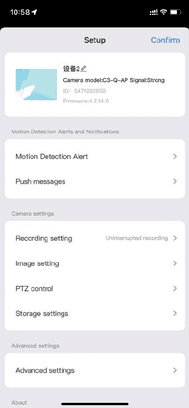
| Function | Details |
|---|---|
| 1. Motion Detection Alert | Alarm settings when a humanoid or moving object is detected. |
| 2. Push messages | App push alert message and push time period setting. |
| 3. Recording settings | Set the video mode, definition, timing video and recording sound switch. |
| 4. Image settings | Fill light mode, image rotation, privacy zone, and human detection frame. |
| 5. PTZ control | PTZ speed setting, cruise selection, and PTZ control direction setting. |
| 6. Storage settings | Cloud storage purchase, TF card status check, and TF card video download. |
| 7. Advanced settings | Camera language setting, wireless setting, time zone setting, Alexa service authorization, and deleting or resetting the camera. |
| 8. About this device | Check the basic information of the camera. |
| 9. Share device | Shared device function management. |
| 10. Help and Live Chat | App tutorials and solutions to abnormal functions; contact service personnel. |
Installation on Computer
Installation and Operation
- Run the
EseeCloud_Setup_3.0.1.exeinstallation package. - Select the display language for the installation.
- Read the agreement and choose whether to accept it.
- Determine the installation path.
- Installation is complete; you can choose to run the software immediately.
User Registration and Login
User Login
- Enter your account and password. You can choose to remember the password and enable automatic login (optional).
- Click Login.
Register an Account
- Enter your phone number and password.
- Click to register now.
Retrieve Password
- Enter your phone number.
- Click to get the verification code and enter it.
- Enter a new password.
- Click to complete.
Log in with the registered account — the account registered in the mobile app can be used here. The first time you use EseeCloud, the software's time zone will automatically sync with your computer; you can change it later in the advanced settings.
Customer Service
For 24-hour technical and installation support, please contact us:
- Email: [email protected]
- WhatsApp: +86 189 2933 7423
You can also browse our Help Center for more guides and answers.
Battery-Powered Security Camera (Kit)
Quick guide for the EZETAI Battery-Powered Security Camera (Kit) — interface, networking, setup and installation, EseeCloud app pairing, charging, match code, app functions, troubleshooting, and FAQ.
WiFi Bulb Camera
Quick guide for the wesecuu WiFi Bulb Camera (E27 socket PTZ camera) — interface, installation, EseeCloud app setup, Bluetooth and WiFi pairing, FAQ.