 EseeCloud Help Center
WiFi Bulb Camera
Quick guide for the wesecuu WiFi Bulb Camera (E27 socket PTZ camera) — interface, installation, EseeCloud app setup, Bluetooth and WiFi pairing, FAQ.
Quick Guide for the WiFi Bulb Camera — an E27 bulb-socket PTZ camera that works with the EseeCloud app.
This manual is suitable for various types of cameras. The appearance may be different due to different batches; the details are subject to the receipt. Please read these instructions carefully before operating this unit and keep them for future use.
Appearance
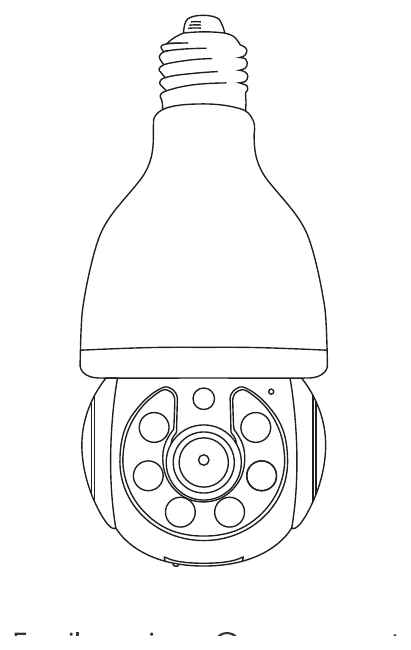
Interface Description
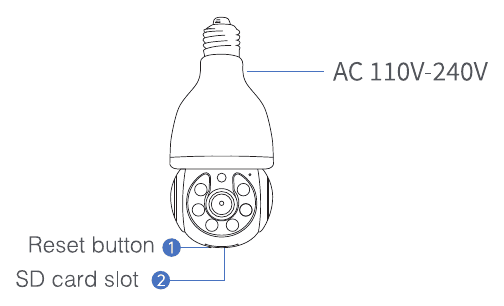
| # | Port | Description |
|---|---|---|
| 1 | Reset button | When the device is in the working state, long press for 5 seconds to restore the factory settings. The camera will have a voice prompt broadcast. |
| 2 | SD card slot | TF card, for storing video and playing back video. |
| — | Power supply | Power input, AC 110V–240V. |
Installation and Placement
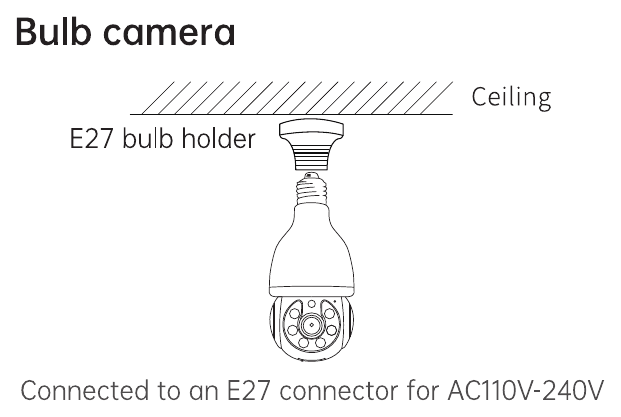
Connect the camera to an E27 bulb holder for AC 110V–240V — for example, screwed into a ceiling bulb socket.
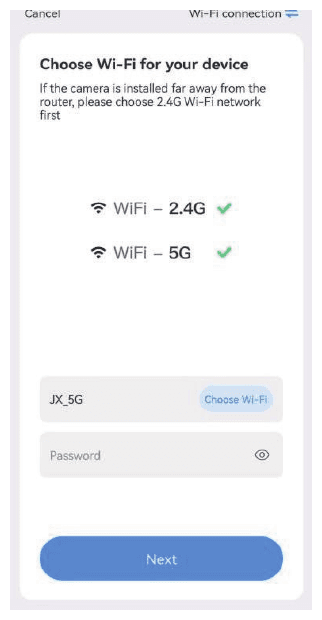
This camera supports both 2.4G and 5G WiFi.
Software Installation
Search "EseeCloud (IP Pro, VR Cam)" in the App Store or Google Play, or scan the QR code below to install the app.
For iOS, it requires iOS 9.0 or above. For Android, Android 5.1 or above.
For a detailed walkthrough of registering and logging in, see the EseeCloud App User Guide.
Account Register / Login
- Account register — Open the app, click Register, enter your email or phone number to create an account.
- Account login — On the login interface, enter your account / phone number / email and the password, then click OK to log in.
- Third-party login — The app supports third-party login. Click the third-party social software icon to jump to the app and complete the authorization and log in.
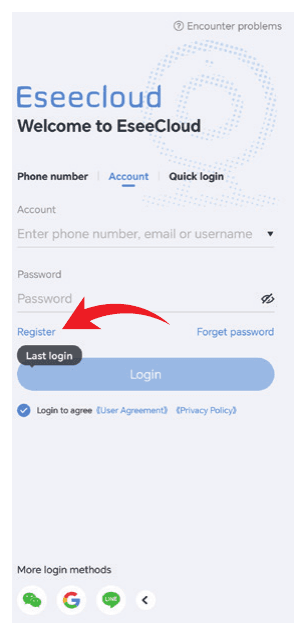
If you are prompted to open certain permissions (such as location, message notification, etc.) during app installation, click Allow (Agree).
Add the Camera — Bluetooth
Before adding a camera, make sure the Bluetooth function of the mobile phone has been turned on, and do not turn off Bluetooth during the adding process. If a prompt box pops up asking to enable Bluetooth or Bluetooth authorization, follow the steps in the prompt to enable it.
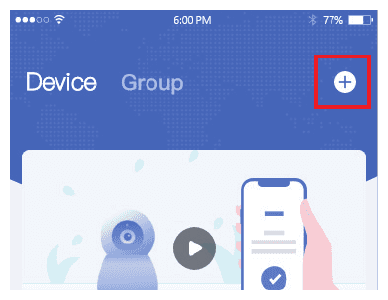
Step 1 — After the camera is powered on, open the EseeCloud app and click the "+" icon in the upper-right corner to enter the device-adding interface. (If a permission prompt pops up, click Agree.)
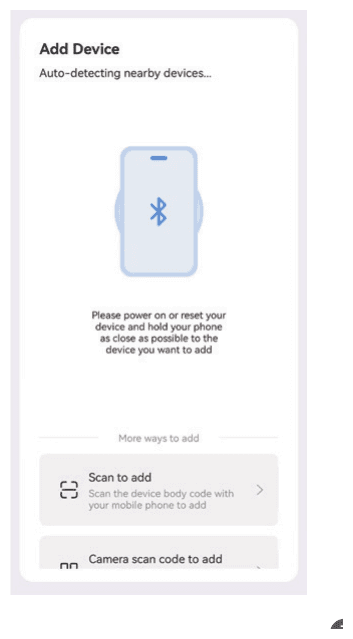
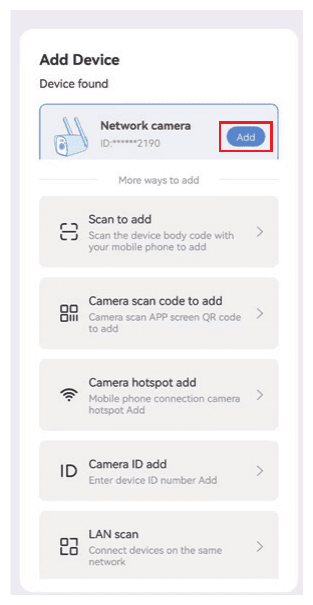
Step 2 — The app will automatically search for a new device. Click the Add button when it finds the device.
Step 3 — Enter the WiFi name and password on the distribution network screen.
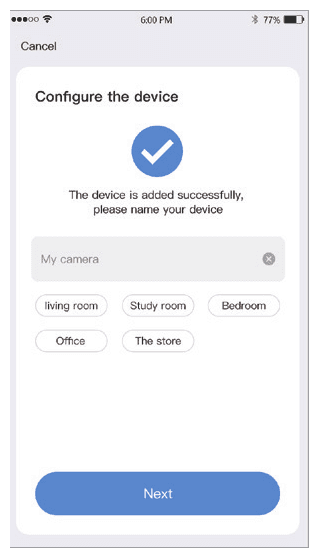
Step 4 — After the network is configured successfully, the system prompts you to enter the device name. Click Next.
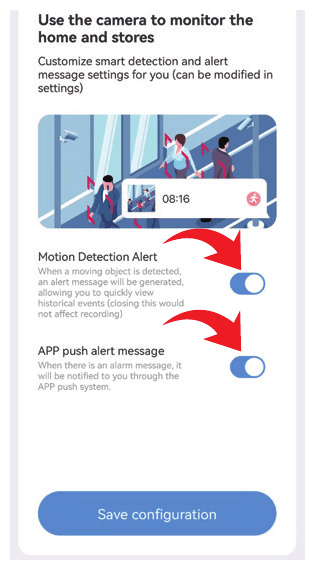
Step 5 — Choose to enable or disable message push according to your own preferences (enabling is generally recommended).
Step 6 — Congratulations, you have successfully connected the device.
Add the Camera — WiFi Configuration
You can also add the camera by WiFi configuration instead of Bluetooth.
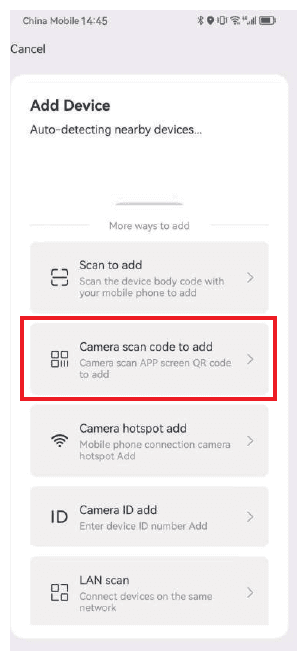
Step 1 — Open the app and click the "+" icon in the middle of the interface to enter the scan-code interface.
Step 2 — Choose the "Camera scan code to add" method.
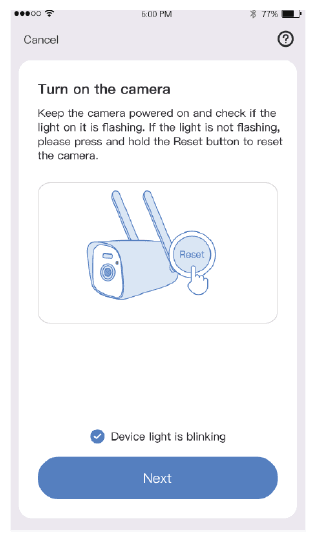
Step 3 — Check whether the camera light is blinking, then tap Next.
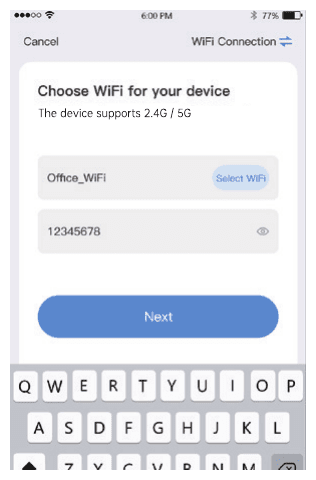
Step 4 — Select the WiFi that the camera needs to connect to, enter the password, and click Next.
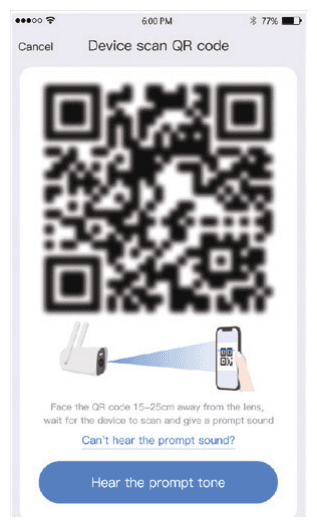
Step 5 — Point the camera at the QR code that appears on the screen of the phone. Face the QR code 15–25 cm away from the lens, wait for the device to scan it, and listen for a prompt sound.
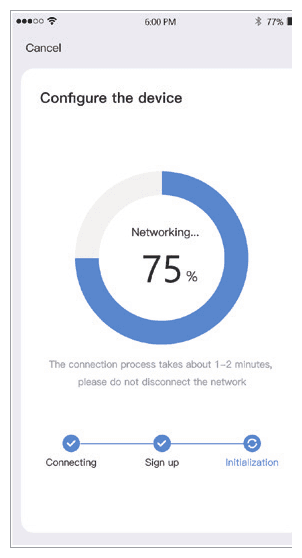
Step 6 — After the network configuration is successful, set a name for the camera.
FAQ
After Service
- Thanks for your purchase and support — we appreciate all your valuable feedback.
- If you have any questions about our products, please feel free to contact us.
- Email: [email protected]
You can also browse our Help Center.
Instruction Video
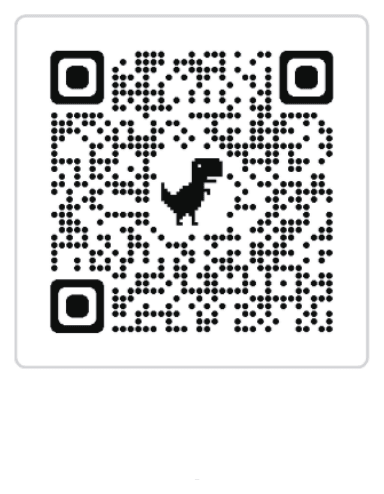
Scan the QR code below to watch the bulb camera use instruction video.
Solar Camera Model-S7
User manual for the YOLUKE Solar Camera Model-S7 — product overview, mounting, EseeCloud app setup, adding the device, functions, settings, and PC software.
NVR Camera System Kit
Setup guide for the JAIOT NVR Camera System Kit (D8208-5) — packing list, specifications, device wiring, camera placement, adding cameras, and recording setup.