 EseeCloud Help Center
Indoor Security Camera
Detailed Electronic Manual for the YESKAMO Y661 Window Camera — product details, LED light guide, installing the Yeskamo App, Bluetooth and QR code setup, and mounting the camera on window glass.
Detailed Electronic Manual for the YESKAMO Y661 Window Camera — Indoor Cameras for Home Security.
Warranty & Support
Your purchase includes a 2-year manufacture warranty with a 100% satisfaction guarantee.
For warranty replacements or returns, contact our customer support team. Our experts are ready to help via:
- Email: [email protected]
- Thank you for choosing our security products.
- This quick guide simplifies setup.
- Although we try our best to make the manual complete and accurate, there might still be some discrepancies due to timely updating of products. The detailed information is according to the final products.
Product Details
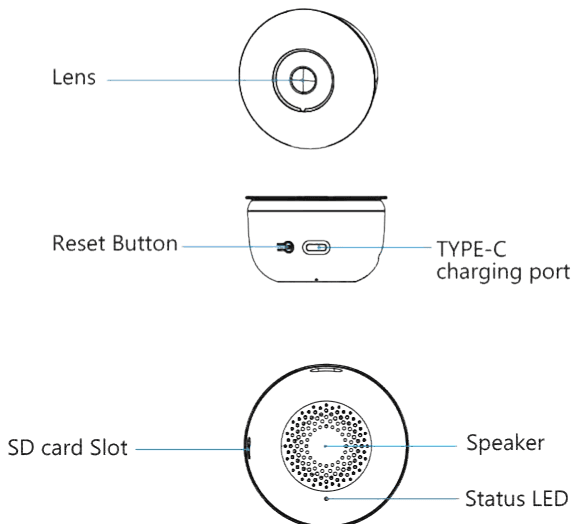
- Lens
- Reset Button
- TYPE-C charging port
- SD card Slot
- Speaker
- Status LED
LED Light Guide
| LED | Status |
|---|---|
| Flashing Blue | Camera is ready for setup |
| Continuous blue | Camera Is Online |
Installing the Yeskamo App
Allow "YESKAMO" to access mobile data and WLAN, so you can add devices. Allow "YESKAMO" to receive notifications, to receive alert notifications when motion is detected.
(The following QR codes are common to both IOS and Android.)

Note: If you can't download the above app or can't connect to it, you can search and download the app "Eseecloud".
For a detailed walkthrough of registering and logging in, see the EseeCloud App User Guide.
1. Register account
- Click "Register"
- Follow the steps to complete your account registration
- Login
Advice
- Make sure you use the correct email address.
- Select the correct region.
- When registering for a new account, please select the region where you are actually located. (Cross-region data sharing between your YESKAMO account is not supported.)
2. Turn on and restart the camera
With the camera connected to power, press and hold the reset button for 5-10 seconds until you hear a tone, then release, wait briefly for the "bip" tone, then begin Wi-Fi configuration through your app.
3. Connect to WI-FI
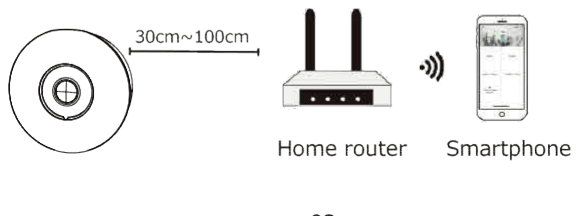
Place the camera and smartphone 1 to 3 feet (30 to 100 cm) away from the router to ensure a strong Wi-Fi signal.
Note: The camera supports both 2.4G wifi and 5G wifi.
Adding the Camera
Method 1: Bluetooth Pairing
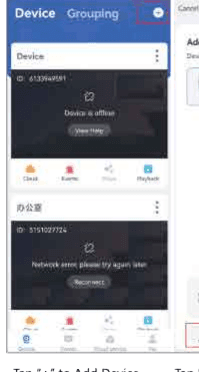
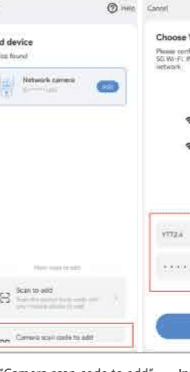
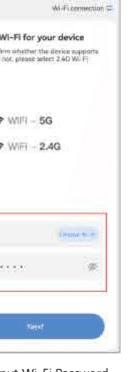
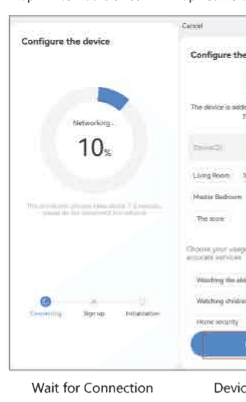
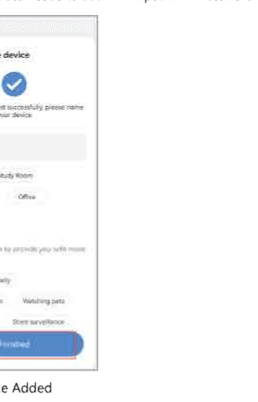
- Enable Bluetooth & Wi-Fi on phone
- In YESKAMO App: Tap Devices → + → Network Camera (auto-detect in 30s)
- Troubleshoot:
- Press camera's RESET button if failed → Retry
- Enable Smart Detection Alarm manually post-setup
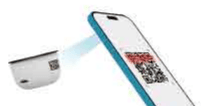
Method 2: QR Code Setup
- Power camera → LED light flashes slowly
- Click the "+" → Scan QR code → Click Next → Select Wi-Fi(2.4/5GHz) → Enter password
- Wait for Connection Successful
Need Help?
- Switch methods if one fails
Key Notes:
- Keep phone near camera during setup
- 5GHz Wi-Fi may require stronger signal
- Default alarm is OFF — activate manually
Mounting the Camera
Place the camera on your window glass based on your preferred viewing angle. Ensure it's near a power outlet and close to your router for stable connectivity.
Steps
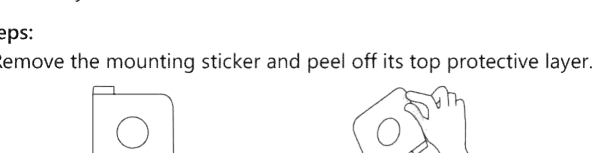
- Remove the mounting sticker and peel off its top protective layer.
- Attach the sticker to the window, then press the camera onto it.
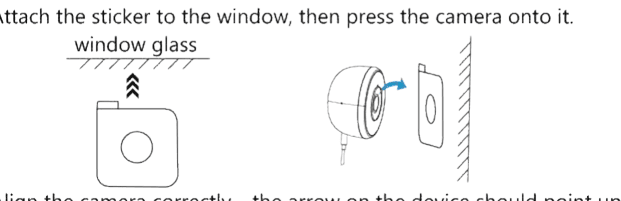
- Align the camera correctly — the arrow on the device should point upward. Keep the setup simple and double-check the camera's direction before securing it.
You can also browse our Help Center for more troubleshooting and FAQ.