 EseeCloud Help Center
Wireless Battery-Powered Camera Kit
User manual for the Hiseeu Wireless Battery-Powered Security Camera Kit (A023) — base station and battery cameras, app setup, functions, settings, and FAQ.
User Manual (A023-V2.0) for the Hiseeu Wireless Battery-Powered Security Camera Kit. The Hiseeu base station is expandable and supports connecting up to 4 cameras.
Please read this manual thoroughly before using and keep it for future reference.
This kit is compatible with the following Hiseeu battery cameras:
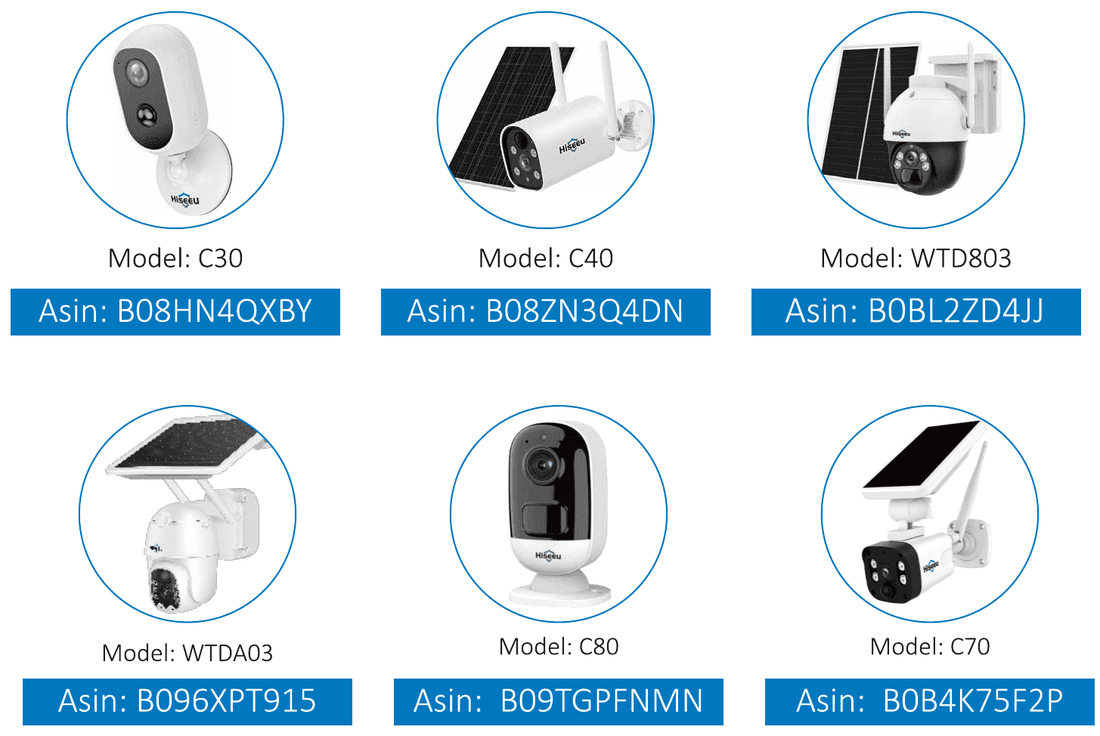
- C30 — Asin: B08HN4QXBY
- C40 — Asin: B08ZN3Q4DN
- WTD803 — Asin: B0BL2ZD4JJ
- WTDA03 — Asin: B096XPT915
- C80 — Asin: B09TGPFNMN
- C70 — Asin: B0B4K75F2P
Out of Box Audit
- The camera is paired by default before leaving the factory. Turn on the camera power to complete automatic pairing.
- After receiving the product, please check all products according to the distributor's packing list. If the product is missing or damaged, please contact the seller directly. The distributor's package contains the following:
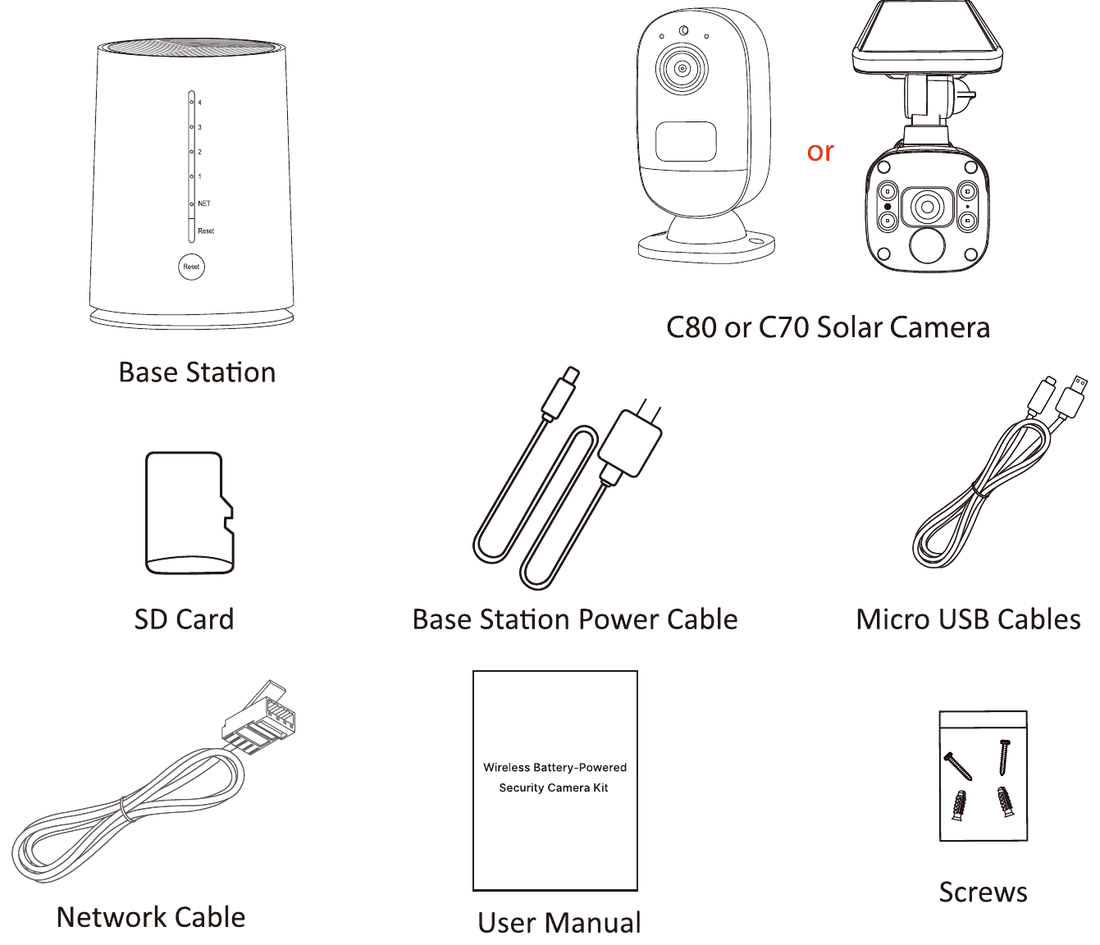
- Base Station
- C80 or C70 Solar Camera
- SD Card
- Base Station Power Cable
- Micro USB Cables
- Network Cable
- User Manual
- Screws
Installation
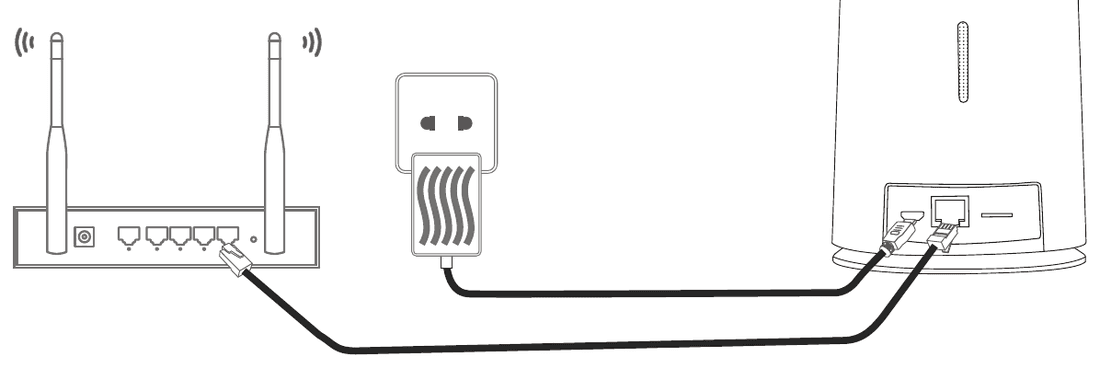
Connect the base station to your router with the network cable, then plug the base station into a power source.
Battery Camera
Model 1
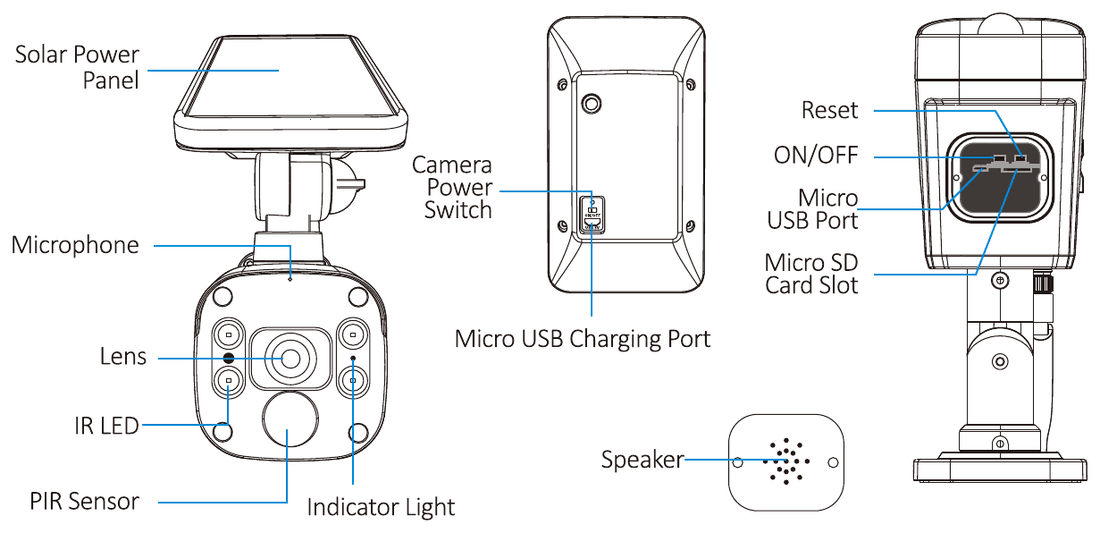
- Solar Power Panel
- Microphone
- Lens
- IR LED
- PIR Sensor
- Indicator Light
- Camera Power Switch
- Micro USB Charging Port
- Reset
- ON/OFF
- Micro USB Port
- Micro SD Card Slot
- Speaker
USB Port: 5V USB power adapter.
Power button: There is a power switch button for the camera on the solar panel.
Reset button: Turn on the camera and long press the reset button for about 8s when the camera is turned on.
Reset successfully: the camera sends out a voice prompt and the lens indicator flashes red.
Model 2
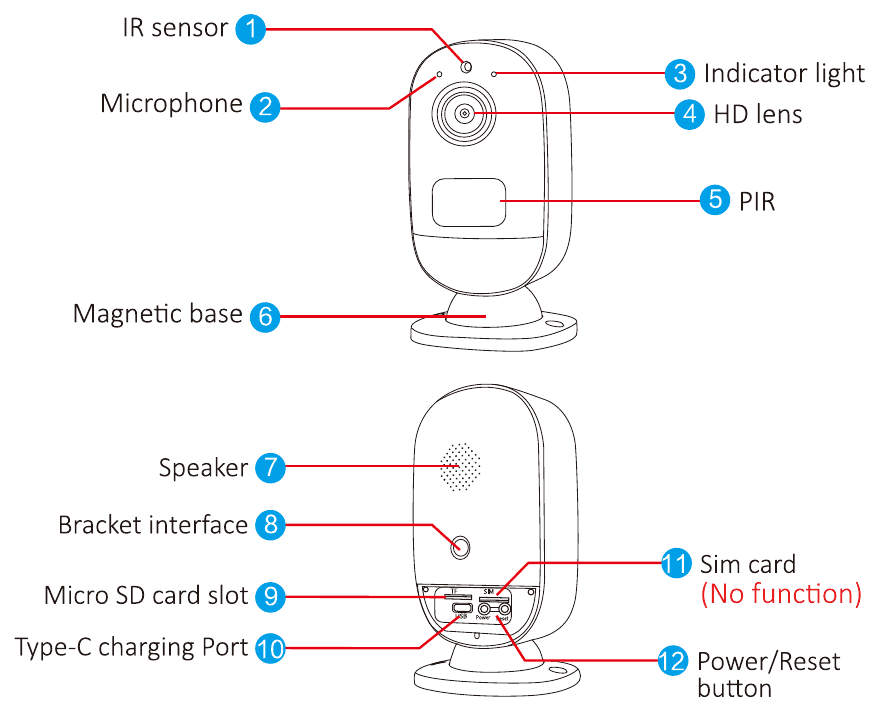
- IR sensor
- Microphone
- Indicator light
- HD lens
- PIR
- Magnetic base
- Speaker
- Bracket interface
- Micro SD card slot
- Type-C charging Port
- Sim card (No function)
- Power/Reset button
USB Port: 5V USB power adapter.
Switch on/off: Press and hold the power button for 5s.
Reset button: Press and hold the reset/power button for 8s when the camera is turned on.
Reset successfully: the camera sends out a voice prompt and the lens indicator flashes red.
Base Station
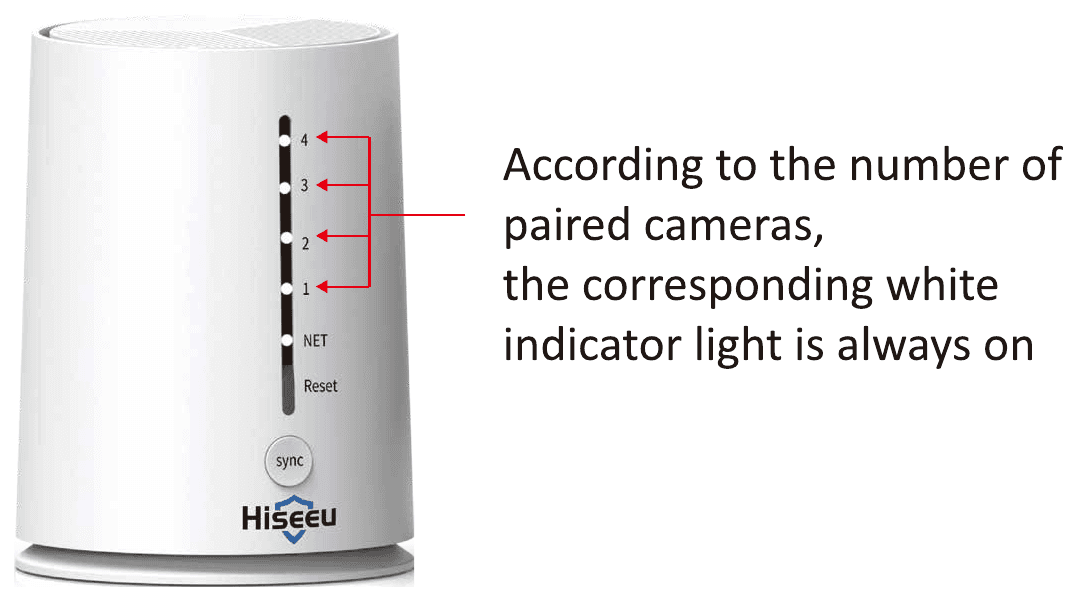
According to the number of paired cameras, the corresponding white indicator light is always on.
After connecting to the Internet, the indicator light is always on. If the base station indicator is flashing, it means the network is disconnected.
Reset BST:
- Press and hold the base station reset button and hear the device prompt that the reset is successful.
- Press and hold the base station Sync button for 6s; the base station prompts to wireless setting, please wait. Wait for the device to prompt that the wireless connection is successful.
Connection and App Remote View
The base station uses a network cable connection, which can help the battery camera to improve the signal. (The camera can be added without using Wi-Fi.)
The camera is paired by default before leaving the factory. You only need to connect the BST (Base Station) with the power supply and network cable, turn on the camera power to complete automatic pairing, then you can scan the QR code on the BST to add the kit to your phone.
If you want to add more camera or reset the kit, here are the steps:
- You need to connect the base station and the router with a network cable and plug in the power supply. When the network indicator of the base station stays on, it means that the network connection is successful.
- Hold the reset button of camera for 8s. After the camera is reset successfully, take it close to the base station, press and hold the sync button on the base station for 5s to pair the camera.
Scan the QR code below to download App or search "EseeCloud" on the App store or Google Play. For a detailed walkthrough, see the EseeCloud App User Guide.
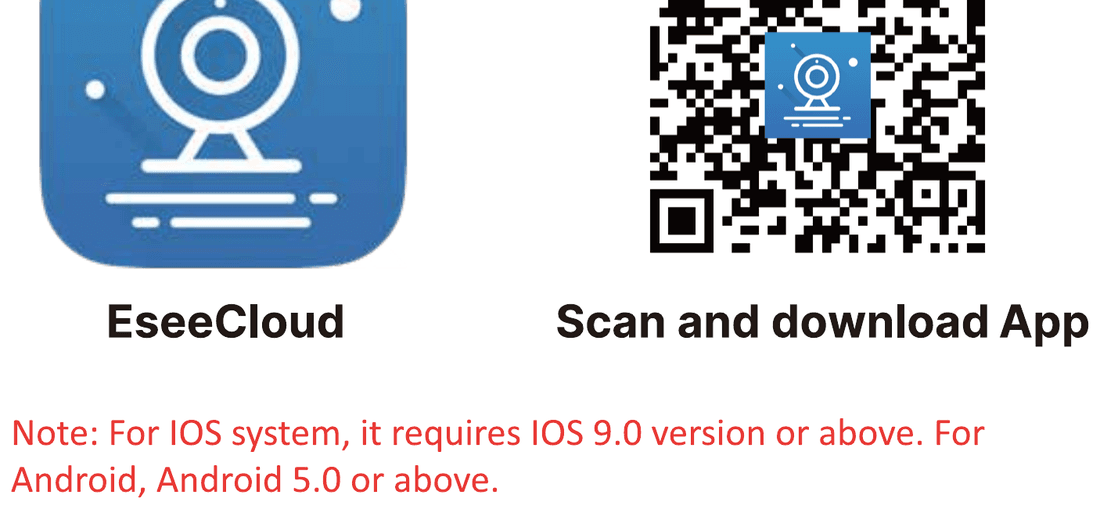
For iOS, it requires iOS 9.0 version or above. For Android, Android 5.0 or above.
Register Account
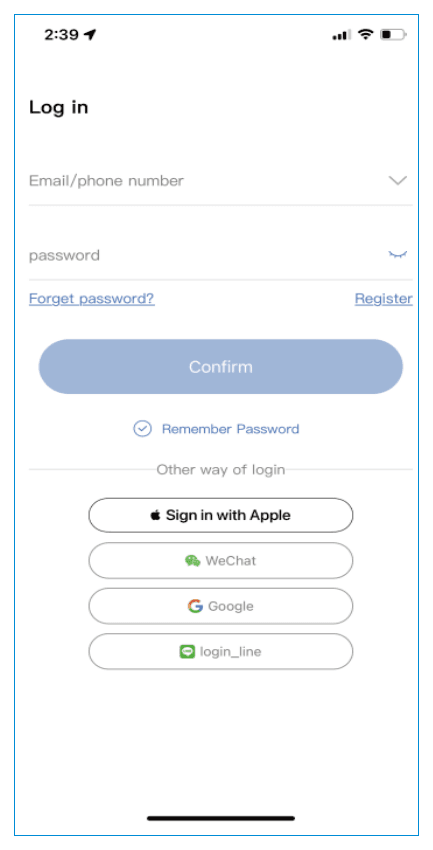
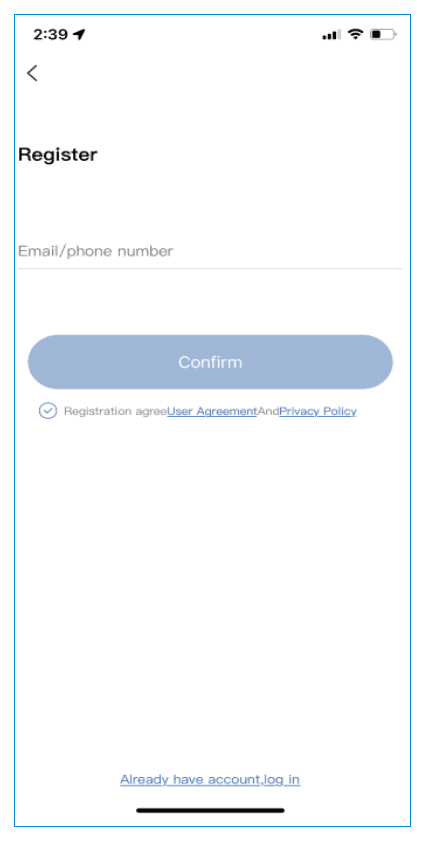
- Go to the login interface, click Register.
- Register with your phone number or email address, click Confirm.
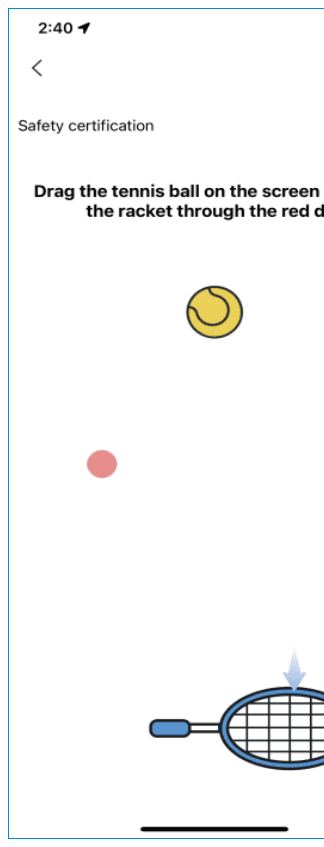
- Manually press and hold the tennis ball, drag it to the red dot, and then drag it to the tennis racket to go to the next step.
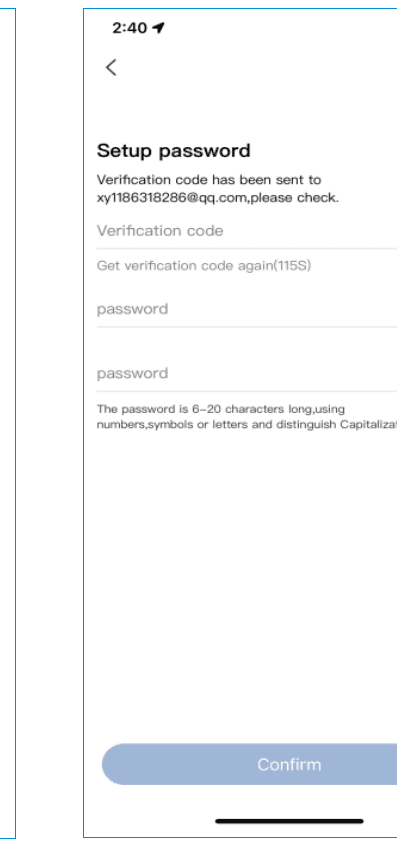
- You'll receive a verification code; input the verification code and set up your own password, then click Confirm to complete.
Add the Base Station Kit to the App
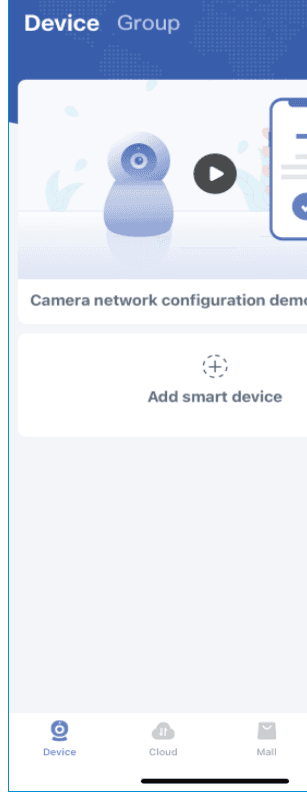
- Open the App and click on Add smart device.
- Scan the QR code of the BTS and wait for network configuration.
- Set the device name, click Confirm.
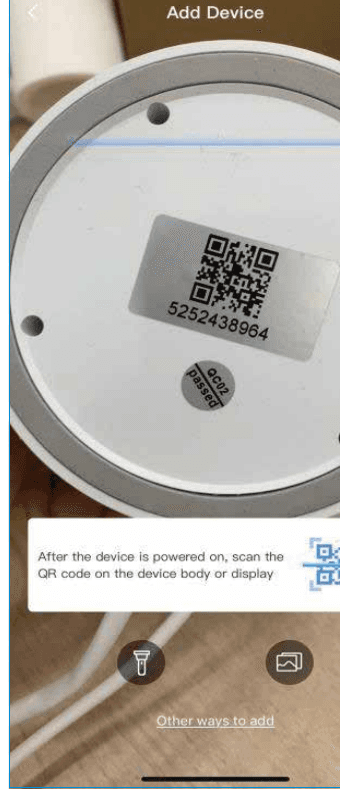
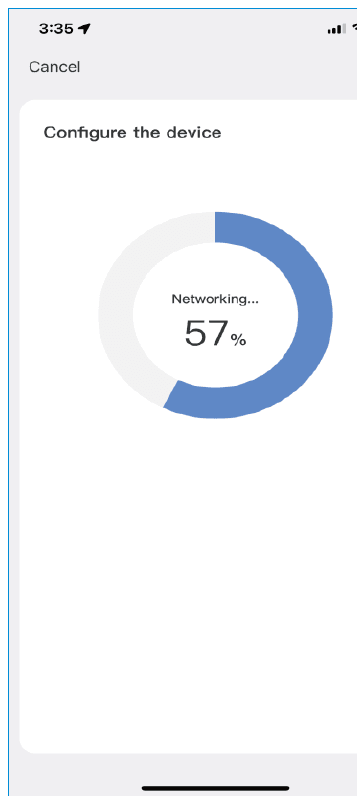
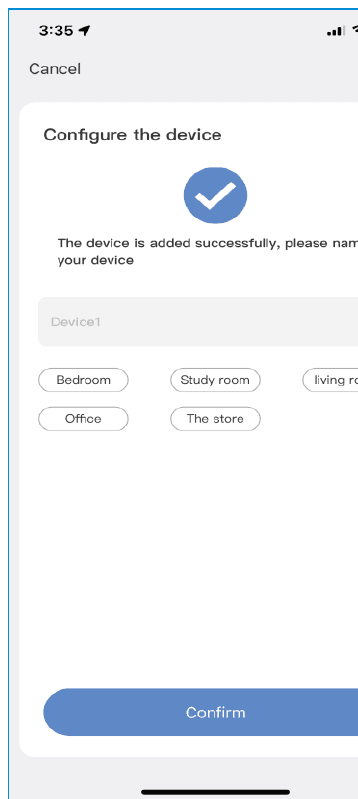
Function and Application
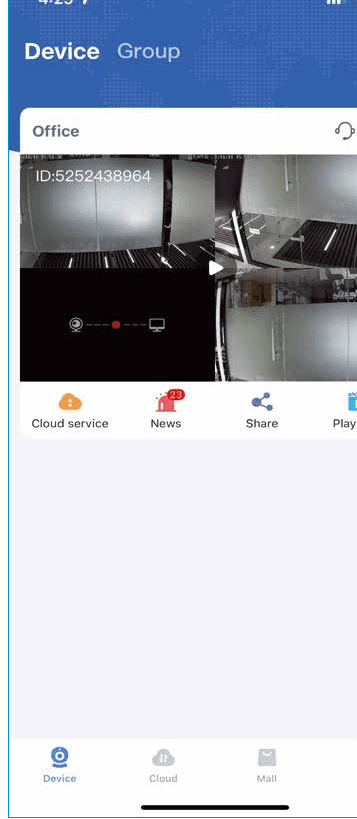
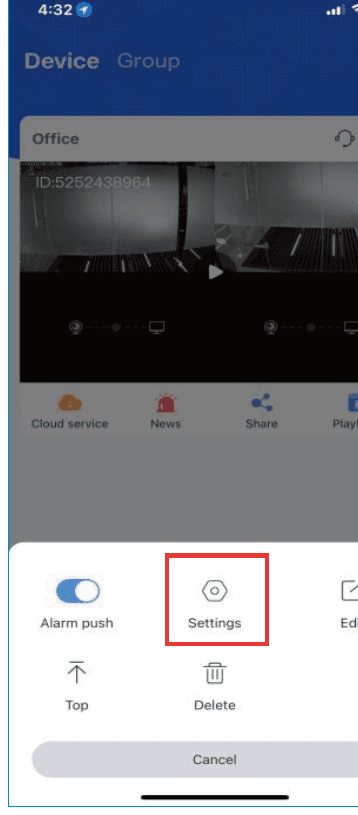
- Alarm Push: Turn on motion detection notification.
- Settings: Go to the Base station setup interface directly.
- Edit: Edit device name and view your device password.
- Top: Top device to the first place.
- Delete: Delete the device on the cellphone.
Base Station Set up Interface
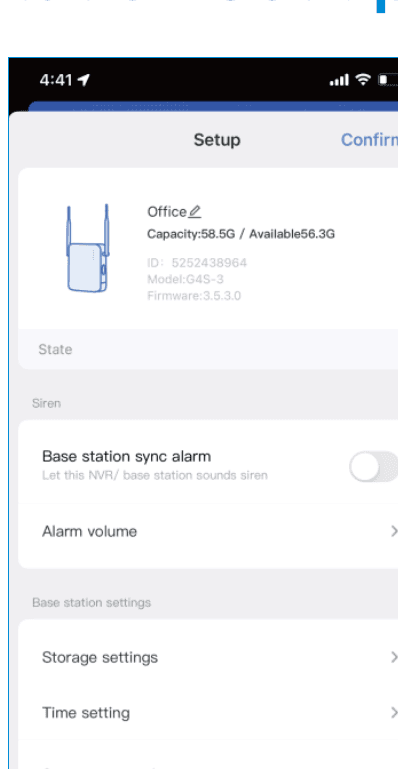
- Base station sync alarm: When the camera triggers motion detection, the base station will send out an alarm synchronously.
- Alarm volume: Adjust the volume of the base station.
Storage setting:
- Check the status of the SD card and storage capacity in the storage settings interface.
- If you have inserted the SD card, but it is not recording, please check if the SD card status is normal or the SD card capacity is full.
- If full, please click format to delete all records, and you also can download video on this interface.
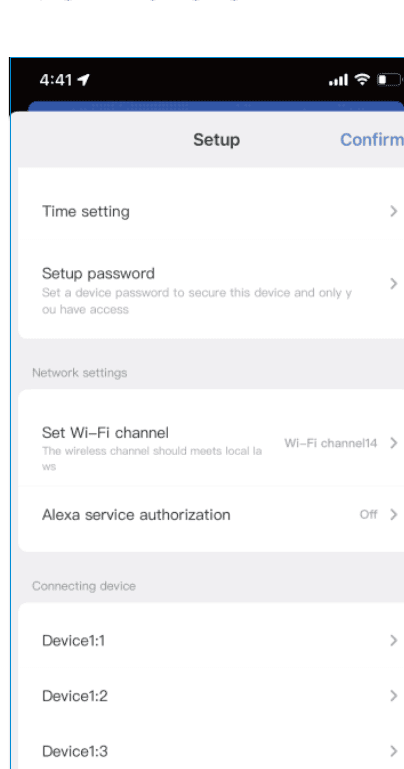
Time setting:
- You can adjust the camera time to match the phone time.
- Choose a different time zone.
- Daylight Saving Time.
Setup password: Set a device password to secure this device.
Alexa service authorization: Add devices to your Alexa.
Cloud Service
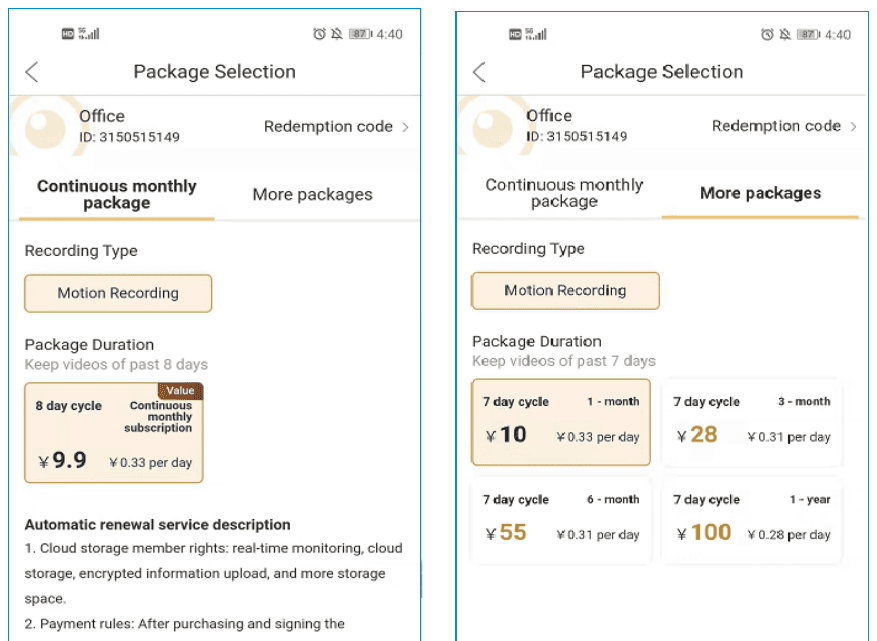
Click the cloud icon to buy cloud storage; base station with SD card does not need to buy cloud storage. Cloud storage only supports buying one channel by one channel.
News
Check the motion detection message and photo, click the photo > View Video > Full video to see 30s motion playback.
Share
Click the share icon to share the device to your family members.
- Share Permissions: set the permissions to allow others to check.
- QR code validity period: the QR code is valid only for the time to add the device on another phone. After all setup, click Complete to generate the QR code; others' phone needs to register a new account of EseeCloud APP, scan this QR code to add it.
Playback
Click the playback icon to see the device playback, select the channel icon to select the channel, and select the calendar icon to select the date. It doesn't support fast forward or backward.
Fast forward function is supported on CloudStorage, which means you need to buy cloud storage for the camera. Click View all playbacks to download the playback on the phone.
Camera functions
SD & HD mode
Click the SD/HD icon to switch SD to HD mode. The camera default is SD mode, for clearer image please switch to HD mode. Because our server can't always support HD viewing, we need to manually switch to HD when watching on the mobile phone.
View more Camera
Click the channel icon to switch to view by x1 or x4 cameras.
Volume ON/OFF
Click the volume icon to turn on the volume of the camera. All of our cameras support audio function; turn it on to hear the voice. Please note that you also need to turn the phone volume up.
Two Way Audio
For a two-way audio camera, please press the microphone icon to communicate.
Landscape View
Take a screenshot or manually record an important picture and save it on your mobile phone as evidence in the future. After recording successfully, please click the screenshot icon, then select the Photo album icon; you can check the video on this interface.
Click the rotate icon to switch the vertical screen viewing to landscape view.
Digital zoom
Please manually zoom in and out by horizontal viewing.
Events
Click the Events icon to see motion detection information.
More
Night Vision Mode: Please check whether your camera has a floodlight. If it has a floodlight, you can use smart night vision and full color night vision; otherwise you can only use infrared night vision.
- Smart night vision: At night, the camera turns on Infrared LEDs and sees B/W image by default. Turns on spotlights and sees color night vision automatically when motion is detected.
- Full color night vision: Spotlights stay on while illumination is low. The camera sees color image.
- Infrared night vision: Daytime shows color image, nighttime shows black and white image; the camera default is in infrared night vision.
Siren: When detecting a stranger in your home or near the house, please click the alarm button, and the camera will make an alarm sound to scare away the intruders. The alarm sound lasts for 14 seconds.
Camera Settings
Select the gear icon to go to change some functions of the camera.
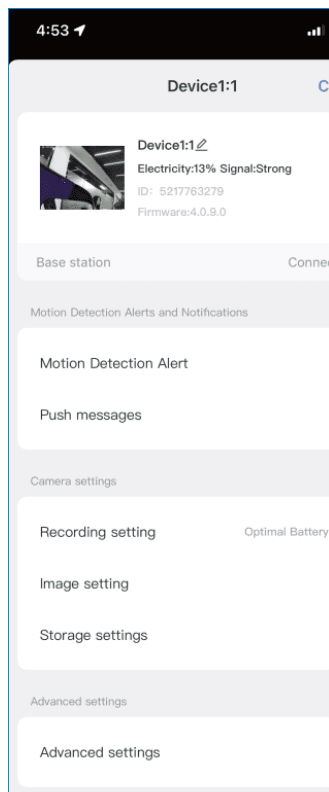
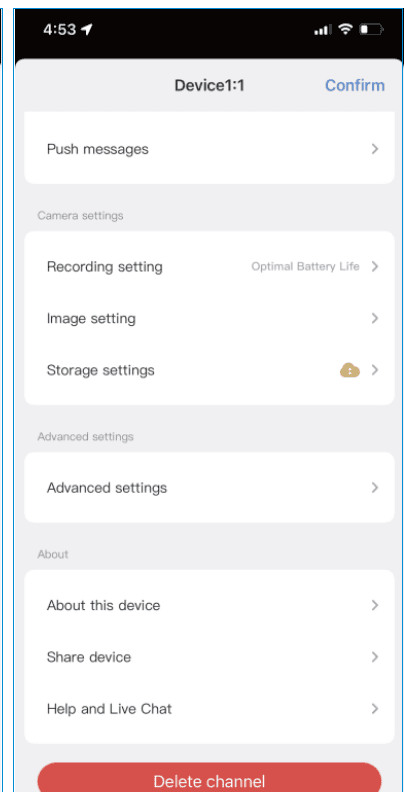
Motion Detection Alert
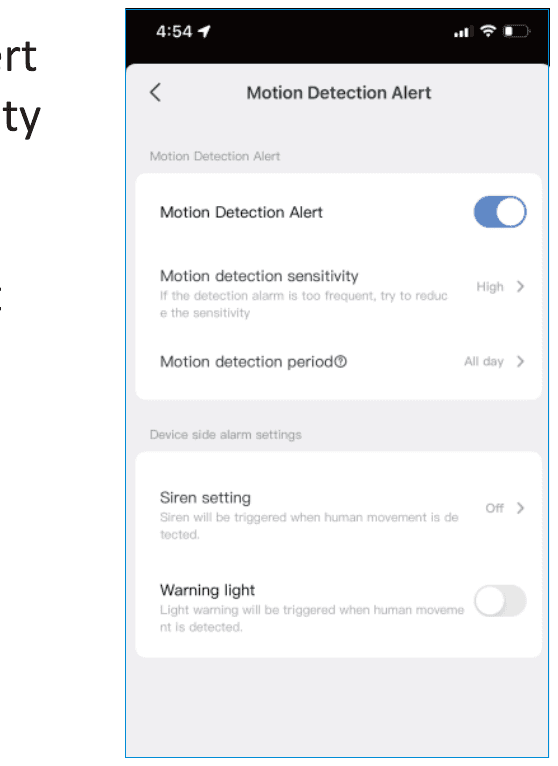
- A) Turn on Motion Detection Alert
- B) Set motion detection sensitivity
- C) Set Motion detection Period
- D) Turn on Camera Siren setting
- E) Turn on Camera Warning light
Push messages
Enable this option, so that you can receive alarm messages.
Record settings
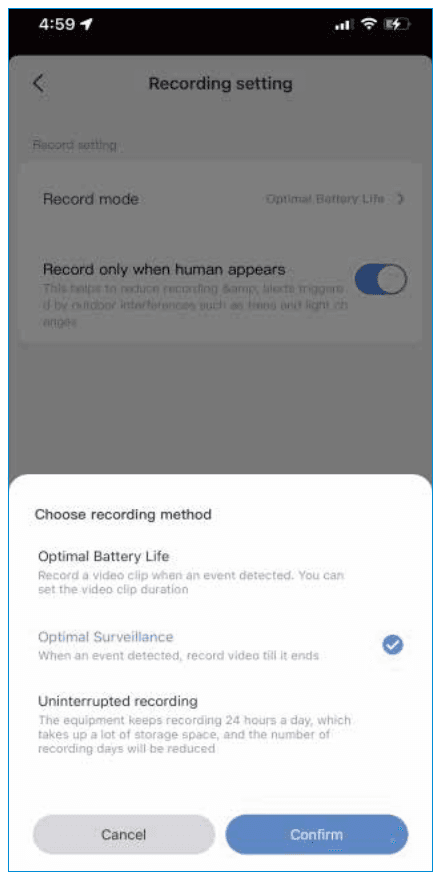
Record Mode
- Optimal Battery Life: When it detects an event, recording a small snippet video. Allows you to change the recording duration and the sleep duration after each recording. Allows you to set record length: 5s, 10s, 20s and 30s.
- Optimal Surveillance: When it detects an event, continuous recording until the end of the event.
- Uninterrupted recording: When the battery level drops below 50%, automatically switches to the Optimal Surveillance mode. When battery power increases to above 80%, it resumes Optimal Surveillance. This mode consumes faster power and is suitable for connecting to a power source.
Record only when human appears: Enable it to reduce false recording.
Image setting
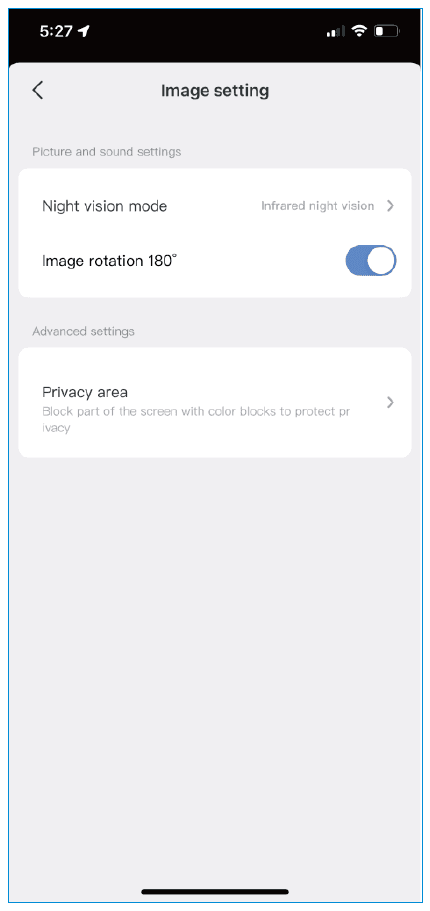
Night vision mode: Please check whether your camera has a floodlight. If it has a floodlight, you can use smart night vision and full color night vision; otherwise you can only use infrared night vision.
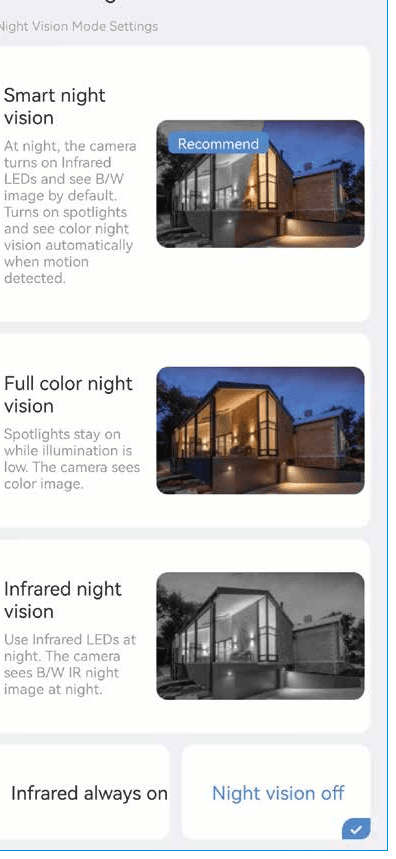
- Smart night vision: At night, the camera turns on Infrared LEDs and sees B/W image by default. Turns on spotlights and sees color night vision automatically when motion is detected.
- Full color night vision: Spotlights stay on while illumination is low. The camera sees color image.
- Infrared night vision: Daytime shows color image, nighttime shows black and white image; the camera default is in infrared night vision.
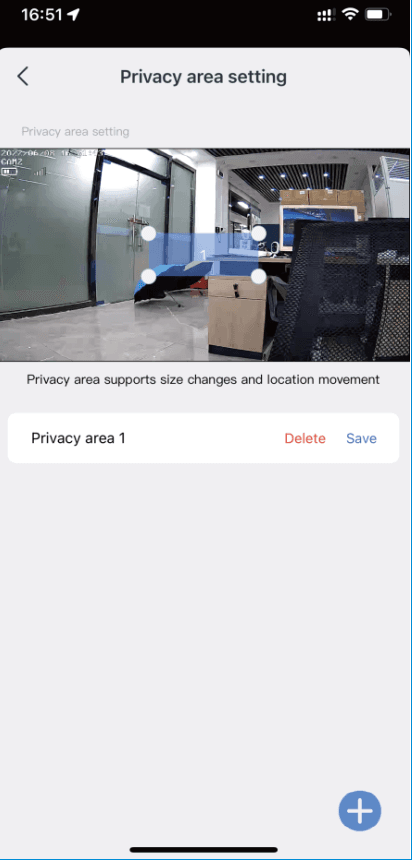
Privacy area setting
Click "+" to set a privacy area; the live stream will no longer see that area.
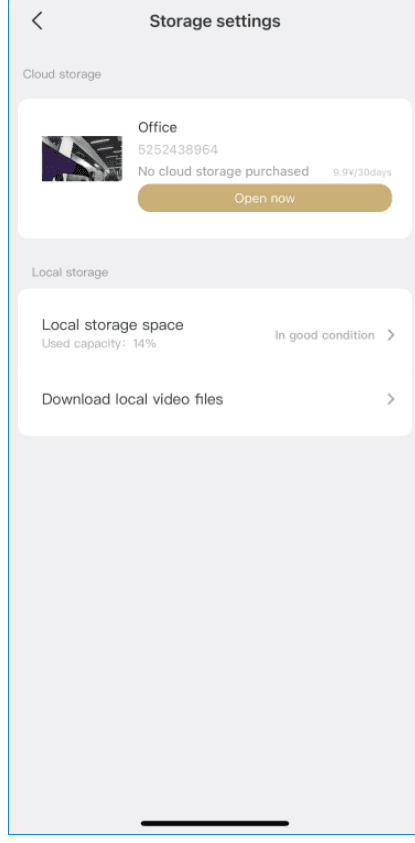
Storage settings
You can check the SD card status and download video.
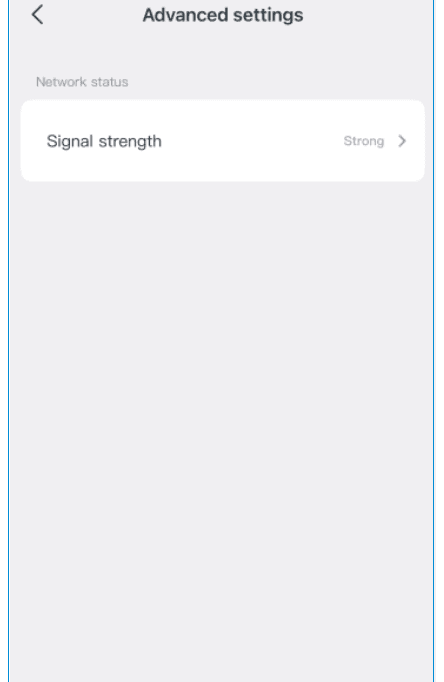
Advance settings
Check whether the camera signal is weak or strong.
Frequently Asked Questions
If the above issues are still not resolved, you can contact us. We will provide after-sales service for you, please do not worry. This battery camera kit is not designed to operate 24/7, or for day and night live view. It is designed to record motion events and for remote live streaming only when you need it.
Customer Service
Amazon Email
- [email protected] (For US)
- [email protected] (For UK & EU)
Hotline / Telephone
+1 917 338 1084 (For US, available Pacific Time 5:00pm–12:00pm)
Wechat / WhatsApp
+86 13392810296
Website
Solar Wire-Free Camera Kit
Quick guide for the Hiseeu Solar Wire-Free Kit (A052) — product overview, charging, system installation, app setup, and camera and solar panel mounting.
Battery Security Camera
User manual for the Hiseeu Battery Security Camera (C014-V2.1) — appearance, installation, app setup, PC viewing, camera functions, settings, and FAQ.